
Can you glue a jigsaw puzzle? Yes, you absolutely can glue a jigsaw puzzle! Saving your completed masterpiece isn’t just about admiration; it’s about puzzle preservation, ensuring your hard work can be admired for years to come. Whether it’s a cherished family photo, a stunning landscape, or a complex pattern, knowing how to properly save a jigsaw puzzle makes all the difference. This guide will walk you through the entire process, from choosing the right supplies to the final touches of puzzle mounting and puzzle display.
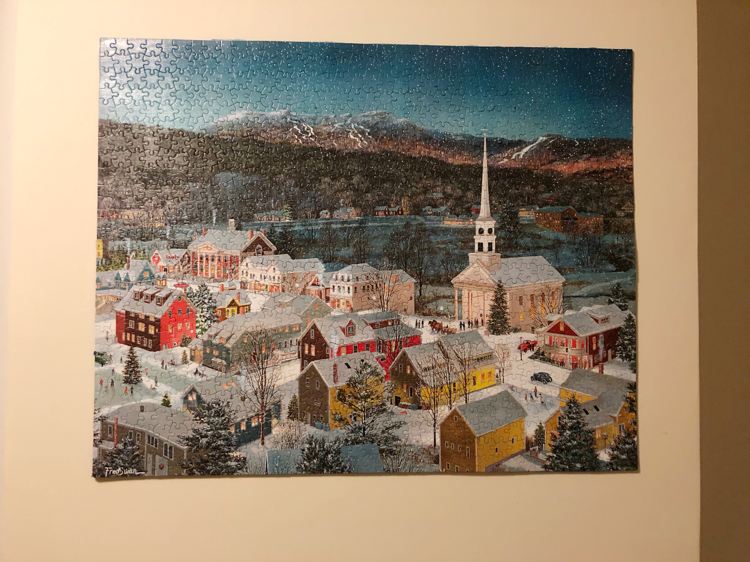
Image Source: momhomeguide.com
Why Save Your Jigsaw Puzzle?
There are many good reasons to commit to puzzle keeping. It’s a rewarding project, and preserving it allows you to:
- Display your accomplishment: Show off your dedication and skill with a beautifully mounted puzzle.
- Preserve memories: Keep a special photo puzzle intact as a memento.
- Create unique decor: Custom puzzles can become beautiful wall art.
- Prevent pieces from getting lost: Secure your puzzle against accidental scattering.
- Pass down your hobby: Save a puzzle for future generations to enjoy.
Gathering Your Supplies for Puzzle Preservation
Before you start, having the right tools is key to a smooth and successful puzzle care process. Here’s what you’ll need:
Essential Materials
- Jigsaw Puzzle: Of course! Ensure it’s fully assembled and dry.
- Puzzle Glue: This is specifically designed for puzzles. It’s clear, non-toxic, and dries without warping the pieces. Look for brands like Mod Podge, Ravensburger Puzzle Conserver, or other dedicated puzzle glue products.
- Protective Surface: Cardboard, a plastic sheet, or a large piece of wax paper to protect your work surface from glue.
- Spatula or Plastic Card: For spreading the glue evenly. An old credit card or a dedicated glue spreader works well.
- Foam Brush or Sponge Brush: For applying glue, especially on textured puzzles.
- Paper Towels or Soft Cloth: For wiping away excess glue.
- Optional: Sealant/Varnish: For an extra layer of protection and a matte or glossy finish.
- Optional: Puzzle Backing Board: If you plan to frame your puzzle, a sturdy backing board is essential for puzzle mounting.
Choosing the Right Puzzle Glue
The type of glue you use significantly impacts the final result. Here’s a breakdown:
- Puzzle Glue: This is the gold standard. It’s formulated to be thin enough to seep into the cracks between pieces without damaging the paper surface. It dries clear and flexible, preventing cracking or yellowing over time.
- Mod Podge: A popular all-in-one glue, sealer, and finish. It’s widely available and works well for most puzzles. You can choose between matte and glossy finishes.
- White Craft Glue (Diluted): While possible, this is a riskier option. You’ll need to dilute it significantly with water (about a 1:1 ratio). If it’s too thick, it can leave a sticky residue or warp the puzzle. It’s best to stick with dedicated puzzle glues.
Table: Glue Options and Their Suitability
| Glue Type | Pros | Cons | Best For |
|---|---|---|---|
| Dedicated Puzzle Glue | Specifically formulated, dries clear, no warp | Can be more expensive, less widely available | All puzzle types, long-term preservation |
| Mod Podge (All-in-One) | Widely available, multiple finishes, easy to use | Can sometimes leave a slight sheen, requires even application | Most puzzles, casual display, quick preservation |
| Diluted White Craft Glue | Inexpensive, readily available | Higher risk of warping or stickiness, less durable | Budget-conscious, temporary display (use with caution) |
Step-by-Step Guide to Saving Your Jigsaw Puzzle
Follow these steps carefully for a perfect puzzle keeping outcome.
Step 1: Prepare Your Workspace
- Ensure your puzzle is completely assembled on a flat, stable surface.
- Place your protective sheet (cardboard, wax paper, plastic) underneath the entire puzzle. This will catch any drips or excess glue.
- Have all your supplies within easy reach.
Step 2: Apply the First Layer of Glue
This is where you start the actual puzzle preservation.
- Pour a small amount of puzzle glue onto the surface of the puzzle. Don’t pour too much at once; you can always add more.
- Use your spatula or plastic card to gently spread the glue over the entire surface of the puzzle. Work from the center outwards, making sure to cover all the pieces and the cracks between them. The goal is to create a thin, even layer.
- Don’t be afraid to apply a little pressure, but avoid digging into the puzzle pieces. The glue should fill the gaps between the pieces.
- If using a foam brush, use gentle dabbing motions to ensure the glue penetrates the seams without pushing pieces out of place.
Step 3: Allow the First Layer to Dry
- Let the first layer of glue dry completely. This typically takes 1-2 hours, depending on the humidity and the type of glue used. The surface should feel dry to the touch.
- Avoid moving or touching the puzzle during this drying period.
Step 4: Apply the Second Layer of Glue (Optional but Recommended)
A second coat adds extra strength and a more uniform finish.
- Apply a second thin, even layer of glue, just like you did the first time.
- Pay extra attention to any areas that seem uneven or have missed spots.
- Ensure all edges are well-covered.
Step 5: Allow the Second Layer to Dry Completely
- This drying period is crucial for proper adhesion and durability. Let it dry for at least 4-6 hours, or preferably overnight. The puzzle should feel solid and secure.
Step 6: Gluing the Back (Optional but Highly Recommended for Durability)
Gluing the back provides additional reinforcement and helps prevent warping, especially for larger puzzles. This is a key step in robust puzzle preservation.
- Carefully slide a piece of cardboard or a thin board underneath the puzzle once the top layer is completely dry.
- Flip the puzzle over using the cardboard as support. It’s easier with two people for larger puzzles.
- Inspect the back of the puzzle for any loose pieces. Gently press them into place if needed.
- Apply a thin, even layer of puzzle glue to the back using a foam brush or spatula. Again, work from the center outwards.
- Allow the glue on the back to dry completely. This may take longer than the front, so be patient.
Step 7: Applying a Sealant or Varnish (Optional)
If you want an extra layer of protection or a specific finish (matte or glossy), this is the time.
- Ensure the puzzle glue is completely dry.
- Apply a thin, even coat of sealant or varnish using a foam brush.
- Allow it to dry according to the product’s instructions. You might need multiple thin coats for a more durable finish.
Puzzle Mounting and Display Options
Once your puzzle is dried and sealed, you have several options for puzzle mounting and puzzle display.
Framing Your Puzzle
This is the most common method for displaying a saved jigsaw puzzle.
- Choose a Frame: Select a frame that complements your puzzle’s image and your decor. Ensure the frame is the correct size for your puzzle.
- Puzzle Backing Board: If your frame doesn’t come with a backing, you’ll need one. Foam board or sturdy cardboard works well. Cut it to the exact size of your puzzle.
- Attach the Puzzle to the Backing:
- If you glued the back of your puzzle, you can often adhere it directly to the backing board using a spray adhesive or strong double-sided tape.
- Alternatively, some people use clear tape on the back edges to secure it to the backing board.
- Insert into the Frame: Carefully place the puzzle (with its backing) into the frame. Secure the backing and add the glass or acrylic front.
- Add Hanging Hardware: Attach appropriate hanging hardware to the frame.
Mounting Without a Frame
For a more modern or minimalist look, consider mounting your puzzle directly onto a rigid board.
- Foam Board Mounting: Use a strong spray adhesive or Mod Podge to adhere the glued puzzle to a piece of foam board. This creates a lightweight and display-ready piece.
- Wood Panel Mounting: For a more robust display, mount the puzzle onto a thin piece of wood. Ensure the wood is smooth and prepped.
Creating a Puzzle Box or Tray
If you want to keep your puzzle safe but not necessarily on display, consider jigsaw puzzle storage solutions.
- Puzzle Boxes: Many jigsaw puzzles come with their own boxes. Ensure all pieces are inside and the box is stored in a cool, dry place.
- Puzzle Organizers: Specialized puzzle organizer systems with trays can help keep pieces sorted during assembly and the finished puzzle protected afterward.
- Fabric Puzzles Mats: Roll up your puzzle on a felt mat and secure it with straps. This is excellent for temporary storage or moving a puzzle mid-assembly.
Tips for Successful Puzzle Keeping and Puzzle Care
Here are some extra tips to ensure your puzzle care is top-notch:
- Handle Pieces with Care: Always handle puzzle pieces by their edges to avoid transferring oils from your fingers, which can damage the surface over time.
- Avoid Direct Sunlight: Prolonged exposure to direct sunlight can fade puzzle images and degrade the glue or paper.
- Humidity Control: Store puzzles in a dry environment. High humidity can cause paper to warp or attract mold.
- Clean Spills Immediately: If you accidentally spill something on an unglued puzzle, try to clean it up gently with a damp cloth immediately. For a glued puzzle, blot the spill carefully with a paper towel.
- Check Glue Application: Ensure glue is applied evenly. Streaks or thick spots can be noticeable after drying.
- Consider Puzzle Backing: For high-quality or very large puzzles, adding a puzzle backing is a worthwhile investment for structural integrity.
- Patience is Key: Rushing the drying process is the most common mistake. Let each layer dry fully before proceeding.
- Test Glue on a Spare Piece: If you’re unsure about how a glue will react with your puzzle’s material, try it on a spare piece from a different puzzle or a small corner you might not be displaying.
Troubleshooting Common Puzzle Preservation Issues
Even with the best intentions, you might encounter a few hiccups. Here’s how to deal with them:
Puzzle Pieces Warping
- Cause: Uneven glue application, too much water in diluted glue, or storing in humid conditions.
- Solution: Ensure you use thin, even coats of proper puzzle glue. If minor warping occurs after drying, place heavy, flat books on top of the puzzle for a few days (with a protective sheet underneath and on top). For severe warping, it might be difficult to fully correct.
Glue Seeping Through
- Cause: Glue was too thin or applied too liberally, or the puzzle has very porous paper.
- Solution: This is tricky. If it’s minor and dries clear, it might not be noticeable. For thicker residue, you might be able to gently scrape it with a craft knife once fully dry, but this risks damaging the puzzle. This is why thin, even coats are crucial for puzzle care.
Puzzle Pieces Coming Apart After Gluing
- Cause: Glue didn’t dry properly, or the wrong type of glue was used, or the back wasn’t glued.
- Solution: Carefully reapply a thin layer of puzzle glue to the affected areas. Ensure you allow ample drying time for both the front and back.
Unwanted Sheen or Stickiness
- Cause: Using a glue not specifically designed for puzzles, or not letting it dry completely.
- Solution: If the sheen is too glossy, you can try applying a matte sealant over the top once everything is dry. If it’s sticky, it indicates the glue may not have cured properly. Try a light dusting of cornstarch or baby powder to absorb excess stickiness. You might need to reapply a thin layer of a different, appropriate glue over the top.
Advanced Puzzle Keeping Techniques
For those who want to go the extra mile in puzzle preservation, consider these:
Puzzle Backing Boards for Strength
For larger or more intricate puzzles, a rigid puzzle backing board is essential for structural integrity.
- Types of Backing:
- Foam Core Board: Lightweight, easy to cut, and provides good support.
- MDF or Plywood: More durable and heavier, suitable for very large or heavy puzzles.
- Mat Board: Often used in framing, it adds a professional touch.
- Adhering to Backing:
- Spray Adhesive: Provides a strong, even bond. Apply in a well-ventilated area.
- Double-Sided Tape: Good for smaller puzzles, but ensure it’s strong and acid-free.
- Puzzle Glue (applied to back): You can apply puzzle glue directly to the back of the puzzle and then press it firmly onto the backing board.
Using Sealants and Varnishes
Beyond basic glue, sealants and varnishes offer:
- Enhanced Durability: A good sealant protects against moisture and wear.
- Finish Options: Choose between a classic matte finish that reduces glare, or a glossy finish that makes colors pop.
- Protection Against UV Rays: Some sealants offer UV protection, preventing fading.
When applying these, use thin, even coats with a foam brush and allow each layer to dry completely.
Frequently Asked Questions (FAQ)
Q1: How long does puzzle glue take to dry?
A1: It typically takes 1-2 hours for the first coat to feel dry to the touch, but it’s best to let it dry for at least 4-6 hours, or preferably overnight, before handling or applying another coat.
Q2: Can I use any glue to save a jigsaw puzzle?
A2: It’s highly recommended to use puzzle glue or a product like Mod Podge. Other glues, especially white craft glue if not diluted properly, can cause warping, stickiness, or damage the puzzle’s surface.
Q3: Do I need to glue the back of the puzzle?
A3: Gluing the back is highly recommended, especially for larger puzzles. It adds significant strength and helps prevent warping, ensuring better long-term puzzle preservation.
Q4: Will gluing a puzzle damage it?
A4: If done correctly with the right materials, gluing should not damage your puzzle. Using too much glue, glue that is too thick, or rushing the drying process are the main causes of damage.
Q5: How do I store a saved jigsaw puzzle?
A5: Saved puzzles can be framed for display, stored flat in a protective box, or rolled up carefully on a puzzle mat. Ensure they are kept in a cool, dry place away from direct sunlight. This falls under good jigsaw puzzle storage practices.
Q6: What if I want to take my puzzle apart later?
A6: Once a puzzle is glued, it is generally considered permanent. If you want to disassemble a puzzle, avoid gluing it. Instead, consider using a puzzle mat for temporary storage or working on it on a removable board.
Q7: How do I make my puzzle look professional?
A7: For a professional finish, ensure your glue application is perfectly even. Consider a second coat on the back, and use a high-quality sealant or varnish. Framing it with a mat board and a quality frame elevates the presentation, contributing to excellent puzzle display.
By following these comprehensive steps and tips, you can confidently save your completed jigsaw puzzles, turning them into lasting pieces of art or cherished memories. Happy puzzling and preserving!