
Are you wondering what the best way to hang a picture is? A picture hanging kit is a set of tools and fasteners designed to help you securely mount artwork, photos, or mirrors on your walls. They contain everything you need to get the job done right. This easy guide will walk you through using one.
Hanging your favorite pieces can transform a house into a home. It’s a fantastic way to showcase your personality and memories. Whether you’re creating a striking focal point or a charming gallery wall arrangement, knowing how to use a picture hanging kit is a fundamental skill for any DIY home decor enthusiast. This guide will demystify the process, ensuring your artwork is hung securely and beautifully.
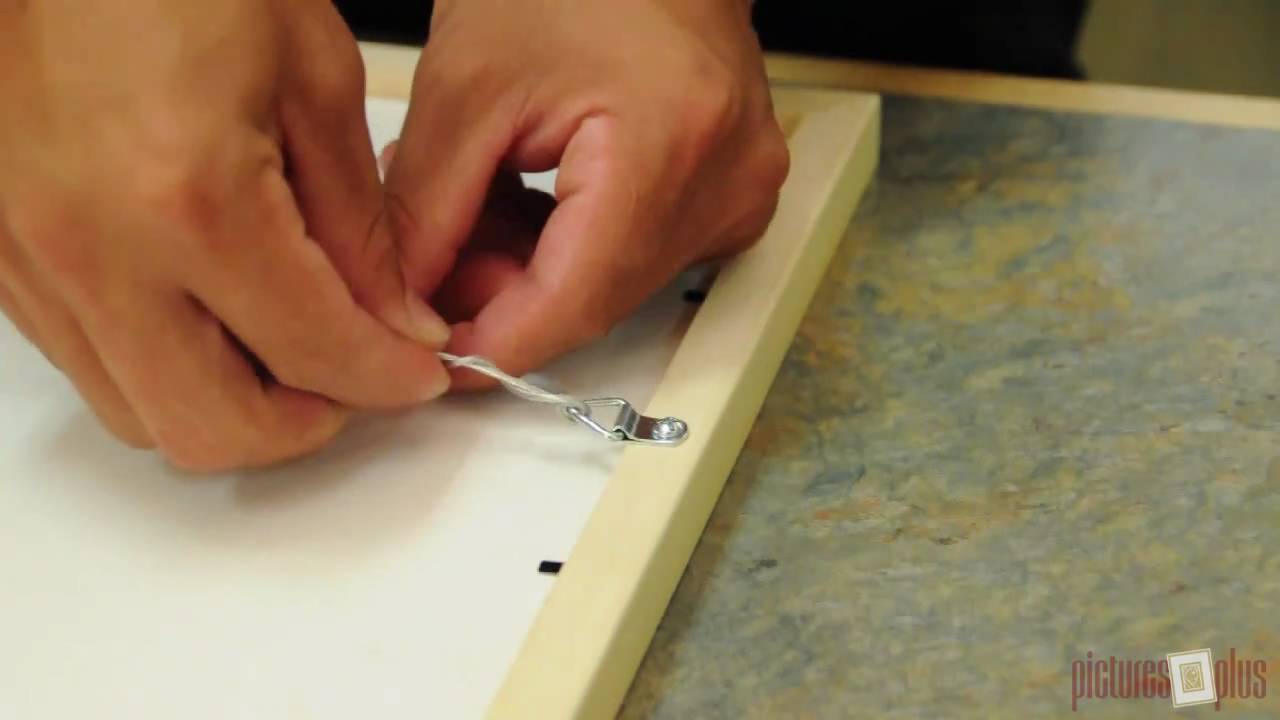
Image Source: i.ytimg.com
Deciphering Your Picture Hanging Kit Contents
Before you start, it’s crucial to know what’s inside your kit. Most picture hanging hardware kits are designed for general use, but some may specialize in heavier items.
Common Components of a Picture Hanging Kit
- Picture Hooks: These are the most basic fasteners. They come in various sizes and weight capacities. Some have one or two small nails, while others have a single, larger nail driven at an angle.
- Screws and Wall Anchors: For heavier items or when you can’t find a stud, screws with wall anchors are essential. Anchors spread out behind the drywall to provide a secure grip.
- Wire and D-Rings/Z-Clips: If your artwork doesn’t have a hanging mechanism, you’ll often find D-rings (metal loops that attach to the frame) and picture wire. Z-clips are another option, a two-piece metal system that interlocks to hold the frame.
- Levels: A small spirit level is often included to help you ensure your frames are straight.
- Nails: Small, thin nails are typically included for the angled hooks.
- Screwdriver (sometimes): Some kits may include a basic screwdriver, though you’ll usually need your own.
Different Types of Picture Fasteners
Understanding the variety of types of picture fasteners available helps you choose the right one for your needs.
- Nail-in Hooks: These are common and easy to use. The nail goes in at an angle, providing good support. They’re best for lighter to medium-weight items.
- Screw-in Hooks: These require pre-drilled holes and offer stronger support than nail-in hooks, especially for heavier items.
- Adhesive Strips: Great for damage-free hanging, especially in rentals or on delicate surfaces. They work best for lightweight frames.
- Monkey Hooks/Deco Nails: These are a popular, easy-to-use option. They are U-shaped and simply hook into the wall, requiring no tools for installation. They are surprisingly strong for their simplicity.
- French Cleats: A heavy-duty system consisting of two interlocking metal or wood strips. One attaches to the wall, the other to the frame, creating a very secure and level hanging system for large or heavy items.
Choosing the Right Picture Hanging Hardware
The weight of your artwork is the most important factor when choosing picture hooks or other fasteners.
Weight Considerations
- Lightweight (under 5 lbs): Small nail-in hooks, adhesive strips, or monkey hooks are usually sufficient.
- Medium-weight (5-20 lbs): Larger nail-in hooks, screw-in hooks with appropriate wall anchors, or multiple smaller hooks can be used.
- Heavy-weight (20+ lbs): You’ll need heavy duty picture hangers. This often means using screws drilled into wall studs, French cleats, or specialized heavy-duty wall anchors designed for significant weight.
Wall Material Matters
- Drywall: Most common in homes. Nail-in hooks and anchors work well here. Always try to locate wall studs for the most secure mounting.
- Plaster: Can be more brittle than drywall. Pre-drilling small pilot holes for screws can prevent cracking. For heavier items, stud mounting is highly recommended.
- Brick/Concrete: Requires a hammer drill and masonry bits to create holes, followed by masonry anchors and screws. Standard kits won’t work here.
- Wood Paneling: You can often drive nails or screws directly into the wood.
Essential Wall Mounting Tools You Might Need
While kits provide many items, you might need a few extra wall mounting tools to complete the job efficiently and accurately.
Tools for Success
- Hammer: For tapping in nails for hooks.
- Screwdriver (Phillips and Flathead): For screws.
- Drill and Drill Bits: Essential for screw-in fasteners, wall anchors, and heavy-duty mounting systems.
- Stud Finder: Crucial for locating wall studs, which offer the strongest support. Electronic stud finders are the easiest to use.
- Measuring Tape: For precise placement.
- Pencil: For marking your intended hanging spots.
- Spirit Level: Even if one is included, a larger, more accurate one is helpful for ensuring frames are perfectly straight.
Step-by-Step Guide to Using Your Picture Hanging Kit
Let’s get to the actual hanging! Follow these steps for a successful installation.
Step 1: Prepare Your Artwork
First, ensure your artwork is ready to hang.
Checking the Back of Your Frame
- Existing Hardware: Many framed pictures already have hanging hardware attached. This could be a wire, D-rings, or a sawtooth hanger.
- Installing D-Rings and Wire: If your frame doesn’t have a hanging system, you’ll need to install one.
- Choosing Hook Placement: For a wire system, attach D-rings about one-third of the way down from the top of the frame on each side.
- Attaching D-Rings: Use the small screws provided with the kit (or ones specifically designed for frames) to screw the D-rings securely into the wooden frame. Make sure they are screwed in straight and firmly.
- Installing Picture Wire:
- Cut a piece of picture wire. A good rule of thumb is to cut it about half the width of your frame. You want enough slack so that when pulled taut, it comes up to about one-third to halfway down the frame.
- Thread the wire through the D-rings and twist it around itself several times to secure it.
- Ensure the wire isn’t too tight. It should have a little give. This allows the picture to hang flush against the wall. If the wire is too tight, the picture will want to stand off the wall at the top.
Sawtooth Hangers
These are simple metal teeth that attach to the top center of a frame. They hook directly onto a nail or screw.
Step 2: Plan Your Picture Placement
This is where your creativity and measuring tape come in handy.
Measuring for Perfect Placement
- Height: The center of your artwork should typically be at eye level, which is around 57-60 inches from the floor.
- Spacing (for gallery walls): If you’re hanging multiple pieces, decide on the spacing between them. A common spacing is 2-4 inches. Use your measuring tape and pencil to mark the intended locations of each frame.
- Alignment: Use your level to ensure that multiple frames are aligned horizontally or vertically, depending on your gallery wall arrangement.
Step 3: Mark the Wall
Once you’ve decided where the picture will go, mark the spot for your fastener.
Marking the Hanging Point
- For Nail-in Hooks: Hold the picture against the wall in its final position. Use a pencil to lightly mark the wall where the hook (or the top of the frame if the hook will be hidden) should go. Then, take the picture down.
- For Wire Hanging: If you’re using a wire, hold the picture up. Gently pull the wire taut as if it were hanging. Mark the wall at the highest point of the taut wire. This is where your hook or nail will go.
- For Screw-in Hooks/Anchors: Measure the distance from the top of your frame to the hanging point (wire or D-ring). Then, measure how far down the picture needs to hang from your desired top edge. Mark the wall accordingly.
Step 4: Installing the Fasteners
This is the most critical part for ensuring your picture stays put.
Installing Nail-in Hooks
- Position the Hook: Place the hook on the wall at your marked spot. The nail(s) should be angled slightly downwards into the wall.
- Tap the Nail: Gently tap the nail with your hammer. You can hold the hook in place with your fingers or use the hammer head to steady it as you start tapping.
- Drive the Nail: Continue tapping until the nail is firmly embedded in the wall, holding the hook securely. For hooks with two nails, ensure both are driven in firmly.
Installing Screw-in Hooks and Anchors
- Drill a Pilot Hole: If you’re using an anchor or a screw that requires one, use a drill bit slightly smaller than the anchor or screw diameter. Drill a hole at your marked spot.
- Insert the Anchor: Gently tap the wall anchor into the hole with a hammer until it’s flush with the wall surface.
- Screw in the Hook: Use a screwdriver to screw the hook into the anchor or directly into the wall (if no anchor is needed or if you hit a stud). Make sure it’s screwed in tightly.
Installing Heavy Duty Picture Hangers
- Locate a Stud: Use your stud finder to locate a wall stud in your desired hanging area.
- Mark and Drill: Mark the stud where you want to hang your picture. Drill a pilot hole.
- Use Heavy-Duty Screws: Drive a long, strong screw into the stud. If your kit has specialized heavy duty picture hangers, follow their specific installation instructions, which often involve multiple screws or larger fasteners.
- French Cleats:
- Attach one cleat to the wall (preferably into studs or with appropriate heavy-duty anchors) ensuring it’s perfectly level.
- Attach the matching cleat to the back of your frame, also ensuring it’s level and centered.
- Lift the frame and hook the wall cleat onto the frame cleat.
Step 5: Hanging Your Artwork
The moment of truth!
Hanging the Picture
- Align: Carefully lift your framed artwork.
- Hook: Align the hanging wire or the back of the frame (if using a sawtooth hanger directly on a nail/screw) with the installed hook or fastener on the wall.
- Lower: Gently lower the picture onto the hook.
- Check Level: Use your spirit level on top of the frame to ensure it’s hanging straight. If it’s not, carefully lift it off the hook, make minor adjustments to the hook’s position or the picture’s tilt, and re-hang.
Step 6: Final Touches and Adjustments
Step back and admire your work!
Making Sure it Looks Perfect
- Check for Straightness: Look at the picture from different angles. Ensure it’s not tilting.
- Confirm Stability: Gently nudge the picture to make sure it feels secure and doesn’t wobble excessively.
- Clean Up: Remove any pencil marks or dust from the wall.
Tips for Hanging Artwork Like a Pro
Here are some extra pointers to elevate your DIY home decor game.
Pro Tips for a Beautiful Display
- Use a Level for Everything: Not just for the picture itself, but for the placement of multiple items in a gallery wall arrangement.
- Measure Twice, Hammer Once: Accuracy in measuring prevents unnecessary holes in your wall.
- Consider Furniture Placement: Hang art at a height that complements your furniture. The bottom of a large piece should generally be 6-10 inches above a sofa or console table.
- Don’t Be Afraid to Mix and Match Hardware: For a large gallery wall arrangement, you might use different types of picture fasteners for different pieces based on their weight and the wall material.
- Test Adhesive Strips: If using adhesive strips, read the manufacturer’s instructions carefully. They often recommend cleaning the wall surface first and may have specific removal instructions.
- For Very Heavy Items: Always aim for studs. If studs aren’t conveniently located, use appropriate heavy duty picture hangers and anchors rated for well beyond the weight of your item. Consider consulting a professional if you’re unsure.
- Installing Picture Wire: Ensure the wire isn’t too tight. A taut wire pulls the top of the frame away from the wall, creating a gap. Leave a little slack.
Common Pitfalls to Avoid
Even with a kit, mistakes can happen. Here’s how to sidestep them.
Avoiding Installation Errors
- Overestimating Hook Strength: Always check the weight rating on your picture hanging hardware.
- Not Using Anchors for Drywall: Relying solely on nails in drywall for anything but the lightest items can lead to the hook pulling out.
- Ignoring Wall Studs: Missing the opportunity to screw into a stud is a common mistake when aiming for maximum security.
- Hanging Pictures Too High: This can make a room feel disconnected and the artwork seem floating.
- Forgetting the Level: Even a slightly crooked frame can detract from the overall look.
- Using the Wrong Tools: Trying to hammer in a screw or drive a nail with pliers rarely ends well.
Frequently Asked Questions (FAQ)
Here are some common questions people have when using picture hanging kits.
Your Picture Hanging Questions Answered
Q1: What is the strongest way to hang a picture?
The strongest way to hang a picture is by securing the fastener directly into a wall stud. If a stud isn’t available, using heavy-duty anchors with screws specifically designed for the weight of your artwork is the next best option. French cleats are also an excellent, robust choice for heavy items.
Q2: Can I hang a heavy mirror with a standard picture hanging kit?
It depends on the kit and the mirror. Standard kits often include hardware for lighter items. For heavy mirrors, you’ll need to ensure the kit contains heavy duty picture hangers with significant weight ratings, or you may need to purchase separate heavy-duty hardware. Always check the weight capacity and ensure it exceeds the mirror’s weight.
Q3: How do I know if I hit a stud?
When drilling into a wall stud, the drill bit will meet more resistance than it does when drilling through drywall. If you’re using a stud finder, it will indicate the presence and location of studs.
Q4: What is the best height to hang pictures?
Generally, the center of the artwork should be at eye level, around 57-60 inches from the floor. If you are hanging art above furniture, the bottom of the frame should be about 6-10 inches above the furniture.
Q5: Can I reuse picture hooks?
Nail-in hooks can sometimes be reused if the nail hole isn’t too damaged and the hook itself is still straight and strong. However, it’s often best to use new hardware for maximum security, especially for heavier items. Reusing wall anchors is generally not recommended as they can lose their grip.
Q6: What are the best picture hanging kits for drywall?
For drywall, kits that include a variety of nail-in hooks, screw-in hooks with appropriate drywall anchors, and potentially monkey hooks are excellent. Always choose hardware rated for the weight of your item, and prioritize locating studs whenever possible.
By following this guide, you can confidently use your picture hanging kit to adorn your walls with your favorite pieces, ensuring they are hung securely and beautifully for years to come. Happy decorating!