
Can you adjust a chainsaw chain yourself? Yes, you can adjust a chainsaw chain yourself with the right tools and by following safe procedures. Proper chainsaw chain tension is vital for both safety and efficient cutting. A chain that’s too loose can derail, causing damage and potential injury, while a chain that’s too tight can strain your chainsaw’s engine and bar, leading to premature wear and reduced chainsaw cutting performance. This guide will walk you through the entire process of chainsaw chain tightening so you can maintain your equipment effectively.
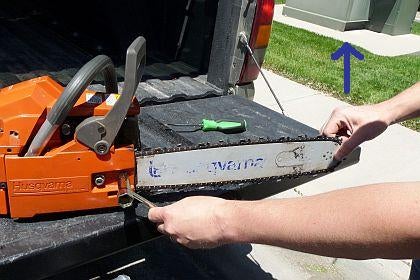
Image Source: content.instructables.com
Why Chain Tension Matters
The chainsaw chain tension is a delicate balance. It dictates how well the chain grips the wood and how smoothly it cuts. If it’s too slack, the chain can bounce off the guide bar, a dangerous situation known as “derailing.” This can also damage the bar and the chain itself. On the other hand, a chain that is too tight will create excessive friction. This friction can overheat the chainsaw bar, leading to its premature wear, and it puts unnecessary stress on the engine and clutch. Maintaining the correct tension ensures optimal chainsaw cutting performance and prolongs the life of your saw.
The Impact of Incorrect Tension
- Too Loose:
- Risk of chain derailment.
- Increased likelihood of kickback.
- Uneven cutting.
- Damage to the guide bar and chain.
- Potential injury to the operator.
- Too Tight:
- Excessive friction and heat.
- Premature wear on the guide bar and chain.
- Strain on the engine and clutch.
- Reduced cutting speed and efficiency.
- Difficulty in turning the chain by hand.
Preparing for Chainsaw Chain Adjustment
Before you begin any chainsaw maintenance, especially chainsaw chain tightening, safety is paramount. Always ensure the chainsaw is turned off and has cooled down if it has been recently used. You will need a few basic tools for this task.
Essential Tools
- Spark Plug Wrench or Screwdriver: This is used to remove the chain brake cover.
- Tensioning Tool or Wrench: Many chainsaws come with a special tool for this purpose. If not, a suitable adjustable wrench or socket set will work.
- Gloves: To protect your hands from sharp chain teeth and grease.
- Safety Glasses: To protect your eyes from debris.
Safety First
Always wear safety glasses and sturdy gloves. Ensure the chainsaw is on a stable, flat surface. Never attempt to tighten chainsaw components while the engine is running.
Locating the Chain Tensioning Mechanism
The location of the chain tensioning mechanism can vary slightly depending on the model of your chainsaw. Most modern chainsaws have the adjustment mechanism accessible from the side of the saw, often near the guide bar.
Common Tensioning Systems
- Screw-Type Tensioner: This is the most common system. You’ll typically find a small screw on the side of the bar mount or near the clutch cover. Turning this screw adjusts the tension.
- Tool-Free Tensioners: Some newer chainsaws feature a knob or lever system that allows for tension adjustments without tools. These are usually integrated into the side cover.
Identifying Your Saw’s System
Consult your chainsaw’s owner’s manual if you are unsure about the specific location or type of tensioning system your saw uses. It’s the best resource for model-specific information.
Step-by-Step Guide to Chainsaw Chain Tightening
Follow these steps carefully to safely and effectively adjust chainsaw bar settings and achieve the correct chainsaw chain slack.
Step 1: Ensure Safety Precautions are Met
- Turn off the chainsaw: Make sure the engine is completely off and the chain brake is engaged.
- Allow to cool: If the saw has been used, let the engine and bar cool down to prevent burns.
- Wear protective gear: Put on your safety glasses and gloves.
- Stable surface: Place the chainsaw on a flat, stable surface.
Step 2: Remove the Clutch Cover
Locate the clutch cover, which typically encloses the clutch drum and sprocket. This cover is usually secured by one or two wing nuts or bolts. Use your spark plug wrench or screwdriver to loosen and remove these fasteners. Carefully lift off the cover.
Step 3: Loosen the Bar Nuts
Once the clutch cover is off, you will see two or more nuts that hold the guide bar securely to the chainsaw body. These are the bar nuts. Use your wrench to slightly loosen these nuts. You don’t need to remove them completely, just loosen them enough so the guide bar can move slightly forward or backward. This allows the tensioning mechanism to do its job.
Step 4: Adjust the Chain Tension
This is where you will tighten chainsaw chain. Locate the chain tensioning screw. It’s usually a small screw located on the side of the guide bar, near the front of the saw.
- To tighten the chain: Turn the tensioning screw clockwise.
- To loosen the chain: Turn the tensioning screw counter-clockwise.
As you turn the screw, you will see the guide bar move. The goal is to achieve the correct chainsaw chain slack.
How to Check for Correct Tension
The ideal chainsaw chain slack is achieved when the chain fits snugly around the guide bar but can still be pulled around by hand with moderate effort. There should be a slight sag in the chain on the underside of the bar.
A common test:
1. Gently pull the chain around the bar. It should move relatively freely but not be loose enough to fall off.
2. Try to lift the chain away from the top of the guide bar. The chain should spring back into place. If a few drive links are exposed and stay on the bar, that’s usually a good sign.
Table: Interpreting Chain Tension
| Symptom | Too Loose | Correct Tension | Too Tight |
|---|---|---|---|
| Feel | Sagging, easily falls off | Snug but moves with effort | Very stiff, hard to move |
| Visual | Visible slack on the underside of the bar | Slight sag, most drive links hidden | No visible sag, chain looks stretched |
| Action | Tighten the chain | Maintain this tension | Loosen the chain |
| Consequence | Derailment, kickback risk | Optimal cutting, reduced wear | Overheating, bar/chain wear, strain |
Step 5: Re-tighten the Bar Nuts
Once you believe you have achieved the correct chainsaw chain tension, it’s crucial to secure the guide bar. While holding the guide bar in the correct position, use your wrench to firmly re-tighten the bar nuts. Tighten them evenly, alternating between the nuts.
Step 6: Check Tension Again and Re-engage Brake
After tightening the bar nuts, re-check the chainsaw chain slack. The act of tightening the bar nuts can sometimes alter the tension slightly. Make any minor adjustments needed. Once satisfied, re-engage the chain brake to ensure it functions correctly.
Step 7: Replace the Clutch Cover
Place the clutch cover back into position. Secure it by tightening the wing nuts or bolts you removed earlier. Ensure the cover is seated properly.
Step 8: Test the Chain’s Movement
With the clutch cover secured, manually rotate the guide bar and chain to ensure it moves smoothly and freely around the entire bar. If you feel any binding or excessive resistance, it’s a sign the chain is too tight. If it feels too loose or has significant slack, repeat the adjustment process.
Specific Considerations for Different Chainsaw Types
While the general principles of chainsaw chain tightening apply to most models, there are some differences in how you might adjust chainsaw bar settings.
Chainsaws with Tool-Free Tensioning
These systems often have a knob or lever integrated into the side cover.
- Access: The clutch cover is usually part of the mechanism. You might not need to remove it entirely.
- Adjustment: Look for a knob or lever. Turning the knob or moving the lever typically adjusts the tension. Some systems involve turning a screw on the outside of the cover.
- Locking: Ensure the system locks the bar in place once the correct tension is achieved.
Chainsaws with Integrated Tensioners (Front-Mounted)
Some chainsaws have a tensioning screw located at the front of the guide bar, often accessed through a small hole in the bar itself.
- Access: You’ll typically loosen the bar nuts slightly.
- Adjustment: Use a screwdriver inserted through the hole in the bar to turn the tensioning screw. Clockwise usually tightens.
- Locking: Re-tighten the bar nuts firmly.
Troubleshooting Common Chainsaw Chain Issues
Even with careful adjustment, you might encounter problems. Here’s how to address them.
Chain Derailing
If your chain keeps derailing, it’s almost always an issue of incorrect tension or a damaged bar/chain.
- Check Tension: First, ensure the chainsaw chain tension is correct. It might be too loose.
- Inspect Bar and Chain: Look for bent teeth, worn sprockets, or a warped guide bar. A worn bar groove can cause the chain to sit too low, increasing the risk of derailment.
- Proper Installation: Make sure the chain is installed with the cutters facing the correct direction.
Chain Not Moving Freely
If the chain is stiff and difficult to turn by hand:
- Too Tight: The chain is likely too tight. Loosen it slightly.
- Dirt/Debris: Check for sawdust, dirt, or lubricant buildup in the bar groove or around the sprocket. Clean these areas.
- Damaged Links: A bent or damaged chain link can cause binding. Inspect the chain for damage.
Chain Loosening Quickly
If the chain consistently becomes loose after a short period of use:
- Bar Nuts Not Tight Enough: Ensure you are tightening the bar nuts sufficiently after each adjustment.
- Worn Parts: The bar groove might be worn, or the sprocket might be damaged, preventing the chain from holding tension. Inspect these components.
- Chain Stretch: New chains can stretch slightly as they break in. You may need to adjust tension more frequently during the initial use.
Maintaining Optimal Chainsaw Cutting Performance
Proper chainsaw chain tension is just one aspect of maintaining your saw. Here are other key points for optimal chainsaw cutting performance:
Chain Sharpness
A dull chain is inefficient and dangerous. It requires more force, leading to operator fatigue and a higher risk of kickback. Learn how to sharpen your chainsaw chain correctly or have it done professionally.
Bar Lubrication
Adequate lubrication is essential. The bar oil keeps the chain and bar cool and reduces friction.
- Check Oil Level: Ensure the oil reservoir is full before each use.
- Oil Flow: Verify that the oil is being pumped onto the chain. You can test this by running the saw briefly at full throttle and pointing the bar at a light-colored surface. You should see a fine mist of oil.
- Clean Oil Port: Ensure the oil port on the bar is clear of debris.
Bar Groove Cleaning
Regularly clean the groove in your guide bar. Sawdust and debris can build up, restricting oil flow and affecting chain tension. Use a brush or a thin tool to clear the groove.
Frequently Asked Questions (FAQ)
Here are answers to some common questions about chainsaw chain tightening.
How often should I check chainsaw chain tension?
You should check your chainsaw chain tension regularly, ideally before each use, and especially after the chain has been sharpened or replaced. Chains can loosen or tighten unpredictably during operation due to heat and wear.
What does “chain tension” mean for a chainsaw?
Chainsaw chain tension refers to how tightly the cutting chain is wrapped around the guide bar. The correct tension ensures the chain stays on the bar during operation while still allowing it to rotate freely.
How do I know if my chainsaw chain is too loose?
A chain is too loose if it sags noticeably on the underside of the guide bar, if you can easily pull it off the bar, or if it bounces around excessively while cutting. This can lead to derailment and increased kickback risk.
How do I know if my chainsaw chain is too tight?
A chain is too tight if it is very stiff and difficult to turn by hand around the bar. Overly tight chains create excessive friction, leading to overheating of the bar and chain, premature wear, and strain on the engine and clutch.
Can I adjust the chain tension without removing the clutch cover?
On some modern chainsaws with integrated or tool-free tensioning systems, you might be able to adjust the chain tension without fully removing the clutch cover. However, for most traditional systems, loosening the bar nuts and accessing the tensioning screw requires removing the cover. Always refer to your owner’s manual.
What are “drive links” in relation to chainsaw chain tension?
Drive links are the parts of the chain that sit within the groove of the guide bar and engage with the drive sprocket. When checking chainsaw chain slack, a common guideline is that you should be able to see about one to two drive links exposed on the underside of the bar when you pull the chain away from the bar.
Does a new chainsaw chain need frequent tension adjustment?
Yes, new chains often stretch slightly as they break in. You may need to check and adjust the chainsaw chain tension more frequently during the first few uses of a new chain to maintain optimal performance and safety.
What is a chainsaw bar nut?
A chainsaw bar nut is a fastener that secures the guide bar to the main body of the chainsaw. There are typically two or three bar nuts, and they must be loosened to allow for chainsaw chain adjustment and then re-tightened to hold the bar in place.
What is chainsaw chain slack?
Chainsaw chain slack refers to the slight looseness or sag in the chain when it’s properly tensioned. It’s the amount of play in the chain that allows it to move freely around the guide bar without being too tight or too loose.
How does chain tension affect chainsaw cutting performance?
Proper chainsaw cutting performance is highly dependent on correct chain tension. A properly tensioned chain cuts efficiently with less effort, reduces wear on the bar and chain, and minimizes the risk of dangerous situations like chain derailment or kickback. Both too loose and too tight tension will negatively impact performance.
By following these detailed steps and safety guidelines, you can effectively tighten chainsaw components, ensuring your equipment operates at its best and keeps you safe. Regular chainsaw maintenance, including proper chainsaw chain tightening, is key to a long-lasting and efficient tool.