
So, how do you use a random orbital sander effectively? A random orbital sander is used for smoothing wood, removing old finishes, and preparing surfaces for painting or staining. It’s a versatile tool that can tackle a variety of tasks. Can you use it on metal? Yes, with the right sandpaper, you can use a random orbital sander on some metal surfaces for light rust removal or surface preparation. Who is a random orbital sander best for? It’s ideal for both DIY enthusiasts and professionals due to its ease of use and the high-quality finish it produces.
This guide will walk you through everything you need to know to master your random orbital sander, from choosing the right sandpaper to advanced sanding techniques. We’ll cover essential sander safety, orbital sander maintenance, and how to achieve that coveted smooth finish every time.
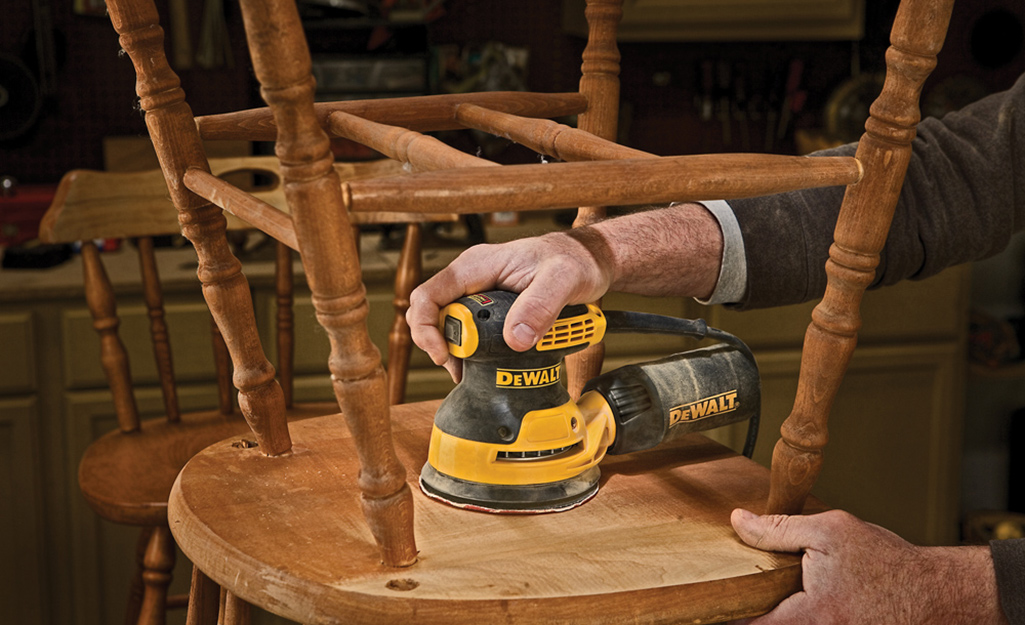
Image Source: contentgrid.homedepot-static.com
What is a Random Orbital Sander?
A random orbital sander is a power tool that uses a sanding disc that spins in a random orbital pattern. This dual-action motion – spinning and oscillating – prevents swirl marks and provides a smooth, even finish. Unlike circular orbital sanders, which sand in a single, consistent circle, the random pattern ensures that no two abrasive points follow the same path, significantly reducing the risk of visible sanding marks. This makes it a preferred choice for fine finishing work.
The Core Components of Your Sander
- Sanding Pad: This is where you attach the sandpaper. It’s usually made of hook-and-loop (velcro) material.
- Motor: Powers the spinning and oscillating action of the pad.
- Dust Port: Connects to a dust bag or vacuum for sander dust collection.
- Variable Speed Control: Allows you to adjust the sanding speed for different materials and tasks.
- On/Off Switch: Self-explanatory, but good to know where it is!
Why Choose a Random Orbital Sander?
When it comes to woodworking and surface preparation, having the right tool makes all the difference. Here’s why a random orbital sander is a staple in many workshops:
- Superior Finish: The random orbital action is the key. It significantly minimizes swirl marks, leading to a smoother, more professional-looking finish compared to other types of sanders. This is especially important for projects that will be painted or stained, as imperfections will be more noticeable.
- Efficiency: These sanders are powerful and remove material relatively quickly, speeding up your workflow.
- Versatility: From rough material removal to final polishing, a random orbital sander can handle it all with the correct choosing sandpaper grits.
- Ease of Use: They are generally lightweight and ergonomic, making them comfortable to use for extended periods. The balanced design also reduces user fatigue.
- Reduced Dust: With a good dust collection system, a random orbital sander can keep your workspace much cleaner, improving air quality and visibility.
Getting Started: A Beginner Sander Guide
If you’re new to power sanding, a random orbital sander is an excellent starting point. Here’s how to get going:
1. Choosing Your Sandpaper: The Foundation of a Good Finish
The type and grit of sandpaper are crucial for achieving your desired outcome.
Understanding Sandpaper Grits
Sandpaper is rated by grit, which refers to the number of abrasive particles per square inch.
- Lower Grit Numbers (e.g., 40-80): Coarse. These are for aggressive material removal, like stripping old paint, removing rough mill marks, or shaping wood.
- Medium Grits (e.g., 100-150): Used for general sanding and removing scratches left by coarser grits.
- Fine Grits (e.g., 180-220): For smoothing surfaces before applying finishes like paint, stain, or varnish.
- Extra Fine Grits (e.g., 240+): Used for ultra-smooth finishes, buffing, and preparing surfaces for high-gloss coatings.
Types of Sandpaper for Orbital Sanders
- Aluminum Oxide: The most common and versatile abrasive. Good for wood and some metals.
- Silicon Carbide: Sharper and more brittle than aluminum oxide. Great for hardwoods, glass, and plastics, and for wet sanding.
- Ceramic: Very durable and sharp, self-sharpening. Excellent for aggressive sanding and long life, especially on hardwoods and dense materials.
How to Select the Right Grit for Your Project
The process of how to sand wood typically involves starting with a coarser grit and progressing to finer grits.
- Stripping Old Finish/Rough Wood: Start with 60 or 80 grit.
- Smoothing after Rough Sanding: Move to 120 grit.
- Prepping for Stain/Paint: Use 150 or 180 grit.
- Final Smoothing for Varnish/Polyurethane: Finish with 220 grit or higher.
Always make sure the sandpaper you choose is designed for random orbital sanders, typically with a hook-and-loop backing.
2. Attaching the Sandpaper
Most random orbital sanders use hook-and-loop (velcro) discs. Simply align the holes on the sandpaper disc with the holes on the sander’s pad and press firmly. Ensure it’s centered for even sanding.
3. Connecting to Dust Collection
Sander dust collection is vital for a clean workspace and healthier air. Most orbital sanders have a dust port.
- Using the Dust Bag: Attach the provided dust bag to the port. Empty it regularly as it fills up.
- Connecting to a Shop Vacuum: For maximum dust capture, connect your shop vacuum to the dust port using an appropriate adapter. This is highly recommended for prolonged sanding sessions.
4. Safety First: Sander Safety Essentials
Power tools require respect and adherence to safety guidelines.
- Wear Safety Glasses: Protect your eyes from dust and debris.
- Use Hearing Protection: Sanders can be noisy, so earplugs or muffs are a good idea.
- Wear a Dust Mask or Respirator: Essential for protecting your lungs from fine wood dust.
- Secure Your Workpiece: Use clamps to hold your project firmly in place. This prevents the wood from moving and gives you better control of the sander.
- Keep Cords Tidy: Ensure power cords are out of the way to prevent tripping or accidental cutting.
- Unplug When Changing Discs: Always disconnect the power before attaching or removing sandpaper.
- Read Your Manual: Familiarize yourself with your specific sander’s features and safety instructions.
Mastering Sanding Techniques: How to Sand Wood Effectively
Now that you’re set up, let’s get to the actual sanding. Here are key sanding techniques for optimal results:
Basic Sanding
- Start the Sander: Place the sander flat on the surface before turning it on.
- Apply Light Pressure: Let the sander do the work. Pressing too hard can lead to uneven sanding and damage the sandpaper.
- Keep the Sander Moving: Move the sander in slow, overlapping strokes.
- Across the Grain: For initial material removal or stripping.
- With the Grain: For finishing and creating a smooth surface. Always finish sanding in the direction of the wood grain.
- Check Your Progress: Lift the sander off the surface before turning it off. Periodically feel the surface to check for smoothness and evenness.
- Transitioning Grits: Once you’ve achieved the desired smoothness with one grit, switch to the next finer grit. For best results, ensure you remove all scratches from the previous grit.
Feathering Edges
To avoid creating noticeable sanding lines when you stop or start, feather the edges of your sanding passes. This means slightly lifting the sander at the end of a stroke to create a very gentle ramp into the surface, rather than an abrupt stop.
Working with the Grain
This is a fundamental rule of how to sand wood. Always sand in the direction of the wood grain. Sanding against the grain or in circles with a non-random orbital sander will leave visible scratches that are difficult to remove. The random orbital action minimizes this, but finishing with the grain is still the best practice.
Sanding Edges and Curves
For edges, hold the sander at a slight angle or use your fingertips to guide the pad. For curves, ensure the sandpaper conforms to the shape without excessive pressure.
What to Do About Dust?
As mentioned, a good sander dust collection system is crucial.
- Regularly Empty the Dust Bag/Canister: A full bag reduces suction and sanding efficiency.
- Clean the Dust Port: Ensure no dust is blocking the airflow.
- Vacuum the Surface: After each sanding grit, vacuum the surface to remove loose dust. You can also use a tack cloth for a final dust-free wipe.
Advanced Random Orbital Sander Tips
Once you’ve got the basics down, these tips can elevate your sanding game:
1. Variable Speed Control is Your Friend
Don’t always run your sander on high speed. Lower speeds are often better for:
- Fine Finishing: Reduces the risk of overheating the wood or burning finishes.
- Sanding Veneers: Prevents sanding through delicate veneers.
- Controlling Dust: Lower speeds can sometimes help the dust collection system keep up.
Start with a medium speed and adjust as needed based on the material and the grit of sandpaper you’re using.
2. Feathering Strokes for Seamless Transitions
When sanding large surfaces, overlap your strokes by about 50%. To avoid distinct lines where you start and stop sanding, use a “feathering” motion. As you reach the end of a stroke, slightly lift the sander off the surface and continue the motion off the edge. This blends the sanded area more smoothly.
3. Don’t Forget the Edges of the Pad
The edges of the sanding pad can sometimes exert more pressure. Be mindful of this, especially when sanding delicate surfaces or edges, to prevent uneven sanding.
4. Tack Cloths are Essential
After sanding with each grit, and especially before applying a finish, use a tack cloth. These sticky cloths pick up the finest dust particles that even a vacuum might miss, ensuring a clean surface for your finish.
5. “Drunk Sanding” is a Myth (Mostly)
While the name sounds funny, “drunk sanding” refers to sanding with a slightly irregular pattern. Because the random orbital sander’s action is inherently random, a slightly less uniform movement is generally fine, as the pad is constantly shifting its path. However, avoid long, straight passes without overlapping, which can still leave subtle lines.
6. For Tougher Jobs, Consider a Backing Pad Alternative
Some higher-end sanders offer softer or firmer backing pads. A softer pad conforms better to curves, while a firmer pad offers more aggressive sanding. You can often buy replacement pads if yours is worn out or if you need a different flexibility.
7. Maintenance for Longevity: Orbital Sander Maintenance
Proper care ensures your sander lasts and performs well.
Cleaning Your Sander
- Exterior: Wipe down the sander with a damp cloth after use.
- Dust Port and Bag: Regularly clear out dust from the dust port and the dust bag or canister. For dust bags, you can often turn them inside out and clean them.
- Sanding Pad: Occasionally brush off any accumulated dust or debris from the hook-and-loop surface to maintain good adhesion for sandpaper.
Checking the Pad
Inspect the hook-and-loop pad regularly. If the “hooks” are worn down or the pad is damaged, it won’t hold sandpaper effectively. Replacement pads are available for most models.
Cord Care
Inspect the power cord for any nicks or damage. If damaged, have it repaired or replaced by a qualified technician.
Common Issues and Solutions
Even with proper use, you might encounter a few common problems.
Issue: Swirl Marks
- Cause: Typically caused by sanding against the grain or using a sander that isn’t truly random orbital (e.g., a standard circular orbital sander). Can also happen if pressure is uneven.
- Solution: Ensure you’re using a random orbital sander. Always finish sanding with the grain. Use lighter pressure and overlap your strokes. If swirl marks are present, you might need to go back to a slightly coarser grit and re-sand with progressively finer grits.
Issue: Sanding Through Veneer
- Cause: Applying too much pressure or using too coarse a grit on thin veneer.
- Solution: Use lighter pressure and finer grits (150 grit and up). Consider using a softer backing pad if available. For very delicate veneers, hand sanding with a sanding block might be safer.
Issue: Inconsistent Sanding Pressure
- Cause: Uneven pressure application by the user.
- Solution: Practice keeping the sander flat and applying even, light pressure. Let the tool’s weight and vibration do the work.
When to Use Other Sanders
While a random orbital sander is versatile, it’s not always the best tool for every job.
Belt Sanders
- Use: Aggressive material removal, flattening large surfaces, removing old paint or varnish quickly.
- Why: Much more aggressive than an orbital sander.
Detail Sanders (Triangle Sanders)
- Use: Getting into tight corners, sanding intricate moldings, detailed work.
- Why: Their pointed shape allows access where an orbital sander cannot reach.
Finishing Sanders (Sheet Sanders)
- Use: Very light sanding, polishing, preparing surfaces for the very final finish.
- Why: They use a flat pad that moves back and forth and are excellent for ultra-fine finishing but remove very little material. An orbital finishing sander is a type of finishing sander with an oscillating pad.
Project Ideas for Your Random Orbital Sander
Your random orbital sander can help with countless projects:
- Refinishing Furniture: Strip old paint or varnish and prepare for a new look.
- Building Shelves: Smooth rough lumber and create crisp edges.
- Deck Restoration: Clean and smooth weathered deck boards before staining.
- Creating Custom Wood Signs: Prepare wood surfaces for painting or carving.
- DIY Planter Boxes: Smooth rough-sawn lumber for a splinter-free finish.
Frequently Asked Questions (FAQ)
Q1: How do I know when to change sandpaper grit?
A1: You change grit when the surface you’re sanding isn’t getting any smoother with the current grit, or when you see scratches that are too deep to be removed by the next finer grit. Always ensure all scratches from the previous grit are gone before moving to a finer one.
Q2: Can I use my random orbital sander for wet sanding?
A2: Generally, no, unless your sander is specifically designed for wet sanding. Most random orbital sanders are designed for dry use. Wet sanding can damage the motor and electronics. Silicon carbide sandpaper is often used for wet sanding applications.
Q3: How long should sandpaper last?
A3: The lifespan of sandpaper depends on the material being sanded, the grit, the pressure applied, and the quality of the sandpaper itself. Hardwoods and dirty surfaces will wear down sandpaper faster. Frequent cleaning of the sanding pad and avoiding pressure buildup will help extend its life.
Q4: What’s the difference between a random orbital sander and an orbital sander?
A4: A standard orbital sander (also known as a sheet sander or finishing sander) uses a square pad that oscillates back and forth. A random orbital sander adds a spinning motion to this oscillation, resulting in a much smoother finish with fewer visible marks.
Q5: Do I need to sand with the grain if I’m painting?
A5: Yes, even if you’re painting, sanding with the grain is still best practice. It ensures a more uniform surface preparation. While paint can hide minor imperfections, proper sanding with the grain makes the final paint job look much better and adhere more evenly.
By following this comprehensive guide, you’ll be well on your way to using your random orbital sander like a pro, achieving beautiful, smooth finishes on all your woodworking projects. Happy sanding!