
Can I build a chop saw station to make my woodworking easier and safer? Yes, you absolutely can build a chop saw station! It’s a fantastic project for any DIYer, offering improved accuracy, better dust control, and convenient storage for your tools and materials. This guide will walk you through the process, from planning to the final touches, ensuring you create a sturdy and functional centerpiece for your workshop.
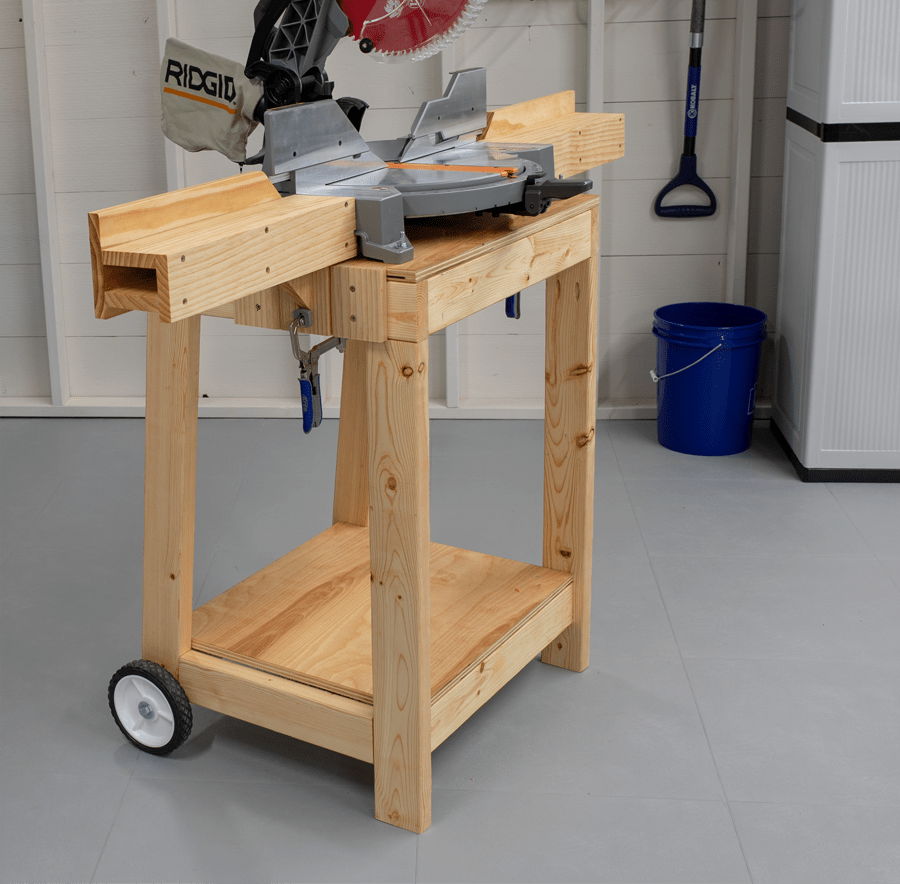
Image Source: learn.kregtool.com
Why You Need a Dedicated Chop Saw Station
Having a dedicated space for your chop saw, often referred to as a miter saw station, brings numerous benefits. Without one, your saw might sit precariously on a temporary stand or a workbench, leading to instability, inaccurate cuts, and increased dust exposure. A well-built station provides a stable platform, extended support for long workpieces, integrated dust collection, and organized storage, transforming your cutting experience.
Key Benefits of a Chop Saw Station:
- Stability and Accuracy: A solid base eliminates wobbling, allowing for precise and repeatable cuts.
- Material Support: Built-in extensions and outfeed tables handle long boards with ease.
- Dust Management: Efficient dust collection for chop saw operations significantly improves air quality and shop cleanliness.
- Ergonomics: A properly heighted station reduces back strain during extended use.
- Organization: Integrated chop saw storage keeps blades, jigs, and measuring tools within easy reach.
- Safety: Features like improved dust collection and secure material clamping enhance workshop safety.
Planning Your Chop Saw Station
Before you start cutting wood, thoughtful planning is crucial. Consider your available space, the types of projects you undertake, and your specific needs.
Design Considerations:
- Footprint: How much space do you have in your workshop?
- Height: The ideal height is usually around your waist or slightly below, allowing for comfortable operation.
- Support: How will you support long workpieces? Think about extensions and outfeed tables.
- Storage: What do you need to store? Blades, measuring tape, pencils, safety glasses?
- Mobility: Do you need a mobile chop saw stand to move it around your shop?
- Dust Collection: How will you integrate a dust collection system?
Material Choices:
- Plywood: 3/4-inch cabinet-grade plywood is excellent for the main structure, offering strength and stability.
- Dimensional Lumber: 2x4s and 2x6s are great for framing and support legs.
- MDF: Medium-density fiberboard can be used for work surfaces and fences.
- Hardware: Screws (wood screws, pocket hole screws), bolts, hinges, drawer slides, casters (if mobile).
Building the Base Frame: The Foundation of Your Station
The base frame provides the structural integrity of your entire miter saw station. It needs to be robust to support the saw, lumber, and the forces generated during cutting.
Step 1: Measure and Cut Your Lumber
- Decide on the desired height of your station. A common ergonomic height is around 36 inches.
- Determine the width and depth of your base. This will depend on your chop saw’s footprint and the desired stability.
- Cut your 2x4s or 2x6s for the legs and the top and bottom aprons.
Example Base Dimensions (Adjust as needed):
| Component | Dimensions (W x L x H) | Material | Quantity |
|---|---|---|---|
| Legs | 2×4 x 36″ | 2×4 Lumber | 4 |
| Top Aprons | 2×4 x 30″ | 2×4 Lumber | 2 |
| Bottom Aprons | 2×4 x 30″ | 2×4 Lumber | 2 |
| Side Aprons | 2×4 x 18″ | 2×4 Lumber | 2 |
| Cross Braces | 2×4 x 18″ | 2×4 Lumber | 2 |
Step 2: Assemble the Legs and Aprons
- Lay out your four legs.
- Attach the top and bottom aprons to the legs using wood screws or pocket hole joinery. Ensure the corners are square.
- Add the side aprons to create a sturdy rectangular frame.
- Install cross braces between the legs for added rigidity.
Step 3: Add Plywood Bracing or a Shelf
- Cut pieces of 3/4-inch plywood to fit the inside of the base frame.
- Secure these plywood panels to the inside of the aprons and legs. This significantly strengthens the base and provides a surface for mounting other components or creating a lower shelf for chop saw storage.
Creating the Chop Saw Platform
The platform is where your chop saw will be mounted. It needs to be flat, stable, and at the correct height.
Step 1: Construct the Saw Platform
- Cut a piece of 3/4-inch plywood to a size that comfortably accommodates your chop saw, with a little extra room around the edges.
- This platform can be mounted directly to the top aprons of your base frame.
Step 2: Mounting the Chop Saw
- Carefully place your chop saw onto the plywood platform.
- Mark the mounting holes for your saw. Most chop saws have pre-drilled holes in their bases.
- Drill pilot holes and then secure the saw to the platform using appropriate bolts or lag screws. Ensure the saw is centered and positioned for optimal material support.
Building the Chop Saw Fence and Support Wings
A good chop saw fence and support wings are essential for accurate cuts, especially for longer pieces.
Step 1: Designing and Building the Fence
- The fence should be at the same height as the blade guard when the saw is in its lowest position. This ensures that the workpiece is held flush against it.
- Cut two pieces of 3/4-inch plywood or MDF for the fence. One piece will be the primary fence, and the other can be used as a support or integrated into storage.
- Attach the primary fence piece vertically to the back of your chop saw platform, ensuring it’s perfectly square to the blade. Use screws and possibly some L-brackets for extra support.
- Consider adding a sacrificial fence layer on top of your primary fence. This allows you to make zero-clearance cuts or add jigs without damaging the main fence.
Step 2: Adding Support Wings (Outfeed Tables)
- Chop saw outfeed tables are crucial for supporting long workpieces and preventing them from tipping during cuts.
- You can build these in several ways:
- Fixed Wings: Cut large pieces of plywood and attach them to the sides of the base frame, extending outwards. These provide a stable, continuous surface.
- Extendable Wings: Incorporate telescoping sections or hinged supports that can be deployed when needed.
- Flip-Top Wings: Design wings that fold down out of the way when not in use.
- For simplicity, fixed wings are a great starting point. Cut plywood to your desired length and width, and attach them to the sides of your base, ensuring they are level with the chop saw’s cutting surface.
Example Wing Construction:
- Cut two pieces of 3/4-inch plywood (e.g., 24″ x 36″).
- Rip some 2x4s to create support ledges on the sides of your base frame.
- Attach the plywood wings to these ledges using screws.
Integrating Dust Collection for Chop Saw
Good dust collection for chop saw use is vital. Most chop saws have a dust port, but it’s often not very effective on its own.
Options for Dust Collection:
- Shop Vac Integration: The simplest method is to connect your shop vac hose to the saw’s dust port. You can create a simple shroud or adapter to improve the seal.
- Dust Collection Hood: Build a plywood or MDF box that fits around the back and sides of the chop saw, with a large opening at the front to capture dust. This hood connects to your shop vac or central dust collection system.
- Central Dust Collection: If you have a dust collector, plumb a 4-inch hose to your station. You might need to build a larger capture hood or dust port adapter.
Building a Simple Dust Collection Shroud:
- Measure the dimensions of the back and sides of your chop saw.
- Cut pieces of plywood or MDF to create a box-like structure that encloses these areas.
- Leave an opening at the top and front for airflow and access to the saw.
- Install a 2-1/2 inch or 4-inch dust port on the shroud, connecting it to your shop vac or dust collection system.
Adding Storage and Features to Your Chop Saw Station
A chop saw station is more than just a platform; it’s a complete workspace. Adding storage and useful features enhances its functionality.
Chop Saw Storage Solutions:
- Shelves: Add shelves below the saw platform for storing lumber, toolboxes, or smaller accessories.
- Drawers: Incorporate drawers using drawer slides for neatly organized storage of blades, measuring tools, safety equipment, and other small items. A shop cabinet integrated into the base can house these drawers.
- Tool Holders: Attach small shelves, magnetic strips, or pegboard to the sides of the station for frequently used items like pencils, tape measures, and combination squares.
- Blade Storage: Dedicate a section of a shelf or build a small cabinet to store your various chop saw blades safely.
Useful Additions:
- Stop Blocks and T-Tracks: Install T-tracks along the fence or outfeed tables to easily attach adjustable stop blocks for repeatable cuts.
- Power Strip: Mount a power strip on the side or underside of the station for easy access to power outlets for your saw and other tools.
- Light: Add an LED shop light above the cutting area for better visibility.
- Mortising Attachment Mounting: If your saw supports it, consider a dedicated mounting point for a mortising attachment.
Making Your Chop Saw Station Mobile
If you need flexibility in your workshop layout, a mobile chop saw stand is a game-changer.
Options for Mobility:
- Heavy-Duty Casters: The most straightforward approach is to attach heavy-duty locking casters to the bottom of your base frame. Ensure the casters are rated for the total weight of the station and your saw.
- Mobile Base Kit: You can purchase commercial mobile base kits designed for large tools. These often attach to the bottom of your station and allow it to be moved easily.
Considerations for Mobile Stations:
- Locking Casters: Always use casters with reliable locking mechanisms to prevent the station from rolling during operation.
- Wheel Placement: Distribute the casters evenly for stability.
- Center of Gravity: Keep the heaviest components (the saw) as low as possible to maintain stability.
Building a Homemade Miter Saw Bench
The term “homemade miter saw bench” often refers to a more elaborate setup that might include a full workbench surface around the chop saw.
Extending the Workbench Surface:
- If you want a more traditional workbench feel, extend the outfeed tables significantly.
- You can create a continuous workbench surface by building a sturdy frame around the chop saw area.
- Consider adding a thicker, more durable top, such as a laminate-covered MDF or a butcher block.
Incorporating a Workbench with Storage:
- Build a sturdy chop saw workbench with integrated cabinets and drawers.
- The chop saw can be recessed into the workbench top, providing a flush work surface when the saw is not in use or lowered.
- This approach maximizes workspace and storage in a compact footprint.
Construction Tips and Techniques
- Pocket Hole Joinery: This is an excellent method for strong, hidden joints, especially for building the base frame and attaching panels.
- Countersinking Screws: For a cleaner look and a flush surface, countersink your screws.
- Squaring Everything: Use a reliable carpenter’s square to ensure all your cuts and assemblies are perfectly square. This is critical for accurate cuts.
- Leveling: Ensure the entire station is level on your shop floor. Use shims if necessary.
- Safety First: Always wear safety glasses, hearing protection, and a dust mask when operating power tools. Ensure the chop saw is securely mounted and that all supports are stable before making any cuts.
Example Project: A Simple, Robust Chop Saw Station
Let’s outline a straightforward build suitable for most DIYers.
Materials List:
- 4 x 8-foot 3/4-inch plywood sheets (cabinet grade recommended)
- 20 x 8-foot 2×4 lumber
- 1 x 4-foot x 8-foot 1/2-inch plywood for dust collection shroud (optional)
- 1-1/4 inch and 2-1/2 inch wood screws
- 2-1/2 inch pocket hole screws
- Wood glue
- 4 x Heavy-duty locking casters (if mobile)
- Lag bolts or carriage bolts for mounting the saw
Tools Needed:
- Circular saw or table saw
- Miter saw (ironic, I know!)
- Jigsaw
- Drill/driver
- Pocket hole jig
- Tape measure
- Carpenter’s square
- Level
- Safety glasses
- Hearing protection
- Dust mask
Build Steps:
- Base Frame: Cut 2x4s for legs (36″) and aprons. Assemble a sturdy rectangular base using pocket holes and glue.
- Lower Shelf/Bracing: Cut plywood to fit inside the base and screw it in place.
- Saw Platform: Cut a 3/4-inch plywood piece sized for your saw. Mount it to the top of the base frame, ensuring it’s level.
- Mount Saw: Place your chop saw on the platform, mark mounting holes, drill, and secure with lag bolts.
- Fencing: Create a fence from 3/4-inch plywood, ensuring it’s square to the blade. Attach it to the back of the platform.
- Outfeed Wings: Cut plywood wings and attach them to the sides of the base, aligning with the saw’s cutting surface.
- Dust Collection (Optional): Build a simple shroud and connect a dust port.
- Storage: Add a simple shelf below the platform or build a basic shop cabinet if desired.
- Mobility (Optional): Attach locking casters to the bottom of the base.
Frequently Asked Questions (FAQ)
Q1: What is the ideal height for a chop saw station?
A1: The ideal height for a chop saw station is typically at waist level or slightly below, usually around 36 inches. This allows for comfortable operation and reduces strain on your back.
Q2: Can I use MDF for the entire chop saw station?
A2: While MDF is dense and smooth, it’s not as strong or moisture-resistant as plywood, especially for structural components like the base frame. It’s best used for work surfaces, fences, or drawer fronts. Plywood is generally preferred for the main structure.
Q3: How do I make my chop saw station stable?
A3: Stability comes from a strong base frame made from sturdy lumber, well-secured aprons, and bracing. If making a mobile stand, ensure the casters lock securely. For fixed stations, ensure it sits level on the floor.
Q4: What is the best way to manage dust from my chop saw?
A4: The best methods involve connecting your shop vac or dust collector to the saw’s dust port, often with a shroud or collection box to improve capture efficiency. A good dust collection for chop saw setup is crucial for air quality and shop cleanliness.
Q5: How can I support long pieces of wood on my chop saw station?
A5: Extendable roller stands, built-in chop saw outfeed tables, and support wings attached to the sides of your station are excellent ways to support long workpieces.
Q6: Is it necessary to have a dedicated chop saw station?
A6: While not strictly necessary, a dedicated station significantly improves safety, accuracy, efficiency, and organization in your workshop. It elevates your woodworking experience.
Q7: How can I build a mobile chop saw stand?
A7: You can build a mobile stand by attaching heavy-duty, locking casters to the base of your chop saw station. Ensure the casters are rated for the total weight of the saw and the station.
Q8: What are the benefits of a chop saw fence?
A8: A chop saw fence provides a stable and accurately positioned surface against which to hold your workpiece, ensuring precise and repeatable cuts, especially for repetitive tasks.
Building a chop saw station is a rewarding DIY project that will undoubtedly enhance your woodworking capabilities. By carefully planning, using quality materials, and following these steps, you can create a robust, functional, and safe workspace tailored to your needs. Enjoy the precision and convenience your new miter saw station brings!