
Can I build a sturdy and functional chop saw table myself? Yes, you absolutely can build a sturdy and functional chop saw table yourself with some basic tools and materials. This guide will walk you through the process, making it easy for even beginner woodworkers.
A chop saw is a fantastic tool for making precise crosscuts and miter cuts on lumber. However, its usefulness is amplified when it’s mounted on a dedicated table. A well-built chop saw table, often referred to as a miter saw stand or tool stand, provides a stable platform, elevates the saw to a comfortable working height, and can incorporate features like outfeed support and storage. Building your own DIY stand is a rewarding project that can save you money compared to purchasing a commercial unit. This in-depth guide will cover everything you need to know, from planning and material selection to assembly and finishing, to create a reliable portable table for your chop saw.
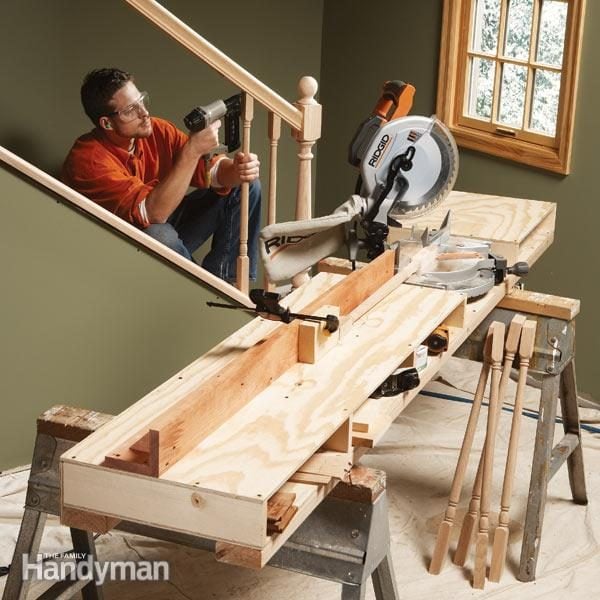
Image Source: www.familyhandyman.com
Planning Your Chop Saw Table
Before you start cutting wood, it’s crucial to plan your chop saw table. Consider these key aspects:
- Saw Dimensions: Measure your specific chop saw, noting its base dimensions, height, and any mounting points. This will dictate the size of the mounting platform.
- Working Height: Determine the ideal working height for you. A common recommendation is to have the top of the saw’s base at roughly waist height. This prevents excessive bending and strain.
- Portability: Do you need to move the stand around your workshop or job site? If so, incorporating a wheeled base is essential. Consider the type of wheels – swivel casters offer maneuverability, while locking casters ensure stability.
- Stability: A wobbly stand is a safety hazard. Your design must prioritize a wide base and robust construction to prevent tipping or vibration.
- Features: Think about additional features you might want:
- Outfeed Support: Long pieces of lumber can sag without support. Integrated flip-up or extendable outfeed rollers are invaluable.
- Storage: Shelves or bins can hold clamps, measuring tapes, spare blades, and other accessories.
- Dust Collection: Connect your chop saw to a shop vacuum or dust collector to manage sawdust, improving air quality and visibility.
- Repeat Stops: A fence with an adjustable stop allows for quick, repeatable cuts of the same length.
- Safety Features: Guards, dust collection ports, and a stable mounting system are paramount.
Design Considerations: A Stable Foundation
The foundation of your chop saw table is its base. A wider base generally translates to better stability. Consider a rectangular or square footprint. The height of the legs will be determined by your chosen working height and the height of your chop saw.
Material Choices: Building for Durability
The lumber dimensions you choose will impact the strength and weight of your stand. For most chop saw tables, common construction lumber like 2x4s and 2x6s is sufficient and readily available. Plywood, particularly 3/4-inch thickness, is excellent for the tabletop and shelves due to its strength and flatness.
Table 1: Recommended Lumber and Plywood Dimensions
| Component | Recommended Lumber/Plywood | Notes |
|---|---|---|
| Legs | 2×4 or 2×6 | For maximum stability, wider legs are better. |
| Base Frame | 2×4 | Connects the legs for structural integrity. |
| Tabletop | 3/4″ Plywood | Provides a flat, stable mounting surface. |
| Shelves (Optional) | 3/4″ Plywood or 1x (e.g., 1×6) | Use thicker plywood for heavier items. |
| Fences/Supports | 1×4 or 2×4 | For attaching fences or extending support. |
When selecting lumber, look for straight pieces with minimal knots. Kiln-dried lumber is generally more stable than green lumber.
Building the Base Frame
The base frame is the skeleton of your chop saw table. It provides the primary support and connects the legs.
Step 1: Cutting the Base Components
Measure and cut your lumber for the base frame according to your design. For a simple rectangular base, you’ll need four pieces.
- Example Base Dimensions: For a stand that’s approximately 30 inches wide and 40 inches long, you might cut:
- Two pieces of 2×4 at 40 inches.
- Two pieces of 2×4 at 27 inches (allowing for the width of the 2x4s used for the 40-inch sides).
Step 2: Assembling the Base Frame
Lay out the cut pieces to form a rectangle. You can assemble this using wood screws. Pre-drilling pilot holes is recommended to prevent the wood from splitting.
- Use at least two screws per joint for a strong connection.
- Ensure the frame is square by measuring the diagonals. They should be equal.
Step 3: Attaching the Legs
Cut your leg pieces to the desired height. Remember to factor in the height of the base frame and the tabletop.
- Example Leg Height: If you want a working height of 36 inches, and your base frame is 3.5 inches high, and your tabletop is 0.75 inches thick, you’ll need legs that are roughly 31.75 inches tall (36 – 3.5 – 0.75).
Attach the legs to the inside corners of the base frame. Again, pre-drilling and using multiple screws will ensure a secure attachment. For added stability, consider using corner braces or lag screws.
Constructing the Tabletop
The tabletop is where your chop saw will be mounted. It needs to be flat, strong, and large enough to accommodate your saw and allow for material support.
Step 1: Cutting the Plywood
Cut a piece of 3/4-inch plywood to your desired tabletop size. A common size might be 24 inches by 48 inches, but adjust this based on your saw and needs.
Step 2: Mounting the Tabletop to the Base
Position the plywood tabletop on top of the base frame. Ensure it’s centered and flush with the edges, or with a slight overhang for added stability.
- Secure the tabletop to the base frame using wood screws. Drive screws down through the plywood into the 2x4s of the base frame. Space the screws every 6-8 inches for a strong bond.
Mounting the Chop Saw
This is a critical step for both functionality and safety.
Step 1: Transferring the Saw’s Footprint
Place your chop saw on the tabletop in the desired position. Mark the locations of the mounting holes on the saw’s base.
Step 2: Drilling Mounting Holes
Carefully remove the saw. Drill pilot holes at the marked locations. The size of the drill bit will depend on the screws or bolts you plan to use.
Step 3: Securing the Chop Saw
Place the chop saw back onto the tabletop, aligning the holes. Use appropriate hardware to secure the saw. This typically involves robust bolts, washers, and nuts. If possible, use locking washers or a thread-locking compound to prevent the bolts from vibrating loose.
Important Safety Note: Ensure the saw is mounted so that the blade has clear clearance and doesn’t interfere with the table structure during operation.
Adding Essential Features
Now it’s time to enhance your chop saw table with practical features.
Outfeed Support: Handling Long Lumber
Long pieces of lumber can easily tip or sag without proper support.
Option 1: Simple Flip-Up Supports
- Cut two pieces of 2×4 to a length that matches the width of your tabletop.
- Attach these to the rear of the tabletop using heavy-duty hinges.
- When not in use, they can flip down and be secured. When in use, they flip up to provide support.
Option 2: Extendable Supports with Rollers
- Build simple rectangular frames that slide into larger frames attached to the sides of your tabletop.
- Mount casters or small wheels on the ends of the inner frames to act as rollers.
- These can be extended to support very long workpieces.
Incorporating a Wheeled Base
If portability is a priority, adding wheels is a must.
Step 1: Attaching Wheel Brackets
- Cut four pieces of 2×4 or 2×6 to act as mounting blocks for your casters. These should be wide enough to accommodate the caster’s footprint.
- Attach these blocks to the bottom of your table legs using screws and possibly wood glue for extra strength.
Step 2: Installing Casters
- Choose heavy-duty casters with a weight rating well above the expected load of your stand and saw. Swivel casters with brakes are ideal for maneuverability and stability.
- Attach the casters to the mounting blocks using appropriate bolts and washers. Ensure the casters are installed so the table sits level.
Dust Collection Integration
Managing sawdust is crucial for a clean workspace and better visibility.
- Hose Clamp/Bracket: Many chop saws have a dust port. Create a simple bracket or attach a hose clamp to the side of your table to hold the dust collection hose when not in use.
- Vacuum Mount: If you use a shop vac, you might be able to mount it directly to the side of the stand or create a small shelf for it.
- Dust Chute: Some designs incorporate a simple plywood chute to direct sawdust towards a central collection point.
Adding Fences and Repeat Stops
For precise, repeatable cuts, a fence is invaluable.
- Material: Use a straight piece of 1×4 or 2×4 for the fence.
- Attachment: Secure the fence to the rear of the tabletop, parallel to the saw blade’s path. Ensure it’s square to the blade. You can use screws or a tongue-and-groove system for adjustability.
- Repeat Stop: For repeatable cuts, attach a stop block to the fence. This can be a simple piece of wood that slides along the fence and is secured with a knob or clamp. You can also purchase commercial sliding stops.
Safety Features: Prioritizing Your Well-being
Safety should be your top priority at every stage of the build and use.
- Blade Guard: Ensure your chop saw’s original blade guard is intact and functional. Never remove or modify it.
- Dust Collection: As mentioned, this improves visibility and reduces airborne debris.
- Stable Base: A well-constructed, stable base prevents tipping.
- Secure Saw Mounting: Properly bolting the saw to the tabletop is non-negotiable.
- Workpiece Clamping: Always use clamps to secure your workpiece to the saw’s base or fence, especially for small offcuts or angled cuts.
- Eye and Ear Protection: Always wear safety glasses or a face shield and hearing protection when operating a chop saw.
- Emergency Shut-off: While not a typical feature of DIY stands, be aware of your saw’s on/off switch and ensure it’s easily accessible.
Finishing Your Chop Saw Table
A few finishing touches can protect your stand and improve its appearance.
Sanding
Thoroughly sand all surfaces to remove splinters and create a smooth finish. Start with a coarser grit sandpaper (e.g., 80 or 100 grit) and progress to finer grits (e.g., 150 or 220 grit).
Sealing and Painting
- Sealer: Apply a wood sealer or primer to protect the wood from moisture and wear.
- Paint or Varnish: Apply a few coats of paint or varnish for durability and aesthetics. A durable enamel paint is a good choice for workshop furniture.
Frequently Asked Questions (FAQ)
Q1: What is the best material for a chop saw table?
A1: For most DIY projects, 3/4-inch plywood for the tabletop and 2×4 lumber for the frame and legs offer a great balance of strength, affordability, and ease of use.
Q2: How high should my chop saw table be?
A2: The ideal height is typically around waist level, which for most people falls between 34 and 38 inches. You should be able to operate the saw without excessive bending.
Q3: Can I make a chop saw table with wheels?
A3: Yes, adding a wheeled base is a popular modification. Ensure you use heavy-duty casters with a sufficient weight rating for stability and easy maneuverability.
Q4: What are the essential safety features for a chop saw table?
A4: Key safety features include a stable base, secure mounting of the saw, functional blade guard, good dust collection, and the practice of always clamping your workpiece.
Q5: How do I ensure my chop saw table is stable?
A5: A wider base, robust construction, and ensuring all joints are securely fastened are crucial for stability. If adding wheels, use locking casters when the table is in use.
Q6: What is the purpose of outfeed support?
A6: Outfeed support is used to support long pieces of lumber as they exit the chop saw. This prevents the material from tipping or sagging, ensuring accurate cuts and safer operation.
By following this guide, you can build a custom chop saw table that meets your specific needs, enhances your woodworking efficiency, and prioritizes safety. Happy building!