
Can you check a circuit breaker with a multimeter? Yes, you absolutely can! A multimeter is an essential tool for diagnosing electrical issues, and checking a circuit breaker is one of its key applications. This guide will walk you through how to test a circuit breaker using a multimeter, covering both continuity and voltage tests. We’ll delve into the specifics of multimeter testing circuit breaker performance, how to check breaker continuity, and perform a continuity test circuit breaker, as well as the multimeter voltage test breaker procedure.
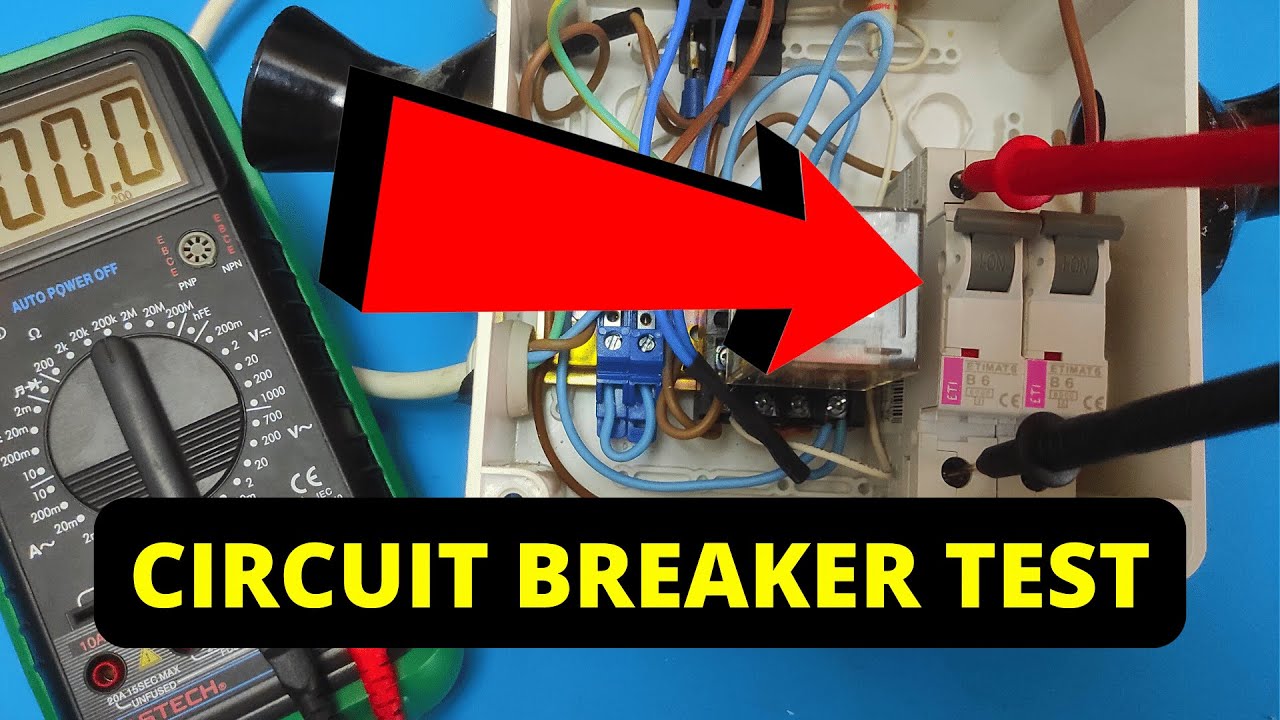
Image Source: i.ytimg.com
Why Test a Circuit Breaker?
Circuit breakers are crucial safety devices in your home’s electrical system. They protect your wiring from damage caused by overloads or short circuits by interrupting the flow of electricity. When a circuit breaker “trips,” it means it has done its job. However, sometimes a breaker might appear to be “on” but not be supplying power to the circuit, or it might trip frequently, indicating a problem. Diagnosing these issues often involves testing the circuit breaker itself.
Common Reasons to Test a Circuit Breaker:
- No Power to a Circuit: If an outlet or light fixture suddenly stops working, and the breaker appears to be in the “on” position, the breaker might be faulty.
- Frequent Tripping: If a breaker repeatedly trips, even with light loads, it could be malfunctioning or there might be an underlying issue with the circuit.
- Electrical Odors or Buzzing: These are signs of potential electrical problems, and testing the breaker is a good first step in diagnosis.
- Renovations or System Checks: Before working on a circuit or after making changes, it’s good practice to verify that the breaker is functioning correctly.
Essential Tools and Safety Precautions
Before you start, ensure you have the right tools and prioritize safety. Working with electricity can be dangerous if not done correctly.
What You’ll Need:
- Digital Multimeter: This is your primary tool. Ensure it has settings for both voltage (V) and continuity (often represented by a speaker or diode symbol).
- Screwdriver Set: You might need a flathead and Phillips head screwdriver to access the breaker panel.
- Safety Glasses: Protect your eyes from dust or debris.
- Insulated Gloves (Optional but Recommended): Provide an extra layer of protection.
- Non-Contact Voltage Tester (Optional but Recommended): A quick way to confirm if a circuit is de-energized before touching anything.
Safety First!
- Turn Off the Main Breaker: For maximum safety, especially when working directly with the breaker panel, it’s best to turn off the main power to your entire house. This is usually the largest breaker at the top of the panel.
- Never Work on a Live Circuit Unless Absolutely Necessary: When performing voltage tests, you will need to turn the breaker back on. Only do this with extreme caution and after performing continuity tests while the power is off.
- Assume All Wires Are Live: Until you have confirmed otherwise with a voltage tester, treat all wires as if they are carrying electricity.
- If You Are Unsure, Call a Professional: Electrical work can be hazardous. If you don’t feel comfortable or knowledgeable, hire a qualified electrician.
Getting Started: Accessing the Circuit Breaker
To perform the tests, you’ll need to access the circuit breakers themselves.
Opening the Breaker Panel
- Locate Your Electrical Panel: This is typically found in a basement, garage, utility room, or hallway closet.
- Remove the Panel Cover: Most breaker panels have a metal cover that is usually held in place by screws or clips. Carefully remove the cover to expose the breakers.
- Identify the Breaker: Locate the specific circuit breaker you want to test. Breakers are usually labeled with the circuits they control (e.g., “Kitchen Outlets,” “Bedroom Lights”).
Part 1: Performing a Continuity Test on a Circuit Breaker
A continuity test checks if there’s an unbroken path for electricity to flow through the breaker. This is best done when the power to the breaker is off. This is a key step in multimeter testing circuit breaker functionality and performing a continuity check breaker.
How to Check Breaker Continuity:
- Set Your Multimeter to Continuity Mode: Turn the dial on your multimeter to the continuity setting. This is usually indicated by a symbol that looks like a sound wave or a diode. When you touch the multimeter probes together, it should beep or display a very low resistance value (close to 0 ohms).
- Turn Off the Breaker: Make sure the circuit breaker you want to test is in the “OFF” position.
- Disconnect the Load (Optional but Safer): For an even safer test, you can disconnect the wires connected to the breaker. However, for a basic continuity test, you can often test directly at the breaker terminals if you can access them safely.
- Place the Multimeter Probes:
- Place one probe on the screw terminal where the wire from the panel connects to the breaker.
- Place the other probe on the screw terminal where the wire leading to your circuit connects to the breaker.
- Alternatively, if the breaker is accessible without removing wires, you can place one probe on the front metal tab of the breaker (where it connects to the bus bar in the panel) and the other probe on the screw terminal where the circuit wire attaches.
- Observe the Multimeter Reading:
- Good Breaker (OFF position): The multimeter should not beep and should show an “OL” (Open Line) or infinite resistance reading. This indicates that the circuit is broken, as it should be when the breaker is off.
- Faulty Breaker (OFF position): If the multimeter beeps or shows a low resistance, the breaker is stuck in the “on” or closed state, even though it’s switched off. This is a faulty breaker.
Testing the Breaker in the “ON” Position (Continuity):
Now, let’s test the breaker when it’s switched “ON.” This continuity test circuit breaker will show if the breaker is allowing power to flow.
- Ensure the Breaker is ON: Flip the circuit breaker to the “ON” position.
- Place the Multimeter Probes: Place the probes on the same terminals as before (the input terminal and the output terminal of the breaker).
- Observe the Multimeter Reading:
- Good Breaker (ON position): The multimeter should beep and show a very low resistance reading (close to 0 ohms). This indicates that the breaker is allowing electricity to pass through.
- Faulty Breaker (ON position): If the multimeter shows an “OL” or a high resistance reading, the breaker is not allowing power to flow, even though it’s in the “on” position. This breaker needs to be replaced.
Part 2: Performing a Voltage Test on a Circuit Breaker
A voltage test confirms whether the breaker is receiving power and if it’s supplying power to the circuit when it’s in the “ON” position. This is crucial for circuit breaker diagnostics multimeter use and performing a voltage check circuit breaker.
Multimeter Voltage Test Breaker Procedure:
Important Safety Note: For voltage tests, you must have power flowing to the breaker. Ensure you are comfortable working with live circuits or have taken all necessary precautions.
- Set Your Multimeter to AC Voltage (V~ or VAC): Turn your multimeter dial to the AC voltage setting. Ensure the range selected is higher than the expected voltage (e.g., 200V or higher for standard household circuits).
- Turn ON the Main Breaker: If you turned off the main breaker earlier, turn it back on now.
- Turn ON the Circuit Breaker: Ensure the specific circuit breaker you are testing is in the “ON” position.
- Measure Voltage at the Breaker Terminals:
- Input Side: Carefully place one multimeter probe on the screw terminal where the wire from the bus bar (the thick strip of metal in the panel) connects to the breaker. Place the other probe on the neutral bus bar (a strip with many white wires) or the ground bus bar (a strip with many green or bare wires) within the panel. You should read approximately 120 volts (V). If you don’t see voltage here, the problem might be upstream from this breaker.
- Output Side: Carefully place one multimeter probe on the screw terminal where the wire leading to your circuit connects to the breaker. Place the other probe on the neutral bus bar or ground bus bar. You should also read approximately 120 volts (V) here if the breaker is functioning correctly and the circuit load is off.
Interpreting Voltage Test Results:
-
Scenario 1: Voltage on Input, No Voltage on Output:
- Breaker is ON: This indicates the breaker is receiving power but not passing it to the circuit. The breaker is likely faulty and needs replacement.
- Breaker is OFF: You should not expect voltage on the output side.
-
Scenario 2: No Voltage on Input:
- This means power is not reaching the breaker. The issue could be with the main breaker, wiring leading to the panel, or a tripped upstream breaker. You will need to investigate further.
-
Scenario 3: Voltage on Both Input and Output:
- If you have voltage on both sides, and the circuit is still not working, the problem likely lies further down the circuit – in the wiring, outlets, or connected devices.
Testing a Double-Pole Breaker
Double-pole breakers control 240-volt circuits (like for dryers, ovens, or air conditioners) and have two handles linked together. Testing these follows similar principles but involves measuring voltage between the two hot wires.
How to test breaker with multimeter (Double-Pole):
- Set Multimeter to AC Voltage: Use the appropriate AC voltage range (e.g., 200V or higher).
- Turn ON the Breaker: Ensure the double-pole breaker is in the “ON” position.
- Measure Voltage Between Output Terminals:
- Place one probe on the output terminal of one of the breaker’s poles (where the hot wire for that pole connects).
- Place the other probe on the output terminal of the other pole of the same breaker.
- You should read approximately 240 volts (V).
- Measure Voltage to Neutral/Ground (Each Pole):
- With the breaker ON, place one probe on the output terminal of one pole and the other probe on the neutral bus bar or ground bus bar. You should read approximately 120 volts (V).
- Repeat for the other pole, placing one probe on its output terminal and the other on the neutral/ground bus bar. You should again read approximately 120 volts (V).
Interpreting Double-Pole Breaker Test Results:
- 240V between poles, but no 120V to neutral/ground on one pole: The breaker is likely faulty on that specific pole.
- No 240V between poles, and/or no 120V to neutral/ground on either pole: Check upstream power. If upstream power is present, the breaker is likely faulty.
Understanding Breaker Ratings and Types
Circuit breakers have specific ratings that indicate the maximum current they can safely handle before tripping. It’s important to know these when testing and replacing breakers.
Common Breaker Types:
| Breaker Type | Description | Common Applications | Voltage Rating (Typical) |
|---|---|---|---|
| Single-Pole | Controls one 120-volt circuit. Has one switch handle. | Lighting, standard outlets, small appliances | 120V |
| Double-Pole | Controls a 240-volt circuit. Has two linked switch handles. | Water heaters, dryers, ovens, central air conditioners | 240V |
| GFCI (Ground Fault Circuit Interrupter) | Trips due to a ground fault (imbalance in current). Detects leakage to ground. | Wet locations: bathrooms, kitchens, outdoors, garages | 120V / 240V |
| AFCI (Arc Fault Circuit Interrupter) | Trips due to dangerous electrical arcs in wiring. | Bedrooms, living areas, general living spaces | 120V |
Ampere Ratings:
Breakers are rated in amperes (amps), such as 15A, 20A, 30A, etc. This rating should match the circuit wiring’s capacity.
- 15 Amp Breaker: Typically used for circuits with 14-gauge wire.
- 20 Amp Breaker: Typically used for circuits with 12-gauge wire.
- 30 Amp Breaker: Typically used for circuits with 10-gauge wire.
Never install a breaker with a higher amperage rating than the circuit’s wiring can safely handle. This can lead to overheating and fire hazards.
When to Replace a Circuit Breaker
Based on your circuit breaker diagnostics multimeter tests, you can determine if a breaker is faulty.
- Failed Continuity Test: If a breaker fails the continuity test (shows continuity when off, or no continuity when on), it needs replacement.
- Frequent Tripping: While frequent tripping can indicate an overloaded circuit or a short, if you’ve ruled those out, the breaker itself might be worn out or defective.
- Physical Damage: If the breaker’s handle is broken, or if you see any signs of melting or discoloration on the breaker itself, replace it immediately.
- Age: While breakers are designed to last, older breakers can become less reliable. If your home’s electrical system is very old, consider having an electrician inspect and potentially replace aging breakers.
Frequently Asked Questions (FAQ)
Q1: Can I test a circuit breaker with just a multimeter?
Yes, a multimeter is the primary tool for testing a circuit breaker. You can perform both continuity and voltage tests to determine if a breaker is functioning correctly.
Q2: What does it mean if my circuit breaker keeps tripping?
If your breaker trips repeatedly, it could be due to an overloaded circuit (too many appliances drawing power), a short circuit (wires touching that shouldn’t be), or a faulty circuit breaker itself. It’s important to investigate the cause.
Q3: How do I know if my circuit breaker is bad?
You can determine if a breaker is bad using a multimeter. If it fails a continuity test circuit breaker (showing continuity when off or no continuity when on), or if a voltage check circuit breaker shows power going into the breaker but not coming out when it’s on, the breaker is likely bad.
Q4: What is the difference between a continuity test and a voltage test for a breaker?
A continuity test checks the electrical path through the breaker when the power is OFF. A voltage test checks if power is present at the breaker terminals when the power is ON. Both are important for circuit breaker diagnostics multimeter use.
Q5: Is it safe to test a circuit breaker with the power on?
It can be safe if you are careful and know what you are doing. Always set your multimeter correctly, use the appropriate probes, and avoid touching any metal parts other than the terminals you are testing. If you are unsure, turn off the main breaker before accessing the panel.
Q6: What is the correct setting on a multimeter for testing a circuit breaker?
For continuity tests, use the continuity setting (often a speaker or diode symbol). For voltage tests, use the AC voltage setting (V~ or VAC). Ensure the selected range is higher than the expected voltage (e.g., 120V or 240V).
Q7: Do I need a special multimeter for circuit breaker testing?
No, a standard digital multimeter with AC voltage and continuity functions is sufficient for most multimeter testing circuit breaker tasks.
Q8: What do the numbers on a circuit breaker mean?
The numbers on a breaker (e.g., 15, 20, 30) indicate its amperage rating. This is the maximum amount of current it can safely allow before it trips to protect the circuit.
By following these step-by-step instructions, you can confidently use your multimeter to check the functionality of your home’s circuit breakers. Remember to always prioritize safety and call a professional electrician if you have any doubts or encounter complex issues.