
Image Source: cdn11.bigcommerce.com
How To Clean Carburetor On Stihl Chainsaw: Step-by-Step
Can you clean a Stihl chainsaw carburetor yourself? Yes, you absolutely can clean a Stihl chainsaw carburetor yourself. With a little patience and the right approach, you can often restore your chainsaw’s performance without needing a professional.
A dirty or clogged carburetor is a common culprit behind a Stihl chainsaw sputtering, a Stihl chainsaw not starting, or an overall lack of power. Fortunately, Stihl chainsaw carburetor cleaning is a manageable DIY task that can significantly improve your saw’s operation. This comprehensive guide will walk you through the entire process, from identifying the problem to performing a thorough clean and even touching on Stihl carburetor adjustment and when a Stihl carburetor rebuild might be necessary.
Why Your Stihl Chainsaw Might Need Carburetor Cleaning
Over time, fuel can degrade, leaving behind gummy residues and varnish. This buildup can clog the tiny passages within the carburetor, restricting the proper mix of fuel and air that your chainsaw needs to run smoothly. Common signs that your carburetor needs attention include:
- Stihl chainsaw sputtering: The engine runs inconsistently, often hesitating or stumbling.
- Stihl chainsaw not starting: The engine either doesn’t crank over or fires up briefly and then dies.
- Loss of power: The chainsaw struggles to cut through wood, even with a sharp chain.
- Difficulty idling: The engine runs rough or stalls when not under load.
- Black smoke from the exhaust: This often indicates too much fuel entering the engine, a potential carburetor issue.
Maintaining your Stihl chainsaw fuel system is crucial for optimal performance and longevity. Regular cleaning is a vital part of Stihl carburetor maintenance.
Gathering Your Supplies for Stihl Chainsaw Carburetor Cleaning
Before you begin, ensure you have the necessary tools and supplies. Having everything ready will make the process smoother.
Essential Tools:
- Screwdrivers (flathead and Phillips head, various sizes)
- Small socket wrench set or adjustable wrench
- Pliers (needle-nose are helpful)
- Carburetor cleaner spray (specifically designed for carburetors)
- Compressed air can or air compressor with a blow gun
- Clean rags or shop towels
- Small brush or toothbrush
- Gloves and eye protection
- A clean, well-lit workspace
Optional but Recommended:
- Stihl carburetor kit: If your carburetor is heavily worn or has damaged parts, a kit can be invaluable.
- Ultrasonic cleaner: For very stubborn clogs, this is an excellent tool.
- Stihl carburetor parts diagram: Helps identify specific components.
Step-by-Step Guide to Stihl Chainsaw Carburetor Cleaning
This section will detail the process of cleaning your Stihl chainsaw’s carburetor. Always refer to your specific Stihl chainsaw model’s owner’s manual for any particular instructions.
Step 1: Safety First and Preparation
- Disconnect the spark plug wire. This is a critical safety step to prevent accidental starting.
- Ensure the chainsaw is cool. Let the engine cool down completely before you start working.
- Choose a well-ventilated area. Carburetor cleaner can have strong fumes.
- Protect your workspace. Lay down some old rags or newspaper to catch any fuel or cleaner spills.
Step 2: Accessing the Carburetor
- Remove the engine cover. This usually involves unscrewing a few bolts or removing clips. On many Stihl models, you’ll need to remove the top shroud to access the carburetor.
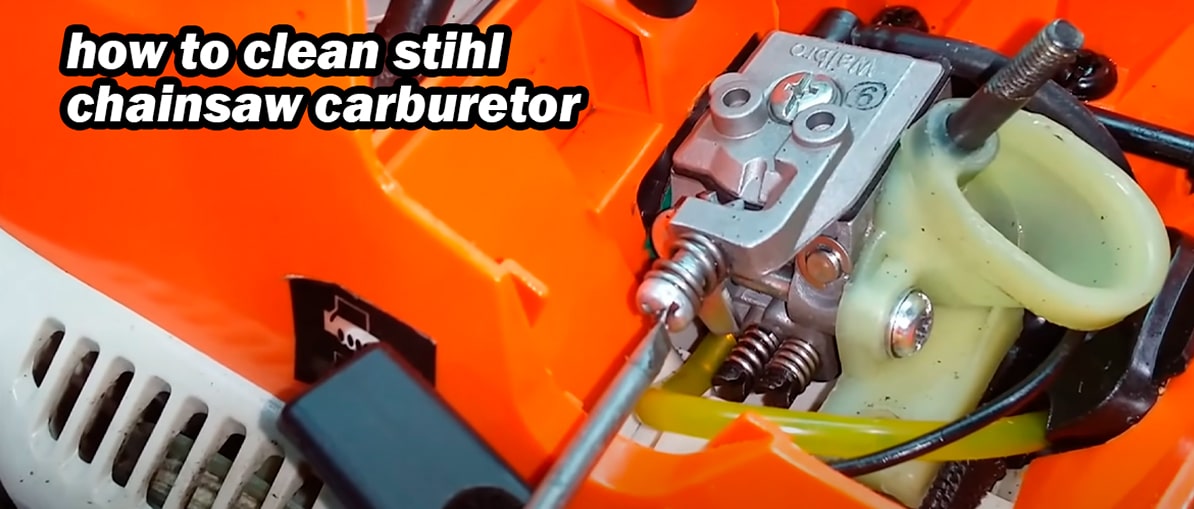
- Locate the carburetor. It’s typically a metal or plastic component connected to the engine by fuel lines and an air intake. It will have a throttle cable attached.
Step 3: Disconnecting Fuel Lines and Cables
- Identify the fuel lines. There will usually be one or two fuel lines connecting the fuel tank to the carburetor.
- Gently disconnect the fuel lines. Use pliers if necessary to loosen any clamps. Be prepared for a small amount of fuel to leak out; have a rag ready. It’s good practice to plug the fuel lines to prevent further leakage and contamination if you plan to leave them disconnected for an extended period.
- Disconnect the throttle cable. The throttle cable connects the throttle lever on the chainsaw to the carburetor’s throttle shaft. There’s usually a small clip or screw holding it in place. Carefully detach it.
Step 4: Removing the Carburetor
- Unbolt the carburetor. The carburetor is typically secured to the engine’s intake manifold by a couple of bolts or nuts. Remove these fasteners.
- Carefully lift the carburetor away. As you lift it, be mindful of any gaskets or seals between the carburetor and the engine. Note their position for reassembly.
Step 5: Disassembling the Carburetor (If Necessary and Comfortable)
For a thorough cleaning, you might need to disassemble the carburetor further. Note: If you are not comfortable with very small parts or have a complex carburetor, you might opt for a spray-clean only approach.
- Identify the bowl. Many carburetors have a small bowl at the bottom. This is often held on by a screw or clip. Remove this bowl.
- Inspect the diaphragm and gasket. Beneath the bowl, you’ll find a diaphragm and gaskets. These are critical for the carburetor’s function. Note their orientation before removing them. If they appear damaged, brittle, or warped, this is a strong indicator you need a Stihl carburetor kit for replacement.
- Inspect the internal components. You might see jets, needles, and other small parts. Be extremely careful with these. It’s best not to disassemble these further unless you are very experienced or following a specific guide for your carburetor model.
Step 6: Cleaning the Carburetor Components
This is where the real cleaning happens. Use your Stihl chainsaw carburetor cleaner generously.
- Spray the carburetor body. Apply carburetor cleaner liberally to all external and internal surfaces of the carburetor. Pay close attention to any ports or openings.
- Clean the jets. The jets are small brass fittings with tiny holes that control fuel flow. Use carburetor cleaner and compressed air to clear any blockages. You can also use a very fine wire (like a guitar string or a specialized carb cleaning tool) to gently poke through the jets, but be careful not to enlarge the holes.
- Clean the bowl. Clean the carburetor bowl thoroughly. If there’s sediment, remove it.
- Clean the diaphragm and gaskets (if reusing). If your diaphragm and gaskets are in good condition, clean them gently with a rag and carburetor cleaner. However, it is often more effective and recommended to replace them if you are doing a comprehensive cleaning, especially if you purchased a Stihl carburetor kit.
- Use compressed air. After spraying with cleaner, use compressed air to blow out all the passages, jets, and ports. This helps remove loosened debris.
Step 7: Inspecting for Worn Parts
While the carburetor is disassembled, take the opportunity to inspect all Stihl carburetor parts.
- Diaphragm: Look for tears, hardening, or swelling.
- Gaskets: Check for cracks, stiffness, or signs of fuel degradation.
- Needle and seat: Ensure the needle moves freely and the seat is not corroded.
- Throttle shaft: Make sure it moves smoothly and isn’t loose.
If you find any damaged parts, it’s time to consider a Stihl carburetor rebuild using a Stihl carburetor kit.
Step 8: Reassembling the Carburetor
Reassembly is the reverse of disassembly.
- Install new diaphragms and gaskets (if replaced). Ensure they are seated correctly and in the proper orientation. This is critical for the carburetor to function.
- Reassemble any internal components. Make sure everything is back in its original place.
- Attach the bowl. Secure the bowl with its screw or clip.
- Mount the carburetor back onto the engine. Ensure the gaskets are in place and that the carburetor is aligned correctly with the intake manifold.
- Tighten the mounting bolts. Snug them down securely but avoid overtightening.
- Reconnect the throttle cable. Make sure it’s properly secured.
- Reconnect the fuel lines. Ensure they are firmly attached.
Step 9: Reconnecting the Spark Plug Wire and Testing
- Reconnect the spark plug wire.
- Start the chainsaw. It might take a few pulls to prime the fuel system. Listen for any unusual sounds.
- Check for leaks. While the engine is running, inspect the fuel lines and carburetor area for any fuel leaks.
Stihl Carburetor Adjustment: Fine-Tuning Your Chainsaw
After cleaning, your Stihl chainsaw might need some Stihl carburetor adjustment. Most Stihl carburetors have adjustment screws, typically labeled ‘L’ (low speed) and ‘H’ (high speed), and sometimes a ‘T’ (idle speed) screw. These screws control the fuel-air mixture.
Important: Incorrect adjustment can lead to engine damage. If you are unsure, it’s best to consult your owner’s manual or a qualified technician.
General Adjustment Procedure (Consult your manual for specifics):
- Initial Setting: The common starting point for many carburetors is to turn the L and H screws in until they lightly seat, then back them out 1 to 1.5 turns. The idle screw (if present) is usually set to achieve a stable idle speed.
- Starting the Engine: Start the chainsaw and let it warm up.
- Idle Adjustment (T-screw): If the idle is too high or too low, adjust the T-screw (if applicable) to achieve a smooth idle without the chain spinning.
- Low-Speed Adjustment (L-screw): With the engine idling, slowly open the throttle. If the engine hesitates or bogs down, slightly turn the L-screw counter-clockwise (richer mixture). If it sputters or surges at low RPM, turn it clockwise (leaner mixture). Find the point where the engine accelerates smoothly.
- High-Speed Adjustment (H-screw): Once the low-speed is set, open the throttle fully. Listen to the engine. If it sounds like it’s “four-stroking” (surging or rough), turn the H-screw clockwise slightly (leaner mixture). If it sounds like it’s “lugging” or lacking power, turn the H-screw counter-clockwise slightly (richer mixture). The goal is a smooth, consistent high-speed run.
Tip: Make very small adjustments (1/8 to 1/4 turn at a time) and allow the engine to respond before making further adjustments.
When to Consider a Stihl Carburetor Rebuild
Sometimes, a simple cleaning isn’t enough. If you’ve cleaned the carburetor thoroughly and are still experiencing problems, or if you found damaged parts during disassembly, a Stihl carburetor rebuild might be necessary. This involves replacing all the internal wear parts, such as diaphragms, gaskets, and needles, using a Stihl carburetor kit.
A Stihl carburetor kit typically contains all the necessary rubber and small metal components to restore the carburetor to like-new condition. This is a more involved process than just cleaning and requires careful attention to detail.
Signs that a rebuild is needed:
- Cracked or hardened diaphragms and gaskets.
- Corroded or damaged internal metal parts.
- Persistent sputtering, bogging, or stalling even after cleaning.
- Difficulty maintaining a consistent idle.
Troubleshooting Common Stihl Chainsaw Fuel System Issues
Beyond carburetor cleaning, other Stihl chainsaw fuel system components can cause problems.
Fuel Filter:
- Location: Usually found inside the fuel tank, attached to the fuel line.
- Symptoms of a clogged filter: Similar to a dirty carburetor – loss of power, sputtering, difficulty starting.
- Solution: Replace the fuel filter. This is a simple and inexpensive maintenance task.
Fuel Lines:
- Issues: Cracks, kinks, or blockages can restrict fuel flow.
- Symptoms: Similar to a clogged fuel filter or carburetor.
- Solution: Inspect fuel lines for damage. Replace any that are cracked, kinked, or appear degraded.
Spark Arrestor Screen:
- Location: In the muffler.
- Issue: Carbon buildup can clog the screen, restricting exhaust flow.
- Symptoms: Loss of power, engine running rough, overheating.
- Solution: Remove and clean the spark arrestor screen.
Frequently Asked Questions (FAQ) about Stihl Chainsaw Carburetors
Q1: How often should I clean my Stihl chainsaw carburetor?
A1: It’s good practice to clean your carburetor at least once a year, or more frequently if you use your chainsaw heavily or if it sits for extended periods with fuel in it. Regular Stihl carburetor maintenance prevents issues.
Q2: What type of fuel should I use in my Stihl chainsaw?
A2: Always use fresh, high-octane gasoline mixed with the correct ratio of Stihl’s 2-stroke engine oil (usually 50:1). Stale fuel is a primary cause of carburetor problems.
Q3: Can I use a general-purpose cleaner on my Stihl chainsaw carburetor?
A3: It’s highly recommended to use a cleaner specifically designed for carburetors. General cleaners may damage rubber components like diaphragms and gaskets.
Q4: My Stihl chainsaw starts but then dies. What could be the problem?
A4: This is often a sign of a fuel delivery issue. Check the fuel filter, fuel lines for blockages, and ensure the carburetor bowl is filling correctly. A clogged carburetor is also a common cause.
Q5: Do I need to adjust the carburetor after cleaning it?
A5: It’s often necessary to perform minor Stihl carburetor adjustment after cleaning to ensure optimal performance. Follow the steps outlined in the article or your owner’s manual.
Q6: When is it better to replace the carburetor than to clean or rebuild it?
A6: If the carburetor body is cracked, severely corroded, or if the internal passages are permanently blocked, replacement might be the most cost-effective and reliable solution.
By following these steps, you can effectively clean and maintain your Stihl chainsaw carburetor, ensuring it runs smoothly and reliably for years to come. Regular Stihl carburetor maintenance is key to preventing common problems and keeping your chainsaw ready for action.