
Can you cut crown molding on a miter saw? Yes, absolutely! Cutting crown molding on a miter saw is a fundamental skill for anyone looking to add a professional touch to their home. This guide will walk you through the process, from setting up your saw to tackling those tricky corners.
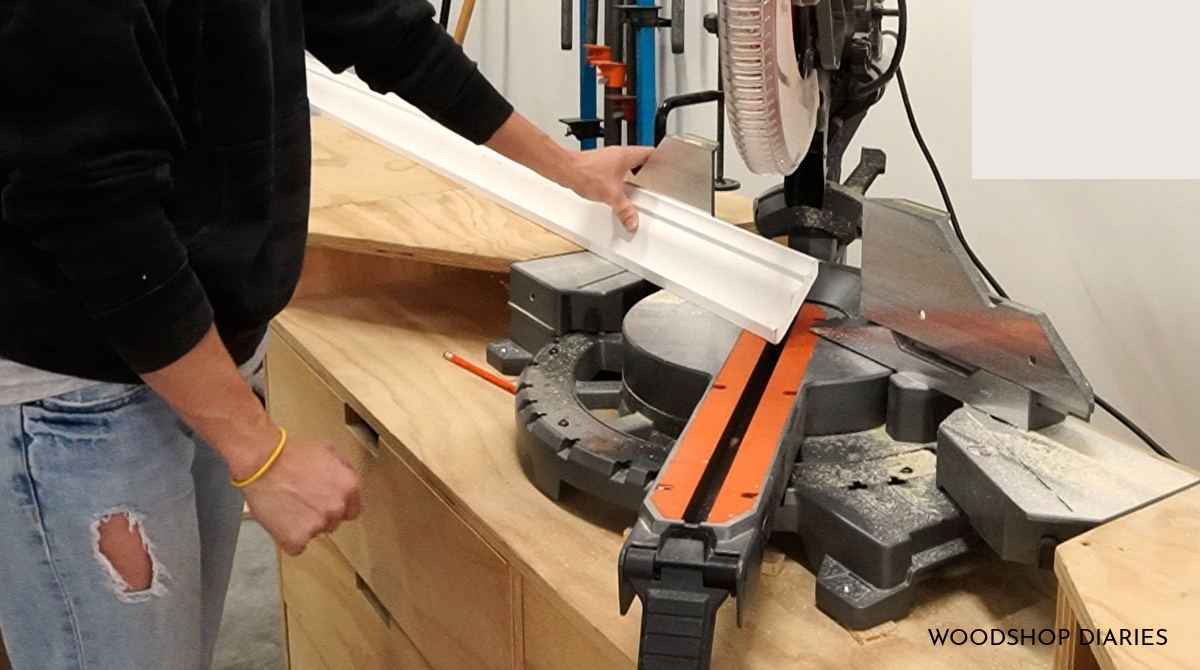
Image Source: www.woodshopdiaries.com
Preparing Your Miter Saw for Crown Molding
Getting your crown molding miter saw setup just right is the first step to success. A properly adjusted saw makes all the difference when you’re dealing with the unique angles of crown molding.
Understanding Your Miter Saw
Before you even think about cutting, familiarize yourself with your miter saw. Most DIYers will use a compound miter saw, which allows for both miter (horizontal) and bevel (vertical) adjustments. This dual capability is crucial for cutting crown molding accurately.
Essential Miter Saw Adjustments
- Miter Angle: This controls the left-to-right pivot of the blade. For standard corner cuts, you’ll often use 45-degree settings.
- Bevel Angle: This adjusts the tilt of the blade. For crown molding, the bevel angle is typically set to 31.6 degrees, but we’ll cover this in more detail later.
- Blade Height: Ensure the blade guard is functioning correctly and that the blade isn’t hitting any part of the saw base when not in use.
Safety First!
Always prioritize safety.
- Eye Protection: Wear safety glasses or a face shield.
- Hearing Protection: Miter saws are loud.
- Blade Guard: Never remove or bypass the blade guard.
- Clear Workspace: Keep your work area tidy and free of clutter.
- Secure Workpiece: Always clamp your molding securely before cutting.
Deciphering Crown Molding Angles
Crown molding is designed to fit snugly into the corner where a wall meets a ceiling. This creates a unique angle that requires specific cuts on your miter saw.
The Standard Crown Molding Angle
The most common angle for crown molding is 38 degrees for the face angle and 52 degrees for the angle against the wall. However, when cutting on a miter saw, we use different settings based on how the molding is positioned.
Why 31.6 Degrees?
You might be wondering why you often hear about a 31.6 degree crown molding cut. This is the magic number for cutting crown molding flat on the saw’s table using standard miter saw settings. This angle is derived from the 38-degree and 52-degree wall/ceiling angles.
Cutting Crown Molding: The Basics
Cutting crown molding on a miter saw can seem daunting, but once you grasp the core principles, it becomes manageable. The key is to position the molding correctly against the saw’s fence.
The Flat-On-The-Table Method
This is the most intuitive method for beginners.
- Positioning: Lay the crown molding flat on the saw’s table, with the back of the molding (the part that touches the wall and ceiling) pressed firmly against the saw’s fence.
- Miter Angle: For a typical 90-degree inside or outside corner, you will set your saw’s miter angle to 31.6 degrees.
- Bevel Angle: For this method, the bevel angle is set to 0 degrees (meaning the blade is perfectly vertical).
This method simulates how the molding will sit in the corner. The 31.6-degree miter cut on the saw creates the correct compound angle for the molding.
The Upside-Down and Backward Method
This method is favored by many experienced trim carpenters because it often results in a cleaner cut and requires less guesswork.
- Positioning: This is where it gets a bit counter-intuitive. You’ll place the crown molding upside down and backward on the saw. The top edge of the molding (which will eventually touch the ceiling) rests against the saw’s fence. The bottom edge (which will touch the wall) is elevated by the table.
- Miter Angle: Set your saw’s miter angle to 31.6 degrees.
- Bevel Angle: Crucially, you will set the bevel angle to 33.9 degrees. This is the complementary angle to the 31.6-degree miter when using this orientation.
Why this works: By flipping the molding, you’re essentially mimicking the orientation it will have in the corner but on a flat plane. The combination of the miter and bevel settings achieves the necessary compound angle.
Table: Comparing Cutting Methods
| Method | Molding Orientation | Miter Angle | Bevel Angle | Key Advantage | Potential Challenge |
|---|---|---|---|---|---|
| Flat-On-The-Table | Back against fence, flat on table | 31.6° | 0° | More intuitive, easier to visualize | May require more careful positioning to avoid slippage |
| Upside-Down and Backward | Top against fence, elevated on table | 31.6° | 33.9° | Often cleaner cuts, better support | Requires more practice to get used to orientation |
Cutting Crown Molding Corners: Inside and Outside
The most common reason for cutting crown molding is to join pieces at corners. This involves creating cutting crown molding corners that fit together perfectly.
Cutting Inside Corner Crown Molding
An inside corner is where two walls meet to form an inward-facing angle, like in a typical room corner.
Measuring for Inside Corners
Accurate crown molding measurement is paramount.
- Measure Wall Length: Measure the length of the wall where the molding will be installed.
- Measure Corner to Corner: For precise cuts, measure from the very tip of one piece of molding to the very tip of the next.
- Account for Waste: Always buy extra molding to account for mistakes and waste.
Making the Cut for Inside Corners
Let’s use the “flat-on-the-table” method for illustration:
- First Piece: Place the molding flat on the saw table with the back against the fence. Set the miter to 31.6 degrees. Make a cut. This is your “long point” cut.
- Second Piece: Flip the molding over (or use the other side if you’re cutting for the opposite corner). Place it flat against the fence. Set the miter to 31.6 degrees but in the opposite direction. Make the cut.
Important: When you fit these two pieces together, the back edges should meet at a 90-degree angle, and the front edges will form a slightly different angle due to the compound nature of the cut.
Tips for Inside Corners
- Test Fit: Always test fit your pieces before applying adhesive or nails.
- Slight Over-cut: Sometimes, cutting the molding slightly longer than measured and then trimming to fit can be easier than trying to hit the perfect length initially.
Cutting Outside Corner Crown Molding
An outside corner is where two walls meet to form an outward-facing angle, such as at the edge of a doorway or a projecting bay window.
Measuring for Outside Corners
The measurement process is similar to inside corners.
- Measure Wall Length: Measure the length of the wall section.
- Measure Tip to Tip: Measure from the tip of the molding on one side to the tip on the other.
- Consider Projection: For outside corners, the molding often projects slightly past the corner, so your measurements need to account for this.
Making the Cut for Outside Corners
Using the “flat-on-the-table” method:
- First Piece: Place the molding flat on the saw table, back against the fence. Set the miter to 31.6 degrees.
- Second Piece: Flip the molding over. Place it flat against the fence. Set the miter to 31.6 degrees in the same direction as the first cut.
Why this works: For an outside corner, the molding pieces will appear to be cut at the same angle relative to their orientation, but when placed in the corner, they create the outward-facing joint.
Tips for Outside Corners
- Check the Angle: Ensure your saw’s miter can be set accurately for these angles.
- Scribe and Cope (Advanced): For very precise outside corners or if the walls aren’t perfectly square, you might need to “scribe” the molding to fit. This involves cutting a piece with a slight bevel and then filing it to match the exact contour of the wall.
Advanced Cutting Techniques and Considerations
Once you’ve mastered the basics, you can refine your technique.
Cutting Different Crown Molding Angles
Not all rooms have perfect 90-degree corners. You might encounter 45-degree corners or other angles.
- 45 Degree Crown Molding Cut: For a 45-degree inside corner, you would typically set your miter saw to 22.5 degrees. For a 45-degree outside corner, you’d also use 22.5 degrees but in the opposite miter direction. The bevel angle remains the same (0 degrees for flat-on-table, 33.9 degrees for upside-down).
- General Rule: Divide the corner angle by two for the miter setting on your saw.
The 45 Degree Crown Molding Cut and Bevel
When dealing with non-standard angles or specific molding profiles, you might need to adjust both the miter and bevel settings. The 45 degree crown molding cut is a common variation.
The 90 Degree Crown Molding Cut: Standard Practice
As discussed, a 90 degree crown molding cut is the most common, requiring the 31.6-degree miter setting.
Using Crown Molding Stops
For repetitive cuts, using crown molding stops on your miter saw stand can ensure consistent lengths and reduce measurement errors.
When to Use a 45 Degree Cut vs. 31.6 Degree Cut
The 31.6-degree setting is specific to how crown molding’s angles interact with a standard miter saw’s fence. A 45 degree crown molding cut is a general miter saw setting that applies to, for instance, picture frames or baseboards that lie flat on the saw. For crown molding, when you need to replicate the angle of a 45-degree corner, you still often use the 31.6-degree miter setting on the saw, but you might need to adjust the bevel depending on the molding’s profile and how you position it.
Crown Molding Installation Tips
Cutting is only half the battle. Proper installation makes all your hard work pay off.
Securing the Molding
- Nail Gun: A pneumatic brad nailer or finish nailer is ideal for installing crown molding. Use 16-gauge or 18-gauge nails.
- Nail Placement: Nail into the studs where possible. If not, the adhesive will do most of the work.
- Adhesive: Use a good quality construction adhesive on the back of the molding before pressing it into place. This is especially important for the first piece installed and for longer runs.
Filling Nail Holes and Gaps
- Wood Filler: Use wood filler or caulk to fill nail holes and any small gaps between the molding and the wall or ceiling.
- Sanding: Lightly sand any filled areas once dry.
Caulking for a Seamless Finish
- Caulk Application: Apply a bead of paintable caulk along the top edge (where molding meets ceiling) and the bottom edge (where molding meets wall).
- Wipe Excess: Use a damp cloth or your finger to smooth the caulk for a clean, professional look.
Painting
- Prime First: Always prime crown molding before painting, especially if it’s raw wood or has been filled.
- Paint Color: Match your ceiling or wall color, or choose a contrasting color for a dramatic effect.
Troubleshooting Common Crown Molding Issues
Even with careful preparation, you might encounter challenges.
Fit Isn’t Perfect
- The “Coping” Technique: For tricky inside corners, especially if walls aren’t perfectly square, you can “cope” the molding. This involves cutting one piece with a straight miter, and then cutting the mating piece with a reverse miter and then carefully cutting away the wood with a coping saw to match the profile of the first piece. This allows for a tighter fit.
- Small Gaps: Small gaps can usually be fixed with caulk.
Cutting Errors
- Practice Pieces: Use scrap pieces of molding to practice your cuts before cutting into your good material.
- Miter Saw Calibration: Ensure your miter saw is cutting accurately at the set angles. Many saws have fine-tuning adjustments.
Frequently Asked Questions (FAQ)
What is the standard crown molding angle?
The standard angles that crown molding is designed to fit are approximately 38 degrees against the ceiling and 52 degrees against the wall. When cutting on a miter saw using the “flat-on-the-table” method, this translates to a 31.6-degree miter cut.
Can I use a regular miter saw for crown molding?
While a compound miter saw is highly recommended due to its ability to make bevel cuts, some simpler crown molding profiles can be cut with a standard miter saw if you use the “flat-on-the-table” method and achieve the correct compound angle through the miter setting alone. However, achieving accurate results for most crown molding will be significantly easier and more precise with a compound miter saw.
How do I measure for crown molding?
Measure the length of each wall segment where the molding will be installed. For corner cuts, measure from the furthest point of the cut on one piece to the furthest point on the next piece to ensure accurate length. Always add extra for waste and potential errors.
What is the best way to cut crown molding corners?
The “upside-down and backward” method on a compound miter saw is often preferred by professionals for its precision. However, the “flat-on-the-table” method is generally easier for beginners to visualize and execute. Both require accurate crown molding angles.
How do I handle a non-90-degree corner?
For corners that are not 90 degrees, you will need to adjust your miter saw’s angle. Divide the total corner angle by two to determine the miter setting. For example, for a 45-degree corner, you’ll set your miter saw to 22.5 degrees. The crown molding angles need to be adapted to the specific corner.
What are the essential crown molding installation tips?
Key crown molding installation tips include: securing the molding with construction adhesive and nails, filling nail holes and gaps with wood filler or caulk, and applying a final bead of caulk along the top and bottom edges for a seamless finish.
This comprehensive guide should equip you with the knowledge and confidence to tackle DIY crown molding with your miter saw. Happy cutting and installing!