
Can you cut laminate flooring without a saw? Yes, you absolutely can! While a saw is the most common tool for cutting laminate, several other methods can achieve clean, accurate cuts, making it possible to complete your flooring project without one. This guide will walk you through the easiest and most effective ways to cut laminate flooring when a saw isn’t an option.
Laying laminate flooring is a popular DIY project because it’s generally affordable and relatively easy to install. However, a common hurdle for beginners is cutting the planks to fit around obstacles, doorways, and walls. Many people immediately think they need a power saw, which can be intimidating or unavailable. Fortunately, you have several excellent alternatives to achieve precise cuts using simpler tools.
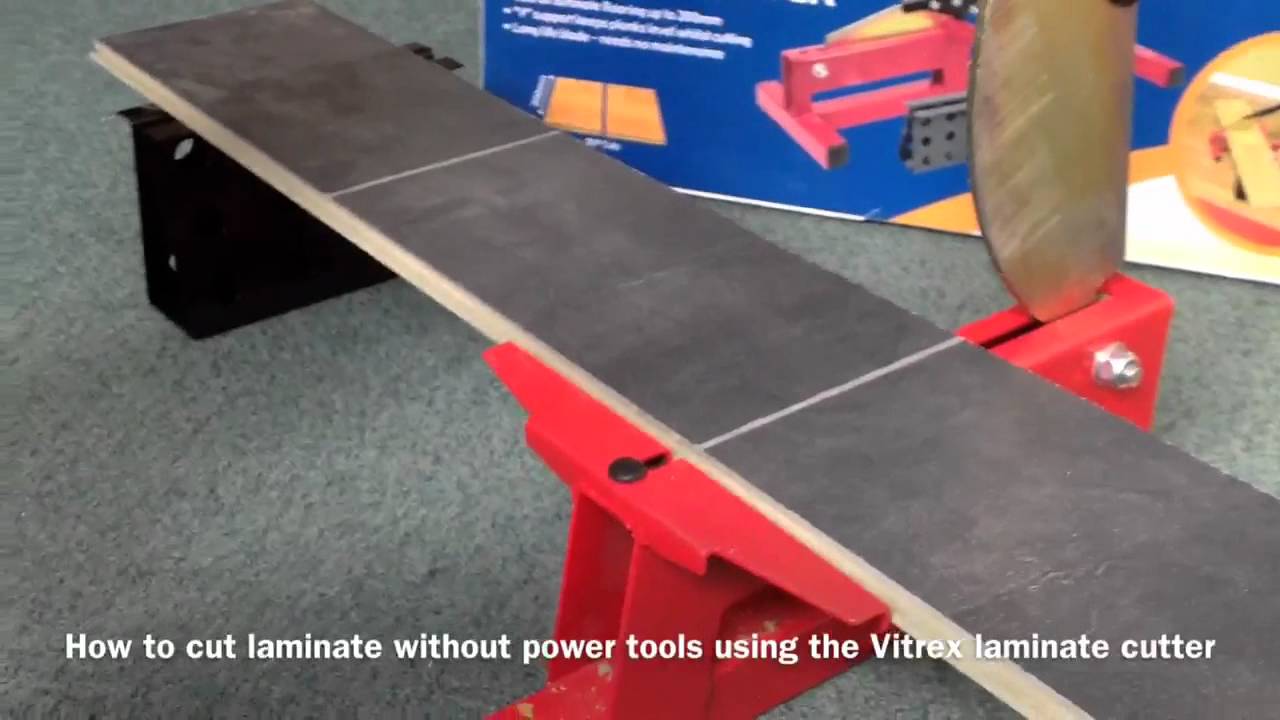
Image Source: i.ytimg.com
Why You Might Need to Cut Laminate Flooring
Before diving into the methods, let’s briefly touch on why cutting laminate is a necessary part of the installation process:
- Fitting Around Walls: Most rooms aren’t perfect rectangles. You’ll need to trim planks to fit snugly against walls, ensuring a clean finish.
- Doorways and Openings: Laminate planks must be cut to fit under door jambs and through archways for a seamless look.
- Obstacles: Pipes, vents, cabinets, and other built-in features require custom cuts to allow the flooring to flow around them.
- End of Rows: The final plank in each row will likely need to be cut lengthwise to fill the remaining space.
- Staircases: If you’re using laminate on stairs, complex cuts will be needed to fit the treads and risers.
Top Methods for Cutting Laminate Flooring Without a Saw
Let’s explore the most effective ways to cut laminate flooring when a saw is not your preferred tool. Each method has its advantages, and the best choice often depends on the type of cut you need and the tools you have on hand.
1. The Utility Knife and Scoring Method
This is perhaps the most accessible method, as it requires only a simple, inexpensive tool: a utility knife. It relies on the principle of scoring and snapping, similar to how you might cut glass.
What You’ll Need:
- A sharp utility knife or a carpet knife (which is essentially a heavy-duty utility knife).
- A sturdy straight edge or metal ruler.
- A pencil or marker.
- A sturdy surface to work on.
How to Do It:
- Measure and Mark: Place the laminate plank where you need to cut it. Measure the required length and mark a clear cutting line with your pencil or marker.
- Position the Straight Edge: Align your straight edge precisely along the marked cutting line. Clamp it down if possible to prevent it from shifting during the scoring process.
- Score the Surface: Using your utility knife, press down firmly and draw the blade along the marked line, following the straight edge. You want to score deeply into the laminate’s wear layer and the decorative paper.
- Repeat Scoring: This is crucial for a clean break. You will need to make multiple passes with the utility knife, increasing the pressure with each pass. Aim for at least 5-10 scores, depending on the thickness of the laminate. The goal is to cut through the top layers.
- Snap the Plank: Once you’ve scored the line thoroughly, position the scored line over the edge of a table or workbench. Apply firm, steady pressure downwards on the overhanging piece. The laminate should snap cleanly along the scored line. If it doesn’t snap cleanly, you likely need to score it more.
- Clean Up (Optional): For very fine edges, you can use sandpaper to smooth any rough spots.
Tips for Success:
- Sharp Blade: A dull blade will make scoring difficult and result in a ragged cut. Change the blade frequently.
- Deep Score: Don’t be afraid to apply pressure. The deeper the score, the cleaner the snap.
- Practice: Try this method on a scrap piece of laminate first to get a feel for the pressure and number of scores needed.
- Direction: For a cleaner break, score from the decorative side of the laminate.
2. Using a Laminate Cutter (Snap Cutter)
A laminate cutter, also known as a snap cutter, is a specialized tool designed specifically for cutting laminate flooring. It works on the same scoring and snapping principle as the utility knife but provides more leverage and a cleaner result for straight cuts.
What You’ll Need:
- A laminate cutter or snap cutter.
- A measuring tape.
- A pencil or marker.
How to Do It:
- Measure and Mark: Determine the length needed for your plank and mark the cutting line on the decorative surface.
- Position the Plank: Place the laminate plank into the laminate cutter, aligning the marked line with the cutter’s blade. Ensure the plank is seated securely.
- Engage the Cutter: Lower the handle of the laminate cutter to score the laminate. Most laminate cutters have a mechanism to score the surface deeply in one or two passes.
- Snap the Plank: Once scored, the cutter will have a lever or mechanism that you push down to snap the plank cleanly along the scored line. The base of the cutter often supports the plank for a controlled break.
- Cut Outouts (Optional): Some specialized laminate cutters or accessories can handle simple cutouts for pipes, but they are primarily designed for straight cuts.
Advantages of a Laminate Cutter:
- Cleaner Cuts: Generally produces cleaner, straighter cuts than a utility knife alone.
- Less Effort: Requires less physical effort than repeated scoring with a utility knife.
- Speed: Can be quicker for straight cuts once you get the hang of it.
Limitations:
- Straight Cuts Only: Most basic laminate cutters are designed only for straight cuts. They cannot handle intricate shapes or cutouts.
- Cost: They are more expensive than a utility knife.
- Weight: They can be heavy and bulky to store.
3. The Scoring Tool Method
Similar to the utility knife, a dedicated laminate scoring tool offers a more robust and ergonomic way to score the laminate. These tools often have a more substantial blade or multiple blades designed for a deeper, more consistent score.
What You’ll Need:
- A laminate scoring tool.
- A sturdy straight edge or metal ruler.
- A pencil or marker.
- A sturdy surface.
How to Do It:
- Measure and Mark: Mark your cutting line clearly on the laminate plank.
- Position Straight Edge: Securely align your straight edge along the marked line.
- Score with the Tool: Place the laminate scoring tool against the straight edge and apply firm pressure. Draw the tool along the line, scoring the laminate. Some tools might have a wheeled blade, while others have a fixed blade. Follow the tool’s instructions.
- Multiple Passes: As with the utility knife, make multiple passes to ensure a deep score through the wear layer and decorative paper.
- Snap the Plank: Once scored sufficiently, snap the laminate over an edge, similar to the utility knife method.
Advantages of a Scoring Tool:
- Better Grip: Often more comfortable to hold and control than a standard utility knife.
- Deeper Score: Can often achieve a deeper score with less effort.
- Consistency: Helps create a more consistent score line.
4. The Oscillating Tool (Rotary Tool)
While an oscillating tool isn’t a saw, it uses a rapidly vibrating blade or accessory to make cuts. It can be a viable option for cutting laminate, especially for more intricate shapes or when you need to make plunge cuts (cutting into the middle of a plank).
What You’ll Need:
- An oscillating tool.
- A wood or laminate cutting blade designed for oscillating tools.
- Safety glasses and hearing protection.
- A measuring tape and pencil.
- A dust mask.
How to Do It:
- Measure and Mark: Mark your cutting line clearly on the laminate plank. For intricate cuts, draw the entire shape.
- Secure the Plank: Ensure the laminate plank is stable and won’t move during cutting. You might need clamps.
- Select the Blade: Use a blade specifically designed for wood or laminate. A fine-tooth blade will generally give a cleaner finish.
- Make the Cut: Start the oscillating tool and carefully guide it along your marked line. Move slowly and steadily for the best results.
- Cut Outouts: The oscillating tool excels at cutting out shapes for pipes or irregular obstacles.
Advantages of an Oscillating Tool:
- Versatility: Can cut straight lines and intricate shapes.
- Plunge Cuts: Can start a cut in the middle of a plank without drilling a pilot hole.
- Good for Tight Spaces: Its compact head can maneuver in confined areas.
Considerations:
- Dust: Oscillating tools create a lot of dust, so wear a mask.
- Noise: They can be noisy, so hearing protection is advisable.
- Blade Wear: Blades can wear down, especially with harder laminates.
- Heat: The blade can get hot, potentially melting the laminate’s adhesive. Work in short bursts and let it cool.
5. Laminate Shears
Laminate shears are specialized clippers designed to cut through laminate flooring. They work like heavy-duty scissors but are built to handle the rigidity of laminate planks. They are particularly useful for cutting long, straight lines.
What You’ll Need:
- A pair of laminate shears.
- Measuring tape and pencil.
- A straight edge (optional, for guidance).
How to Do It:
- Measure and Mark: Mark the cutting line on the laminate plank.
- Position the Shears: Place the laminate plank in the shears, aligning the cutting blades with your mark. Ensure the plank is supported.
- Cut: Squeeze the handles firmly and steadily to cut through the laminate. You might need to use both hands for leverage.
- Long Cuts: For very long cuts, you may need to reposition the shears or use a straight edge to guide the cut.
Advantages of Laminate Shears:
- No Dust: Creates very little dust compared to saws or oscillating tools.
- Quiet: Operates silently.
- Clean Edges: Can produce very clean, straight edges.
- Portability: Compact and easy to carry.
Limitations:
- Limited Cut Types: Primarily for straight cuts. Not suitable for curves or intricate shapes.
- Plank Thickness: May struggle with thicker or very dense laminate planks.
- Leverage: Requires significant hand strength for thicker materials.
Preparing for Your Cuts
Regardless of the method you choose, proper preparation ensures a smoother and more accurate cutting process.
Accurate Measurements are Key
- Measure Twice, Cut Once: This old adage is especially true for flooring. Double-check all your measurements before making any cuts.
- Account for Expansion Gaps: Laminate flooring needs an expansion gap around the perimeter of the room to allow for natural expansion and contraction due to temperature and humidity changes. Typically, this gap is around 1/4 inch to 1/2 inch. Use spacers to maintain this gap. You’ll often need to trim your planks to fit the final row, taking this gap into account.
- Template for Irregular Shapes: For complex cuts around obstacles like pipes or cabinets, create a cardboard template first. Trace the shape onto the laminate plank, and then make your cut based on the template.
Setting Up Your Workspace
- Stable Surface: Ensure you have a flat, stable surface to work on. This could be sawhorses, a sturdy table, or even the floor itself, depending on the method.
- Good Lighting: Proper lighting will help you see your marks clearly and make precise cuts.
- Safety First: Always wear safety glasses, especially when using tools that create dust or debris. If using power tools, wear hearing protection and a dust mask.
Comparing the Methods
Here’s a quick comparison to help you decide which method is best for your needs:
| Method | Best For | Pros | Cons |
|---|---|---|---|
| Utility Knife | Small cuts, tight spaces, simple jobs. | Inexpensive, widely available, good for small adjustments. | Time-consuming for many cuts, requires practice for clean breaks, can be messy. |
| Laminate Cutter | Straight cuts across planks. | Clean cuts, less effort, faster than utility knife for straight lines. | Limited to straight cuts, more expensive, bulky. |
| Scoring Tool | Straight cuts, better grip than utility knife. | Better control, potentially deeper scores, more comfortable. | Still relies on snapping, may require multiple passes. |
| Oscillating Tool | Intricate shapes, cutouts, plunge cuts. | Versatile, good for complex jobs, can reach tight spots. | Noisy, dusty, requires practice, blades can wear. |
| Laminate Shears | Long, straight cuts on thinner laminate. | Dust-free, quiet, clean edges, portable. | Limited to straight cuts, requires strength, not for thick laminate. |
Frequently Asked Questions (FAQ)
What is the easiest way to cut laminate flooring without a saw?
The easiest method, especially for beginners, is often the utility knife and scoring tool method due to the low cost of tools and the simple scoring and snapping technique. A laminate cutter is also very easy to use for straight cuts if you invest in one.
Can I cut laminate flooring with just scissors?
No, standard household scissors are not strong enough to cut laminate flooring. You would need specialized laminate shears for a scissor-like action.
Will a utility knife cut laminate flooring?
Yes, a sharp utility knife can cut laminate flooring, but it requires multiple scoring passes and firm pressure to snap.
What if my laminate flooring is too thick for a utility knife?
If your laminate is particularly thick or dense, a laminate cutter, oscillating tool, or laminate shears might be more effective than a standard utility knife. You might also consider if a specialized saw is truly avoidable for very thick materials.
How do I make a clean cut on laminate flooring?
Making a clean cut involves using a sharp blade (whether a utility knife, scoring tool, laminate cutter, or oscillating tool blade), scoring deeply and repeatedly along a straight edge, and then snapping the material firmly and evenly. For intricate cuts with an oscillating tool, a steady hand and the right blade are key.
Can I cut laminate flooring with a utility knife for an entire floor installation?
While possible, cutting an entire floor with only a utility knife can be very time-consuming and physically demanding, especially for straight cuts. If you have many straight cuts to make, a laminate cutter or laminate shears would be a more efficient alternative.
Conclusion
Cutting laminate flooring without a saw is entirely achievable with the right approach and tools. Whether you opt for the accessible utility knife and scoring tool method, the specialized laminate cutter, the versatile oscillating tool, or the efficient laminate shears, you can achieve professional-looking results. Remember to prioritize accurate measurements, prepare your workspace, and always put safety first. With a little patience and the techniques outlined in this guide, you’ll be well on your way to completing your laminate flooring project with ease.