
Yes, you can easily cut tile with a wet saw if you follow some basic steps. A wet saw is a powerful tool that makes cutting tile much simpler and cleaner for DIY projects. This guide will walk you through everything you need to know, from choosing the right saw to making precise cuts.
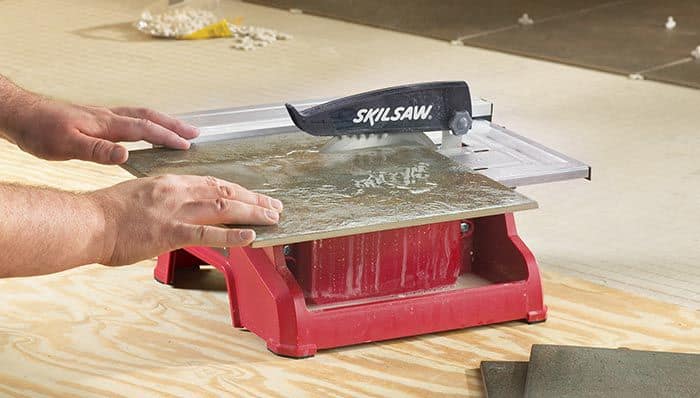
Image Source: mobileimages.lowes.com
Getting Started with Your Wet Saw
Using a wet tile saw can seem intimidating, but with the right knowledge, it’s a straightforward process. These saws use a water reservoir and a diamond blade to cool the blade and the tile as you cut. This not only makes for cleaner cuts but also significantly reduces dust, making your work environment much safer and more pleasant. Whether you’re cutting ceramic tile or cutting porcelain tile, the principles are largely the same.
What You’ll Need
Before you start, gather all your tools and materials. Having everything ready will ensure a smooth and efficient workflow.
- Wet Tile Saw: The core of your operation. Different types exist, but for most DIY jobs, a portable or benchtop tile saw will suffice.
- Diamond Blade: Ensure the blade is suitable for the type of tile you are cutting (e.g., ceramic, porcelain, glass).
- Water: For the saw’s reservoir. Tap water is usually fine.
- Safety Glasses or Goggles: Absolutely essential for protecting your eyes from flying debris and water spray.
- Ear Protection: While not as loud as a dry saw, the motor can still be noisy.
- Gloves: Protect your hands from water and sharp edges.
- Measuring Tape: For accurate measurements of your tiles.
- Pencil or Marker: To mark your cutting lines.
- Straight Edge or Tile Square: To ensure straight and consistent cuts.
- Dustpan and Brush: For cleaning up any small debris.
- Bucket: To hold excess water or for cleaning your blade.
- Rags or Towels: For wiping down the saw and your workspace.
Choosing the Right Wet Tile Saw
There are several types of wet saws available, each suited for different needs:
- Tabletop Wet Saws: These are common for DIYers. They are relatively compact and sit on a workbench. They are great for smaller to medium-sized projects.
- Slab Saws: Larger and more powerful, these are designed for cutting thicker materials or larger slabs. They are usually overkill for standard tile jobs.
- Slab Grinders: These combine cutting and grinding capabilities. They are useful for intricate cuts but might be more than a beginner needs.
When selecting a wet tile saw, consider the size of the tiles you’ll be cutting and the complexity of the cuts. For most home renovations, a good quality tabletop tile saw with a decent motor (around 1/2 HP to 3/4 HP) will be more than adequate.
Mastering Tile Cutting Techniques
Tile cutting techniques can vary depending on the shape and size of the tile you need. The wet saw excels at straight cuts, but with a bit of practice, you can achieve more complex shapes too.
Preparing Your Tile and Saw
Before you make any cuts, proper preparation is key.
- Read Your Saw’s Manual: Every wet tile saw is a little different. Familiarize yourself with its specific features, operation, and maintenance.
- Set Up Your Saw: Place the saw on a stable, level surface. Ensure it’s plugged into a GFCI-protected outlet for wet saw safety.
- Fill the Water Reservoir: Add water to the reservoir according to your saw’s instructions. The water should be enough to submerge the pump’s intake.
- Install the Diamond Blade: Ensure the diamond blade is correctly seated and tightened. Blades typically have directional arrows, so make sure it’s installed to spin in the correct direction for cutting.
- Test the Water Flow: Turn on the saw briefly to ensure the water pump is working and water is flowing over the blade. This is crucial for cooling and dust control.
Making a Straight Cut
This is the most common type of cut you’ll make.
- Measure and Mark: Carefully measure the tile and mark your cutting line with a pencil or marker. Use a straight edge to ensure a clear, straight line.
- Position the Tile: Place the tile on the saw’s table, ensuring it’s flat and stable. Align your marked cutting line with the diamond blade.
- Feed the Tile Slowly: Gently and steadily push the tile into the spinning blade. Don’t force it. Let the blade do the work. The water spray should keep the blade cool and the tile lubricated.
- Guide, Don’t Push: Use the saw’s guide or your own steady hand to guide the tile through the blade. Maintain a consistent speed.
- Complete the Cut: Continue feeding the tile until it passes completely through the blade.
- Remove the Cut Piece: Once the blade has stopped spinning, carefully remove the cut tile.
Cutting Ceramic Tile vs. Porcelain Tile
While the process is similar, there are some nuances when cutting ceramic tile versus cutting porcelain tile.
- Ceramic Tile: Generally softer and easier to cut than porcelain. It produces less dust and is less likely to chip.
- Porcelain Tile: Denser and harder. It requires a more powerful saw and a good quality diamond blade. You might need to cut porcelain tile more slowly to avoid overheating the blade or the tile, which can lead to chipping. A continuous rim diamond blade is often best for porcelain as it provides a cleaner cut with less chipping.
Making Other Types of Cuts
Beyond straight cuts, wet saws can handle:
Rip Cuts (Longitudinal Cuts)
These are cuts made parallel to the length of the tile. You’ll often use a rip fence or guide to keep the tile moving in a straight line.
- Measure and Mark: Mark your line along the length of the tile.
- Set Up the Guide: Use your saw’s rip fence or a sturdy straight edge secured to the saw’s table to guide the tile.
- Feed and Cut: Feed the tile smoothly along the guide, maintaining contact with the blade.
Angle Cuts (Bevel Cuts)
Many wet saws have adjustable cutting tables that allow for angled cuts, often used for decorative edges or corners.
- Adjust the Table Angle: Loosen the table’s adjustment mechanism and set it to your desired angle (e.g., 45 degrees).
- Secure the Angle: Tighten the adjustment mechanism firmly to prevent movement during the cut.
- Mark and Cut: Mark your tile and feed it through the blade at the set angle. Be extra careful as angled cuts can be trickier to keep stable.
Curved or Shape Cuts (Using a Wet Saw)
While not as precise as a wet grinder or tile nippers for intricate shapes, you can achieve some basic curves with a wet saw.
- Mark the Curve: Draw your desired curve on the tile.
- Make Multiple Straight Cuts: Instead of trying to follow the curve directly, make a series of straight cuts from the edge of the tile towards your marked curve.
- Nibble Away Material: Carefully feed the tile into the blade, cutting off small sections of waste material along the curve. This is a slow process and requires patience.
- Refine with Nippers or Grinder: After making the basic shape, you can often refine the edges using tile nippers or a rubbing stone.
Wet Saw Safety: Paramount to Your Success
Wet saw safety cannot be overstated. These tools can be dangerous if not used correctly. Adhering to safety protocols will prevent injuries and ensure a positive DIY experience.
Essential Safety Practices
- Wear Personal Protective Equipment (PPE): Always wear safety glasses or goggles, gloves, and consider ear protection.
- GFCI Protection: Always plug your wet tile saw into a GFCI (Ground Fault Circuit Interrupter) protected outlet. Water and electricity are a dangerous mix, and a GFCI will shut off power immediately if it detects a ground fault.
- Keep the Area Clean and Dry: Ensure the area around the saw is free of clutter, especially water spills on the floor.
- Never Reach Over the Blade: Do not reach over or near the spinning blade. Wait until the blade has completely stopped before removing cut tiles or adjusting anything.
- Proper Ventilation: While wet saws significantly reduce dust, some mist and water spray will occur. Ensure good ventilation in your workspace.
- Do Not Force the Tile: Let the blade cut at its own pace. Forcing the tile can cause it to bind, shatter, or kick back.
- Keep Hands Away from the Blade: Always maintain a safe distance between your hands and the spinning diamond blade. Use the saw’s provided push stick or guide if available.
- Secure the Saw: Ensure the saw is stable and won’t move during operation.
- Read and Follow Instructions: Always refer to your specific tile saw manual for detailed safety instructions.
Wet Saw Safety Checklist
- [ ] GFCI outlet used?
- [ ] Safety glasses/goggles worn?
- [ ] Gloves worn?
- [ ] Workspace clear and dry?
- [ ] Blade spinning correctly?
- [ ] Water reservoir filled?
- [ ] No reaching over the blade?
- [ ] Tile being fed smoothly?
Tile Saw Maintenance for Longevity
Proper tile saw maintenance will ensure your wet tile saw functions effectively and safely for years to come. Regular cleaning and care are essential.
Cleaning Your Wet Tile Saw
After each use, it’s important to clean your saw.
- Unplug the Saw: Always disconnect the power before cleaning.
- Drain the Water Reservoir: Carefully drain the water reservoir. You can reuse the water for other cleaning tasks if it’s not too dirty, or dispose of it responsibly.
- Clean the Reservoir: Remove any sediment, tile dust, or debris from the reservoir. A shop vacuum can be helpful here.
- Wipe Down the Saw: Clean the saw’s body, table, and any moving parts with a damp cloth. A mild detergent can be used for tougher grime, but rinse thoroughly.
- Clean the Blade: You can clean the diamond blade with a stiff brush and water. For particularly stubborn residue, you can use a blade cleaner specifically designed for diamond blades, or run the blade through a block of pumice stone (though this is more for “dressing” the blade).
Blade Care
Your diamond blade is the most critical component.
- Check for Wear: Inspect the blade for excessive wear on the diamond grit. If the cutting surface looks worn down, it’s time for a new blade.
- Keep it Clean: As mentioned, cleaning the blade after use helps prevent build-up.
- Proper Storage: Store blades properly when not in use.
General Maintenance Checks
- Check for Loose Parts: Periodically inspect all nuts, bolts, and screws to ensure they are tight.
- Lubricate Moving Parts: Some saws may have specific lubrication points. Consult your manual.
- Inspect the Power Cord: Ensure the power cord is not damaged.
Tile Cutting Tips for a Professional Finish
Even with the right tools, a few extra tile cutting tips can elevate your work from amateur to professional.
- Practice Makes Perfect: If you’re new to using a wet saw, practice on scrap tiles before cutting your project tiles.
- Mark Your Cut on the “Good” Side: Always mark your cutting line on the side of the tile that will be most visible once installed.
- Consider Blade Overhang: For straight cuts, you can align your mark so that the blade cuts slightly into the waste side of your line, ensuring the visible edge is perfectly straight.
- Control Water Flow: Ensure the water pump is delivering adequate water to the blade. If you see excessive steam or hear a grinding noise, the blade is likely too dry.
- Use a Sighting Groove: Some saws have a groove or indicator on the housing that aligns with the blade. Use this to help guide your tile.
- Clean Up Splatter: Keep rags handy to wipe up water splatter as you work.
- Score First for Porcelain: For very hard porcelain, some professionals recommend scoring the cut line first with a carbide scribe, though this is often debated and may not be necessary with a good quality blade and saw.
- Don’t Waste Small Pieces: Smaller tile cuts can often be used for tricky spots or in mosaic patterns.
Can I Cut Tile with a Regular Saw?
No, you should not attempt to cut tile with a regular saw (like a circular saw or jigsaw) unless it’s specifically designed for tile and equipped with a diamond blade. Standard blades are not made for the hardness of tile and will be destroyed. Moreover, cutting tile dry generates excessive dust, which is harmful to inhale and creates a messy work environment. A wet tile saw is the appropriate tool for the job.
What Kind of Blade is Best for Cutting Tile?
The best blade for cutting tile is a diamond blade. These blades are made with industrial diamonds bonded to the cutting edge. The type of diamond blade depends on the material:
- Continuous Rim Blade: Ideal for smooth, clean cuts on delicate materials like glass, porcelain, and ceramic. They produce less chipping.
- Turbo Rim Blade: Has a wavy or segmented edge that provides faster cutting and better cooling. Good for general-purpose cutting of ceramic and some porcelain.
- Segmented Blade: Features gaps or segments along the edge. It’s best for rougher cuts and harder materials like stone or thick porcelain where speed and cooling are priorities, but it may result in more chipping.
For most DIYers, especially when cutting ceramic tile and general cutting porcelain tile, a continuous rim or a good quality turbo rim blade will offer the best balance of speed and finish.
Frequently Asked Questions (FAQ)
How do I prevent chipping when cutting tile with a wet saw?
Chipping can be minimized by using a high-quality diamond blade appropriate for your tile type (continuous rim blades are excellent for preventing chipping), ensuring the blade is adequately cooled by water, feeding the tile slowly and steadily, and not forcing the tile through the blade. For very hard porcelain, ensure your saw has sufficient power.
How often should I change the water in my wet saw?
The water should be changed whenever it becomes noticeably dirty or cloudy. This is important for maintaining blade cooling and visibility of your cutting line. For heavy use, you might need to change it every hour or two. For lighter projects, you may get through a day’s work before needing a change.
Can I cut stone or marble with a wet tile saw?
Yes, you can cut most natural stones and marble with a wet saw, but you’ll need a blade specifically designed for stone, usually a segmented diamond blade that offers better cooling and durability for harder materials. Always check the saw and blade manufacturer’s recommendations for compatibility.
My saw seems to be struggling. What could be wrong?
If your tile saw is struggling, check a few things:
1. Is the blade dull or worn out?
2. Is the motor overheating? Ensure adequate water flow and don’t push the tile too hard.
3. Is there enough water in the reservoir?
4. Is the blade installed correctly?
5. Is the saw powerful enough for the material you’re cutting (especially with dense porcelain)?
How can I make very precise cuts or small cutouts?
For very precise cuts or small, intricate cutouts (like for electrical outlets), a standard wet saw might not be ideal. You might need a specialized tile nipper or a handheld wet polisher with a diamond grinding wheel for refining cuts. Some larger, more expensive tile saws have features that allow for more intricate work, but for most DIYers, it’s about making straight cuts and then refining with other tools if necessary.
Conclusion
Using a wet tile saw is an essential skill for anyone undertaking a tiling project. By familiarizing yourself with the tool, practicing good tile cutting techniques, prioritizing wet saw safety, and performing regular tile saw maintenance, you can achieve professional-looking results with confidence. From cutting ceramic tile to the more challenging task of cutting porcelain tile, this guide provides the foundation you need to make those cuts easily and accurately. Happy tiling!