
Can you make straight cuts with a skill saw? Yes, absolutely! With the right technique, proper setup, and attention to safety, you can achieve remarkably straight cuts with your skill saw. This guide will walk you through everything you need to know to master this essential woodworking skill.
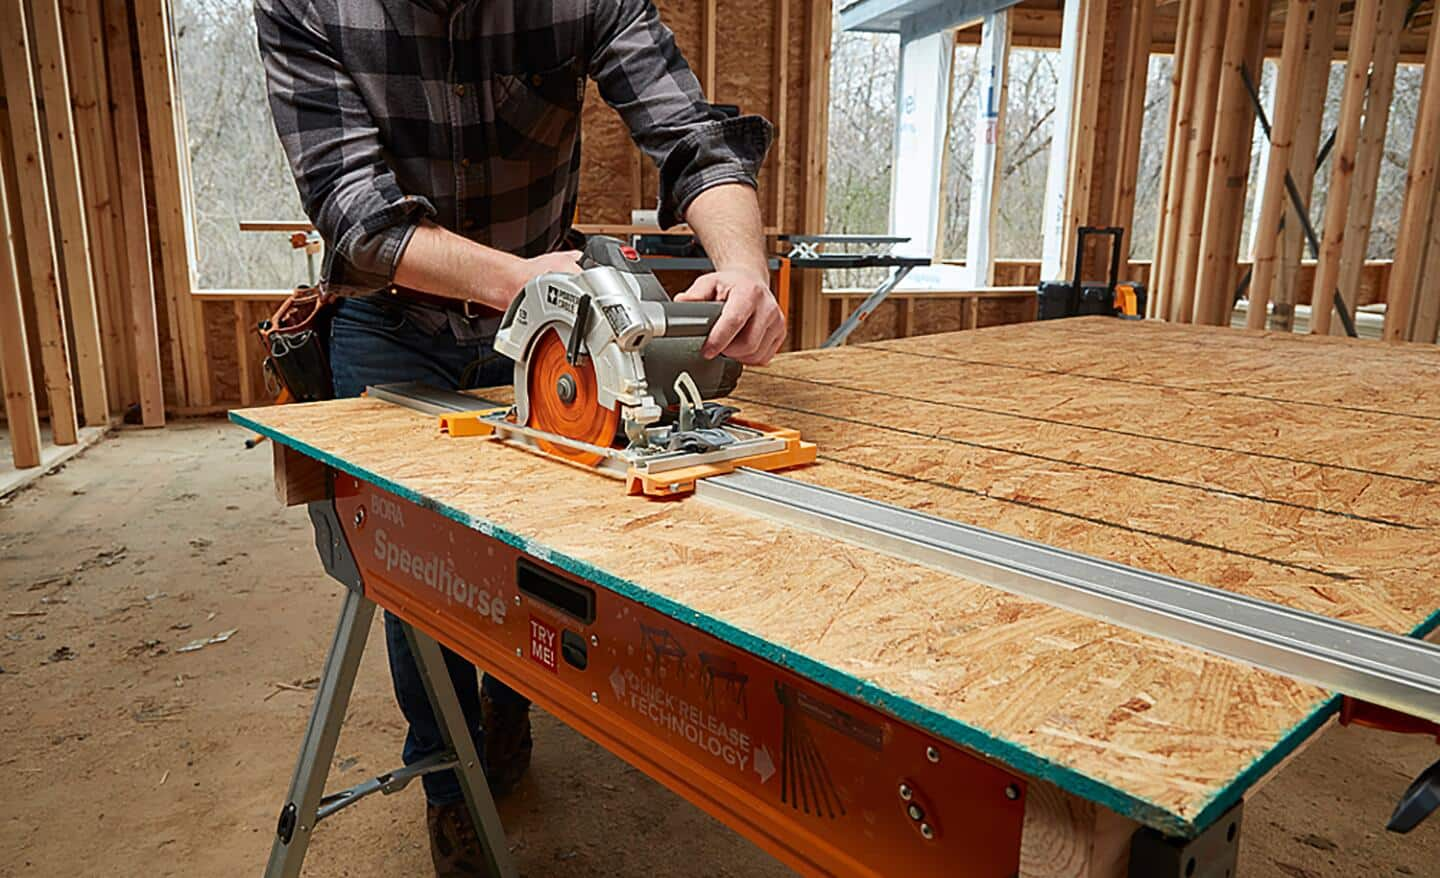
Image Source: dam.thdstatic.com
Mastering the Circular Saw for Precision Wood Cutting
The circular saw, often called a skill saw by DIY enthusiasts, is a powerful and versatile tool for wood cutting. It’s an indispensable piece of equipment for any home workshop or construction site. However, its power also means that safety and precision are paramount. This guide will equip you with the knowledge to use your circular saw effectively and safely, turning what might seem like a daunting task into a manageable and rewarding one.
Safety First: Essential Precautions for Skill Saw Operation
Before you even think about making a cut, prioritizing safety precautions is non-negotiable. A moment of carelessness with a circular saw can lead to serious injury. Familiarize yourself with these fundamental safety rules:
- Read Your Owner’s Manual: Every circular saw is slightly different. Your manual is the best resource for specific operating instructions and safety guidelines for your particular model.
- Wear Appropriate Safety Gear:
- Safety Glasses: This is the most crucial piece of safety gear. Always wear them to protect your eyes from flying sawdust and debris.
- Hearing Protection: Circular saws are loud. Earplugs or earmuffs will prevent long-term hearing damage.
- Dust Mask: Sawdust can irritate your lungs. A quality dust mask will filter out fine particles.
- Gloves: While some prefer not to wear gloves for better grip, others find they offer protection from splinters. If you wear gloves, ensure they fit snugly and won’t catch on the blade.
- Appropriate Clothing: Avoid loose clothing, dangling jewelry, or anything that could get caught in the spinning blade. Wear sturdy, closed-toe shoes.
- Inspect Your Saw: Before each use, check the power cord for damage, ensure the blade guard operates smoothly, and verify that the blade is securely attached and sharp.
- Secure Your Workpiece: Always clamp down your wood. Never try to hold the wood with one hand while operating the saw with the other. This is a recipe for disaster. Use clamps or a vise to keep the material from moving during the cut.
- Maintain a Stable Stance: Stand in a balanced position with your feet shoulder-width apart. Avoid overreaching. Move yourself to the material rather than the material to you.
- Keep the Blade Guard Functioning: The retractable blade guard is a critical safety feature. Never disable or tape it up. Ensure it springs back into place after each pass.
- Be Aware of the Kickback Zone: Kickback occurs when the blade binds in the wood, causing the saw to violently jump back towards the operator. Avoid pinching the blade, especially when cutting large or warped pieces. Keep the cord and your body out of the path of the kickback zone.
- Unplug When Changing Blades or Making Adjustments: Always disconnect the power before performing any maintenance or adjustments to your saw.
- Don’t Force the Saw: Let the saw do the work. Pushing too hard can bind the blade and increase the risk of kickback.
Choosing the Right Blade: The Key to Clean and Efficient Wood Cutting
The blade selection for your circular saw is as important as the saw itself. Different blades are designed for different types of cuts and materials, impacting the speed, cleanliness, and ease of your wood cutting.
Blade Tooth Count and Type
- High Tooth Count (e.g., 40-60 teeth): These blades are ideal for making smooth, clean cuts, often referred to as finish cuts or crosscuts on thinner materials like plywood or hardwoods. They produce less tear-out and a finer finish.
- Low Tooth Count (e.g., 24 teeth): These blades are designed for faster, rougher cuts. They are excellent for ripping lumber (cutting along the grain) or cutting thicker, softer woods where speed is more important than a perfectly smooth finish.
- Combination Blades: These offer a balance, typically with 40-50 teeth, suitable for both ripping and crosscutting. They are a good all-around choice for general-purpose woodworking.
- Carbide-Tipped Blades: These are far more durable and stay sharp longer than standard steel blades. They are worth the investment for frequent use.
Blade Material and Design
- Carbide-Tipped: As mentioned, these are superior for longevity and sharpness.
- Thin Kerf Blades: These blades remove less material with each cut, requiring less power from your saw and producing less dust. They are particularly beneficial for cordless saws.
- Anti-Vibration Slots: Some higher-quality blades have slots that reduce vibration, leading to smoother cuts and a quieter operation.
Table 1: Common Circular Saw Blade Applications
| Tooth Count | Blade Type | Best For | Cut Quality |
|---|---|---|---|
| 24-36 | Ripping Blade | Fast rip cuts in softwoods, framing lumber | Rougher |
| 40-50 | Combination Blade | General purpose, rip and crosscuts | Moderate |
| 50-60+ | Crosscut Blade | Clean crosscuts in hardwoods, plywood | Smoother, less tear-out |
| Specific | Specialty Blades | Laminates, metal, masonry (ensure compatibility) | Varies |
Important Note: Always ensure the blade you choose is the correct diameter for your circular saw and that it’s installed with the teeth facing the correct direction (usually indicated by an arrow on the blade and the saw base).
Setting Up for Straight Cuts: Guides and Techniques
Achieving making straight cuts is the primary goal for many users of the skill saw. While freehanding can work for rough cuts, precision requires some form of guidance.
Adjusting the Cutting Depth
Before any cut, you need to set the cutting depth. The goal is to set the blade depth so that it extends just slightly below the material you are cutting, typically about one-quarter inch (6mm) deeper than the material’s thickness.
- Why is this important?
- Safety: Setting the depth correctly exposes less blade, reducing the risk of accidental contact and the severity of kickback if it occurs.
- Cut Quality: A shallower blade setting can reduce tear-out on the underside of the material, especially with plywood. It also allows the blade guard to function more effectively.
- Efficiency: While you don’t want excessive blade exposed, a blade that’s too shallow may not cut through the material completely, leaving a tab that needs to be broken off.
How to Set Cutting Depth:
- Unplug the saw.
- Place the saw on the edge of your workpiece (or a scrap piece of the same thickness).
- Loosen the depth adjustment lever or knob on your saw.
- Lower the saw’s base plate until the blade teeth extend about 1/4 inch (6mm) below the material.
- Tighten the adjustment lever or knob securely.
Using a Guide Rail or Straight Edge
This is the secret weapon for making straight cuts consistently. Relying solely on your eye is rarely accurate enough for anything beyond basic rough cuts.
-
Using the Saw’s Rip Fence: Most circular saws come with a rip fence, a metal guide that attaches to the base plate. You set this fence a specific distance from the blade to guide the saw along the edge of your material. This is best for cuts parallel to an existing straight edge.
- Pros: Simple, often included with the saw.
- Cons: Limited to cuts parallel to an edge; can be difficult to get perfectly parallel over longer distances.
-
Using a Clamp-On Guide Rail or Straight Edge: This is the most accurate method for achieving perfectly straight cuts, especially long ones or when you don’t have a perfectly straight edge to follow.
- What to use:
- Commercial Guide Rails: Systems like Festool, Makita, or Kreg offer dedicated guide rails that clamp securely to your workpiece and have a track that the saw base slides along. These are the most precise but also the most expensive.
- DIY Straight Edge: A long, flat piece of material like a metal level, a straight piece of hardwood, or a factory-edge plywood sheet can be used.
- How to set it up:
- Measure the offset: You need to know the distance from the edge of your saw’s base plate to the cutting edge of the blade. This offset varies by saw model. Measure it carefully!
- Mark your cut line: Draw a clear line on your workpiece where you want to cut.
- Position the guide: Place your straight edge or guide rail on the workpiece. Align the edge of the straight edge with your cut line, plus the offset measurement. For example, if your offset is 3 inches and your cut line is at 10 inches, the edge of your guide rail should be at the 7-inch mark (10 inches – 3 inches).
- Clamp securely: Clamp the guide rail or straight edge firmly in place at multiple points to prevent any movement during the cut. Ensure the clamps are not in the path of the saw blade or its guard.
- What to use:
Using the Base Plate Guide Marks
Most circular saw base plates have markings indicating different distances from the blade. These can be helpful for quick, approximate cuts if you’re not using a dedicated guide, but they are generally less accurate than a guide rail.
Executing Different Types of Cuts with Your Skill Saw
Once you’ve mastered the safety basics and learned how to set up for accuracy, you can tackle various types of cuts.
Making Crosscuts
A crosscut is a cut made perpendicular to the grain of the wood. This is one of the most common types of cuts.
- Mark your cut line: Ensure the line is clear and visible.
- Set up your guide: Use a clamp-on straight edge or guide rail for accuracy. Position it so the blade will follow your mark precisely.
- Position the saw: Place the circular saw onto the workpiece with the blade just before the start of the cut line. Ensure the base plate is flat on the wood and the guide is engaged.
- Start the saw: Squeeze the trigger and allow the blade to reach full speed before it touches the wood.
- Make the cut: Push the saw forward smoothly and steadily through the material. Let the saw’s weight do the work; don’t force it. Keep the base plate flat against the material and follow the guide.
- Complete the cut: Continue pushing until the blade has passed completely through the wood.
- Release the trigger: Allow the blade to stop spinning before lifting the saw off the workpiece. Ensure the blade guard returns to its covering position.
Performing Rip Cuts
A rip cut is made parallel to the grain of the wood. This is often used to reduce the width of a board.
- Measure and mark: Clearly mark your rip line.
- Use the rip fence or guide rail:
- Rip Fence: If you’re cutting a board parallel to a factory edge, the rip fence is the simplest option. Adjust it to the desired width from the factory edge.
- Guide Rail: For more accuracy or if you don’t have a straight factory edge, clamp a guide rail parallel to your marked rip line. You’ll need to account for the saw’s offset from the guide.
- Ensure support: Make sure the offcut piece is supported, especially if it’s long. It should not sag or bind the blade.
- Start the saw: Allow the blade to reach full speed.
- Make the cut: Smoothly push the saw along the fence or guide. Maintain consistent pressure and keep the base plate flat.
- Finish the cut: Allow the blade to clear the wood before releasing the trigger.
Creating Bevel Cuts
A bevel cut is an angled cut across the material, often used for joining pieces at an angle or for decorative purposes. Most circular saws allow you to tilt the base plate to achieve bevels.
- Identify the bevel angle: Determine the angle you need. Common bevels include 45 degrees.
- Adjust the base plate:
- Locate the bevel adjustment lever or knob on your saw.
- Loosen it.
- Tilt the base plate to the desired angle using the built-in degree markings. You may need a protractor or angle finder for precise angles.
- Tighten the adjustment securely.
- Set the cutting depth: Ensure the blade depth is correctly set for the material thickness at the new angle. The longest point of the blade from the base plate should be about 1/4 inch past the material.
- Use a guide: Just as with straight cuts, a guide rail or a securely clamped straight edge is essential for accuracy, especially on angled cuts.
- Make the cut: Start the saw, let it reach speed, and then smoothly push it through the material, following your guide. Be extra mindful of kickback when making bevel cuts, as the geometry changes.
Performing Plunge Cuts
A plunge cut is when you lower the spinning blade directly into the material, rather than starting from an edge. This is useful for cutting out shapes or creating openings within a panel. Plunge cuts are inherently more dangerous and require extreme caution.
- Safety First! Ensure you have excellent lighting, a stable workpiece, and all safety gear.
- Mark your start point: Clearly mark where you want to plunge the blade.
- Set the cutting depth: Set the cutting depth so the blade will cut through the material without hitting anything underneath.
- Position the saw: Place the saw on the material with the blade directly over your marked start point.
- Grip firmly: Hold the saw with both hands, keeping it stable and controlled.
- Start the saw: Squeeze the trigger and let the blade reach full speed.
- Plunge slowly and steadily: Gently and smoothly lower the front of the saw’s base plate. The blade will begin to cut into the material.
- Control the descent: As the blade cuts, the saw will naturally want to tilt forward. Use your grip to keep the base plate as level as possible during the plunge. Avoid jerky movements.
- Continue the cut: Once the blade is fully through the material, you can begin to move the saw forward to complete your cut line.
- Finish and retract: Complete your cut line, then carefully retract the saw by lifting the front of the base plate. Ensure the blade guard covers the blade as you withdraw.
Warning: Plunge cuts are risky. If you are new to using a circular saw or are working with thick or difficult materials, it’s best to avoid plunge cuts or practice them extensively on scrap wood first. Many woodworkers prefer to drill a pilot hole at the start of a plunge cut to reduce initial resistance.
Advanced Tips for Precision and Performance
Beyond the basics, a few advanced techniques can elevate your skill saw game.
Using the Zero-Clearance Insert
Many advanced users or those seeking the absolute cleanest cuts might consider or create a zero-clearance insert for their saw’s base plate. This is a thin piece of material (like hardboard or melamine) that sits flush with the blade’s path.
- How it works: The blade cuts a kerf directly into the insert. This minimizes the gap around the blade, preventing small offcuts from being sucked under the blade and causing tear-out, especially on the bottom of the cut.
- Pros: Significantly reduces tear-out, especially on delicate materials like veneers or premium plywood.
- Cons: Requires modification of your saw’s base plate (or a specific insert if available), and you’ll need a new insert for every different blade type or bevel angle.
Dealing with Tear-Out
Tear-out is when the wood fibers splinter and break away along the cut line, leaving a ragged edge.
- Blade Choice: A higher tooth count blade designed for crosscuts will minimize tear-out.
- Blade Sharpness: A dull blade is a primary cause of tear-out. Keep your blades sharp.
- Cutting Depth: As mentioned, setting the blade depth to just 1/4 inch below the material can help.
- Masking Tape: Applying a strip of painter’s tape or masking tape along your cut line before cutting can help hold the wood fibers together.
- Sacrificial Support: For cuts on the edge of a board, clamp a piece of scrap wood (a “sacrificial strip”) along the cut line on the side where the tear-out is most likely to occur. The saw will cut into this scrap rather than the edge of your workpiece.
Maintaining Control and Stability
- Two-Handed Grip: Always use both hands to control the saw – one on the main handle with the trigger and one on the auxiliary handle or front grip.
- Smooth, Deliberate Movements: Avoid rushing. Let the saw work at its own pace.
- Support the Offcut: Make sure the piece being cut off is adequately supported so it doesn’t fall away and bind the blade, or doesn’t pull the main piece away from your guide.
- Keep Cords Clear: Always be aware of the power cord and keep it out of the blade’s path.
Frequently Asked Questions (FAQ)
Q1: How do I get a perfectly straight cut with a circular saw without a guide rail?
A1: While difficult, you can improve accuracy by using the saw’s rip fence if cutting parallel to a good edge, or by carefully clamping a known straight edge (like a metal level) to your workpiece, accounting for the offset from your saw’s base plate to the blade. Always mark your line clearly and proceed slowly.
Q2: Can I cut metal with a skill saw?
A2: You can cut some metals with a circular saw, but you must use a blade specifically designed for metal cutting. Standard wood blades will not work and can be extremely dangerous if used on metal. Always wear appropriate safety gear, including eye and hearing protection, and ensure the material is securely clamped.
Q3: What is the best way to avoid kickback with a circular saw?
A3: Avoid pinching the blade in the wood, especially when cutting warped lumber or when the offcut is not properly supported. Ensure the blade guard is functioning correctly, maintain a firm grip on the saw, and keep your body out of the direct line of travel if the saw were to kick back.
Q4: How often should I change my circular saw blade?
A4: This depends on the blade’s quality, the type of wood you’re cutting, and how much you use it. A dull blade will make cutting harder, produce rougher cuts, and increase the risk of kickback. If you notice increased effort, tear-out, or a rougher cut finish, it’s time for a new blade. Carbide-tipped blades last significantly longer than standard steel blades.
Q5: What are plunge cuts used for?
A5: Plunge cuts are used to start a cut in the middle of a piece of wood, rather than from an edge. This is useful for cutting out openings, creating shapes within panels, or making precise cutouts for fixtures. They require extra caution due to the increased risk of kickback.
By adhering to these safety guidelines, selecting the right blade, and practicing with proper techniques, you can confidently use your skill saw to achieve clean, straight cuts for all your woodworking projects. Happy cutting!