
How To Hammer A Rivet: Master the Craft
Hammering a rivet is a fundamental skill used in various trades, from leatherworking and metal fabrication to aviation and historical reenactment. It’s a method of joining two or more pieces of material together using a rivet, which is essentially a metal pin or bolt. The process involves using specialized tools to deform the end of the rivet, creating a second head that secures the materials. This blog post will guide you through the essential steps and considerations for mastering the art of hammering a rivet.
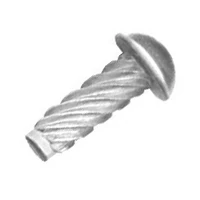
Image Source: itafasteners.com
The Basics of Riveting
Riveting is a permanent joining method. Once a rivet is set, it’s difficult to remove without damaging the materials being joined. This permanence is often a desired characteristic, providing a strong and reliable connection. There are two primary types of rivets you’ll encounter: solid rivets and hollow rivets.
Solid Rivets: These are the most common type. They consist of a smooth cylindrical shaft with a head on one end. The other end, called the tail, is then deformed to create a second head, securing the materials. Solid rivets are known for their strength and are used in applications where structural integrity is paramount.
Hollow Rivets: These rivets have a hole through their center. They are typically used for lighter-duty applications, often in fabric, leather, or thin sheet metal. The hollow center makes them easier to set with less force.
The core of the process, regardless of the rivet type, is setting a rivet. This involves shaping the tail end of the rivet to form a second, equally strong head.
Essential Riveting Tools You’ll Need
Before you can start hammering, you need the right equipment. Having the correct riveting tools is crucial for a clean, strong, and efficient rivet installation. While specialized tools exist, many common items can be adapted, especially for simpler tasks.
- Hammer: The most fundamental tool. For general riveting, a ball-peen hammer is ideal. The rounded end (the peen) is used to shape the rivet head. The weight of the hammer should be appropriate for the size of the rivet and the material you are working with. A lighter hammer might be used for delicate work, while a heavier one is better for larger, tougher materials.
- Rivet Set (or Setting Die): This is a specialized tool with a concave or cupped end that matches the shape of the rivet head you want to create. It’s placed against the tail of the rivet to guide the hammer blows and form a uniform head. You’ll need a rivet set that matches the type and size of your rivet.
- Anvil or Hard Surface: You need a stable, hard surface to work on. This could be a workbench, a dedicated anvil, or even a thick piece of steel. The surface should be flat and unyielding to provide a solid backing for the rivet.
- Vise (Optional but Recommended): A vise can hold your workpiece securely, allowing you to focus on the hammering. This is particularly useful for smaller or fiddly projects.
- Center Punch (for solid rivets): Before setting a solid rivet, you often need to create a slight indentation in the center of the rivet tail. This helps to center the rivet set and prevent the hammer from slipping.
- Drill and Drill Bits: If you are creating new holes for rivets, you’ll need a drill and bits of the correct size. The hole diameter is critical for a snug fit.
- Files: To clean up any rough edges on the material or the rivet itself.
- Safety Glasses: Absolutely essential to protect your eyes from flying metal fragments.
- Gloves (Optional): Can provide a better grip and protect your hands.
Beyond the Hammer: The Rivet Gun
While this guide focuses on hammering, it’s worth noting that for high-volume or industrial applications, a rivet gun is often used. A rivet gun, whether pneumatic or manual, uses a different mechanism to set rivets, often by pulling or pushing a mandrel through the rivet body, expanding it to create a secure joint. This is especially common with blind rivets, which can be installed from one side. However, for many craftspeople and for certain types of traditional work, hand riveting remains the preferred and most accessible method.
Step-by-Step Guide to Hammering a Rivet
Mastering the craft of hammering a rivet involves understanding the precise movements and forces required. The goal is to create a smooth, symmetrical, and secure head without damaging the rivet or the surrounding material.
1. Preparing the Materials
- Create Holes: If you are joining two pieces of material, you first need to create holes for the rivet. The holes should be the same size and perfectly aligned. For sheet metal, use a drill bit that is slightly larger than the rivet shaft for a snug fit. For leather or fabric, a punch is often used.
- Clean the Surfaces: Ensure the surfaces of the materials that will be in contact with the rivet are clean and free of debris. This ensures a flush fit.
- Deburr the Holes: Any sharp edges around the drilled holes can snag the rivet or weaken the joint. Use a deburring tool or a file to smooth these edges.
2. Inserting the Rivet
- Thread the Rivet: Push the rivet through the aligned holes in your materials. Make sure the rivet sits flush against the material.
- Support the Rivet Head: For a solid rivet, ensure the existing head is resting on a hard, flat surface. If the head is already on the workpiece, ensure the workpiece itself is firmly supported.
3. Initial Setup for Setting
- Center Punching (Solid Rivets): For solid rivets, take your center punch and gently tap the center of the rivet tail. This creates a small dimple that will guide the rivet set and prevent it from skidding. This step is not necessary for most hollow rivets.
- Positioning the Rivet Set: Place the rivet buck (another term for a rivet set, particularly one used for starting the forming process or for specialized shapes) or the rivet set tool over the dimple (or directly onto the tail of a hollow rivet). Ensure the cup of the rivet set is perfectly centered on the rivet.
4. The Hammering Process: Setting the Rivet
This is where the skill comes in. The action needs to be controlled and deliberate.
- First Few Taps (Starting the Form): Begin with light, glancing blows to seat the rivet set and start forming the new head. This is often done with a slightly angled hammer blow to guide the metal outwards. The goal is to begin shaping the material without collapsing it or creating an uneven surface.
- Forming the Head: Once the rivet set is stable, use firm, consistent blows directly onto the end of the rivet set. The hammer should strike the center of the rivet set, transferring force directly to the rivet tail. The metal of the rivet tail will flow outwards, forming a new head.
- Solid Rivets: The aim is to create a new head that is a mirror image of the original head (e.g., a round head or a countersunk head, depending on the rivet type). The peen of the ball-peen hammer is used to gently spread the metal.
- Hollow Rivets: These are typically set with a flat-faced rivet set, or sometimes even a nail set. The force is applied to the open end of the hollow rivet, causing it to flare and grip the material.
- Consistency is Key: Aim for consistent strike force and rhythm. Overly hard blows can mushroom the rivet excessively, weaken the joint, or even deform the original rivet head. Too light a blow will result in a poorly formed head.
- Rotating and Checking: Periodically lift the rivet set and inspect the progress. You may need to rotate the workpiece or slightly adjust the rivet set’s position to ensure an even formation of the new head.
5. Completing the Rivet Installation
- Desired Head Shape: Continue hammering until the new head is fully formed and securely grips the materials. The final head should be symmetrical and flush with the workpiece, or as intended for the specific application.
- Final Taps: A few final, lighter taps can help to smooth the surface of the newly formed head.
- Inspection: Check the rivet for any signs of damage, such as cracking, excessive mushrooming, or looseness. The joint should be tight, with no gaps between the materials.
Considerations for Different Rivet Types
The method of rivet installation can vary slightly depending on whether you are working with a hollow rivet or a solid rivet.
Hammering Solid Rivets
- Ball-Peen Hammer: Crucial for shaping the metal.
- Center Punch: Essential for guiding the rivet set.
- Rivet Set: Must match the existing rivet head shape (e.g., round, oval, countersunk).
- Forming the Head: The goal is to create a new head that is roughly the same size and shape as the original. This is achieved by carefully peening the tail of the rivet.
Hammering Hollow Rivets
- Flat-Faced Rivet Set or Nail Set: Used to flare the open end.
- No Center Punch Needed: The open end of the hollow rivet can be directly struck.
- Forming the Head: The rivet is essentially “crimped” or flared to create a secure hold. This is a simpler process than forming a solid rivet head but still requires a steady hand.
Tips for Achieving Professional Results
- Practice on Scrap Material: Before working on your final project, practice on scrap pieces of the same material. This allows you to get a feel for the hammer force and the rivet set.
- Choose the Right Hammer Weight: A hammer that is too heavy can be difficult to control, while one that is too light may not provide enough force.
- Keep Tools Clean: Dirt or debris on your hammer or rivet set can transfer to the rivet head, creating an undesirable finish.
- Work in Good Lighting: Proper lighting will help you see what you are doing and ensure accuracy.
- Maintain a Steady Hand: Tremors can lead to misshapen heads or damage. If you have a shaky hand, consider using a vise to stabilize your workpiece.
- For Countersunk Rivets: If you are using rivets that require a countersunk head, you will need a specialized rivet set that matches the countersink angle. You may also need to pre-chamfer the hole to accommodate the countersunk rivet head.
Common Riveting Mistakes and How to Avoid Them
- Over-Hammering: This can mushroom the rivet, weakening the joint and creating an unsightly finish.
- Avoidance: Use controlled blows, and stop when the head is fully formed.
- Under-Hammering: Results in a loose rivet with a poorly formed head.
- Avoidance: Ensure sufficient force is applied with each hammer blow.
- Missed Hammer Blows: Hammering off-center can deform the rivet head unevenly.
- Avoidance: Use a center punch for solid rivets and carefully align the rivet set. Maintain a steady hand.
- Damaging the Material: Forceful hammering can dent or damage the workpiece around the rivet.
- Avoidance: Ensure the workpiece is well-supported and use appropriate hammer force.
- Incorrect Rivet Size: Using a rivet that is too large or too small for the material thickness can lead to a weak joint.
- Avoidance: Consult rivet sizing charts and select the appropriate rivet for your application.
Maintaining Your Riveting Tools
Proper care of your riveting tools ensures their longevity and your ability to produce quality work.
- Hammers: Keep the striking faces of your hammers clean and free of rust. A light coat of oil can prevent rust on steel hammers.
- Rivet Sets: Clean the cupped end of the rivet set after each use to remove any metal debris. Inspect for wear or damage to the cup, as this can affect the quality of the rivet head. Store them in a way that prevents the striking ends from being damaged.
- Vises and Anvils: Keep these surfaces clean and free of rust.
When to Use Riveting Over Other Fasteners
Riveting offers distinct advantages in certain situations:
- Permanence: As mentioned, rivets create a permanent bond, ideal for applications where fasteners should not loosen over time (e.g., structural components).
- Vibration Resistance: Riveted joints are generally more resistant to vibration than threaded fasteners like screws or bolts, which can loosen.
- Aesthetics: In some crafts, the appearance of a riveted joint is preferred for its traditional or industrial look.
- Material Compatibility: Rivets can be used to join materials that are difficult to thread or weld.
However, riveting also has limitations:
- Difficult to Disassemble: Removing rivets requires drilling or cutting them out, which is destructive to the fastener.
- Requires Access to Both Sides: Traditional riveting requires access to both sides of the workpiece to form the second head. Blind rivets overcome this limitation.
- Can Require More Labor: Compared to screwing, riveting can be more time-consuming, especially for simpler assemblies.
Frequently Asked Questions About Hammering Rivets
Q1: What is the best type of hammer for riveting?
A1: A ball-peen hammer is generally the best choice for hammering rivets, especially solid rivets. The rounded peen is ideal for shaping the rivet tail into a new head. The weight of the hammer should be chosen based on the size of the rivet and the material.
Q2: How do I know if I’ve hammered the rivet enough?
A2: You’ve hammered the rivet enough when the newly formed head is symmetrical, well-defined, and securely holds the materials together without being excessively mushroomed or deformed. You can gently tug on the materials to ensure they are held firmly. Visually, the head should resemble the original head on the rivet.
Q3: Can I use a regular nail set instead of a rivet set?
A3: For hollow rivets, a nail set can sometimes be used, especially for lighter materials. However, for solid rivets, a proper rivet set with a matching cupped end is highly recommended to ensure a well-formed and uniform rivet head. Using a nail set on a solid rivet can lead to a less consistent shape and potentially damage the rivet.
Q4: What happens if I hammer too hard?
A4: Hammering too hard can cause several problems: the rivet head can become excessively large and deformed (mushrooming), the rivet material can crack, the original rivet head can be flattened or distorted, or the material surrounding the rivet can be dented or damaged.
Q5: How do I rivet without damaging my workpiece?
A5: Ensure your workpiece is well-supported on a hard, stable surface. Use controlled hammer blows, and consider using a vise to hold the workpiece securely. If working with delicate materials, use a lighter hammer and lighter blows, and ensure the rivet set is perfectly aligned.
Mastering the craft of hammering a rivet might take a bit of practice, but with the right tools and a methodical approach, you can achieve strong, reliable, and aesthetically pleasing joints. Whether you’re a hobbyist or a professional, this timeless technique offers a durable way to connect materials.