
Can you rip wood easily with a table saw? Yes, you can. Operating a table saw safely is paramount for any woodworker, from hobbyists to seasoned professionals. What is a table saw? A table saw is a woodworking tool with a blade protruding through a table, used for cutting wood. Can I cut different types of wood with it? Yes, a table saw can cut various types of wood, from softwoods like pine to hardwoods like oak, and even some engineered materials, provided the correct blade is used and proper techniques are followed. Who is this guide for? This guide is for anyone looking to operate a table saw safely and effectively.
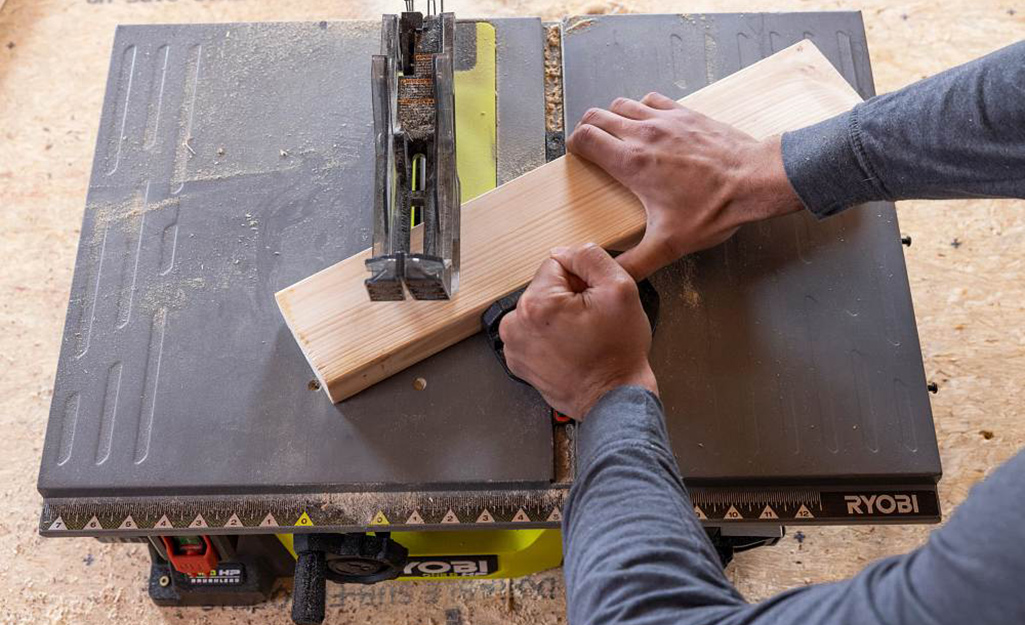
Image Source: contentgrid.homedepot-static.com
Essential Table Saw Safety Practices
Table saw safety isn’t just a suggestion; it’s a fundamental requirement for preventing injuries. The table saw is one of the most versatile and useful tools in a woodworking shop, but it’s also one of the most dangerous if not handled with respect and care. Mishandling can lead to severe cuts, amputations, or worse. This section will cover the critical safety measures you must adopt before, during, and after using your table saw.
Before You Turn It On: Pre-Operation Checks
Before you even think about making a cut, a thorough inspection and preparation of your table saw setup is vital.
- Read the Manual: Every table saw comes with an owner’s manual. This document contains specific safety instructions, operating procedures, and maintenance guidelines for your particular model. Always read and familiarize yourself with it.
- Inspect the Blade: Ensure the table saw blade is sharp, clean, and free of damage. A dull or damaged blade can cause the wood to bind, increasing the risk of table saw kickback. The blade should also be installed correctly, with the teeth pointing in the direction of blade rotation.
- Check the Guard and Riving Knife: The blade guard and riving knife (or splitter) are crucial safety features. The guard protects you from the spinning blade, and the riving knife prevents the kerf (the cut made by the blade) from closing and binding the blade, which is a primary cause of kickback. Ensure they are in place, adjusted correctly, and functioning properly.
- Examine the Table Surface: Keep the table clean and free of sawdust, wax, or any debris. A clean surface allows wood to glide smoothly. Apply a paste wax to the table surface to further reduce friction.
- Test the Fence and Miter Gauge: Ensure the table saw fence is locked securely in place parallel to the blade. Verify that the table saw miter gauge slides smoothly in its slot.
- Clear the Work Area: Remove any clutter from around the table saw. Ensure you have enough space to maneuver the material you’ll be cutting. Keep bystanders, especially children and pets, away from the operating area.
- Wear Appropriate Safety Gear: Always wear safety glasses or a face shield to protect your eyes from flying debris. Hearing protection is also recommended, as table saws can be very loud. Avoid loose clothing, jewelry, or anything that could get caught in the blade. Tie back long hair. Wear sturdy, closed-toe shoes.
During Operation: Safe Cutting Techniques
Once your table saw is set up correctly and you’ve conducted all pre-operation checks, you can proceed with cutting. However, maintaining vigilance and employing safe table saw cutting techniques is essential throughout the process.
- Never Reach Over the Blade: This is one of the most critical rules. Always maintain a safe distance from the spinning blade. If you need to retrieve something from the other side of the saw, turn it off first.
- Use Push Sticks and Push Blocks: When cutting smaller pieces or when your hands would get too close to the blade, always use a table saw push stick or push block. These tools help guide the wood through the blade safely, keeping your fingers well away from danger. You can buy these or make your own.
- Maintain a Firm Grip: Keep a firm grip on the wood as you feed it through the blade. Never let go of the workpiece while it’s in contact with the blade.
- Stand to the Side, Not Directly Behind the Blade: Position yourself to the side of the blade, not directly behind the piece of wood you are cutting. This is crucial to avoid injury from table saw kickback, where the wood is violently thrown back towards the operator.
- Feed the Wood Smoothly and Consistently: Don’t force the wood. Let the blade do the work. A consistent feed rate prevents the blade from bogging down, which can lead to burning or kickback.
- Use the Fence for Ripping, Not for Dadoes: When ripping (cutting with the grain), use the fence to guide the wood. Never use the fence as a guide for crosscuts (cutting across the grain) if the miter gauge is also being used. This creates a dangerous situation where the wood can bind between the blade and the fence.
- Use the Miter Gauge for Crosscuts: For crosscuts, use the miter gauge. This provides a stable platform and guides the wood safely through the blade.
- Avoid Freehand Cutting: Never attempt to cut freehand on a table saw. Always use the fence or the miter gauge for guidance.
- Be Aware of the Blade Height: Set the blade height so that it extends no more than 1/4 to 1/2 inch above the workpiece. Too much exposed blade increases the risk of injury and can contribute to kickback.
- Listen to Your Saw: Pay attention to the sound of the motor. If it bogs down or makes unusual noises, stop the cut and investigate.
- One Person Operation: A table saw should be operated by one person at a time. Avoid having others in the immediate vicinity.
After the Cut: Securing the Saw
Once you’ve completed your cuts, the safety procedures aren’t over.
- Wait for the Blade to Stop: Never reach for the workpiece or make adjustments until the blade has come to a complete stop.
- Turn Off the Saw: Once the blade has stopped, turn off the table saw.
- Unplug When Changing Blades or Making Adjustments: Always unplug the table saw from the power source before changing the blade, making any adjustments to the fence, guard, or riving knife, or performing maintenance.
Fathoming the Core Components of Your Table Saw
To operate a table saw safely and effectively, you need to comprehend its primary components and their functions. Each part plays a crucial role in both performance and safety.
The Table
The table is the flat surface on which you’ll place your wood. It’s typically made of cast iron for stability and durability. The table has slots to guide the miter gauge.
- Material: Cast iron is preferred for its weight, which helps reduce vibration and keeps the saw stable.
- Surface: Keep it clean and waxed for smooth material feeding.
- Slots: These T-shaped slots are for the miter gauge and specialized accessories.
The Blade
The table saw blade is what does the cutting. The type of blade you use significantly impacts the cut quality and efficiency.
- Types:
- Rip blades: Have fewer teeth (around 24-30) and larger gullets (the spaces between teeth) for fast cutting with the grain.
- Crosscut blades: Have more teeth (around 60-80) and smaller gullets for clean cuts across the grain.
- Combination blades: Offer a balance of rip and crosscut performance, typically with 40-50 teeth.
- Specialty blades: Include dado blades for cutting grooves, plywood blades for clean plywood cuts, and blades for metal or plastic.
- Tooth Count: More teeth mean a smoother cut but slower progress. Fewer teeth mean a faster cut but a rougher finish.
- Material: Blades are typically made from high-speed steel (HSS) or carbide-tipped steel. Carbide-tipped blades are more durable and stay sharp longer.
- Blade Guard: A crucial safety feature that covers the blade. It should allow for easy access to the blade for adjustments but protect the user from accidental contact.
- Riving Knife/Splitter: Positioned behind the blade, it keeps the kerf from closing and pinching the blade, preventing kickback. It should be the same kerf width as the blade.
The Fence
The table saw fence is a guide that runs parallel to the blade. It’s used for ripping operations to ensure straight, consistent cuts.
- Function: Provides a stable guide for ripping wood to width.
- Alignment: It must be perfectly parallel to the blade. Misalignment is a common cause of binding and kickback.
- Locking Mechanism: A good fence locks securely and accurately.
The Miter Gauge
The table saw miter gauge is used for making crosscuts and angled cuts. It fits into the table slots and has an adjustable fence that can be set to various angles.
- Function: Guides wood for crosscuts and angled cuts.
- Adjustability: Allows for precise angle settings.
- Stability: Provides a stable platform for the workpiece.
The Motor
The motor powers the blade. Its horsepower determines the saw’s capacity for cutting dense hardwoods and making demanding cuts.
- Horsepower (HP): Higher HP motors offer more power for tougher jobs.
- Drive System: Most modern table saws use belt-drive systems, which isolate the motor from the blade for smoother operation and reduced vibration. Direct-drive motors are found on some smaller or portable saws.
The Blade Height Adjustment Handwheel
This allows you to raise or lower the table saw blade to achieve the desired cut depth.
- Setting Depth: The blade should extend just enough to clear the workpiece.
The Bevel Adjustment Handwheel
This allows you to tilt the blade to make angled cuts (bevels).
- Angled Cuts: Essential for joinery and specific woodworking projects.
Mastering Table Saw Cutting Techniques
Different table saw cutting techniques are used for various woodworking tasks. Learning these techniques is vital for both efficiency and safety.
Ripping
Ripping is cutting wood along its grain. This is where the table saw fence is your primary guide.
- Set the Fence: Adjust the fence so the distance from the fence to the nearest blade tooth is the desired width of your ripped piece. Measure from the fence to the gullet between two teeth for accuracy.
- Ensure Blade Height: Set the blade height to about 1/4 to 1/2 inch above the workpiece.
- Use the Fence: Place the wood against the fence.
- Feed the Wood: Push the wood smoothly and steadily through the blade using your hands, keeping them well away from the blade. Use a push stick as you near the end of the cut.
- Keep Hands Clear: Never place your hands directly in line with the blade. Always feed from the side.
- Avoid Kickback: Do not rip pieces that are too narrow to safely use the fence and keep your hands clear. For very narrow rips, consider a table saw jig or a push stick.
Crosscutting
Crosscutting is cutting wood across its grain. The table saw miter gauge is the primary guide for this.
- Set the Miter Gauge: Adjust the miter gauge to the desired angle (usually 90 degrees for a square cut).
- Position the Wood: Place the wood against the miter gauge.
- Feed the Wood: Gently push the miter gauge and workpiece through the blade. Keep the wood firmly against the miter gauge’s fence.
- Never Use Fence and Miter Gauge Together: As mentioned, using both the fence and the miter gauge simultaneously creates a dangerous situation where the wood can bind and cause kickback.
- Support Long Workpieces: For long pieces, use outfeed support or a roller stand to prevent the end of the workpiece from dropping and binding the blade.
Bevel Cuts
Bevel cuts are angled cuts made by tilting the blade.
- Set the Bevel Angle: Use the bevel adjustment handwheel to tilt the blade to your desired angle.
- Use the Fence (for Ripping Bevels): When ripping a bevel, use the fence as a guide, just like a standard rip cut.
- Use the Miter Gauge (for Crosscutting Bevels): For crosscutting a bevel, use the miter gauge. Ensure the miter gauge is set to the correct angle and the wood is held firmly against it.
Dado Cuts (Grooves)
Dadoes are grooves cut into the surface of wood. This requires a specialized dado blade set.
- Install Dado Blade Set: Follow the manufacturer’s instructions for installing your dado blade set. This typically involves arranging multiple blades and chippers on the arbor.
- Set Blade Height: Set the blade height to the desired depth of the dado.
- Use the Miter Gauge: Always use the miter gauge to guide the wood for dado cuts. Never use the rip fence, as this can cause the wider dado blade to bind.
- Make Multiple Passes: For wide dadoes, you may need to make multiple passes, incrementally increasing the blade height or adjusting the miter gauge to push the workpiece further.
- Table Saw Dust Collection: Dado cuts produce a lot of sawdust. Ensure your table saw dust collection system is connected and working effectively.
Advanced Techniques and Table Saw Jigs
Beyond basic cuts, a table saw jig can enhance precision, safety, and expand the capabilities of your table saw.
Push Blocks and Push Sticks
These are essential accessories for safely guiding wood.
- Push Sticks: Long, thin pieces of wood with a notch at one end to grip the workpiece. Ideal for narrow rips.
- Push Blocks: Solid blocks with a handle and a rubberized base for superior grip. Excellent for crosscuts and wider rips.
Crosscut Sled
A table saw jig that provides a more stable and accurate guide for crosscuts than a standard miter gauge. It consists of a base that slides in the miter gauge slot and a fence that is perfectly square to the blade.
Tenon Jig
Used for cutting tenons (the projecting part of a joint). It holds the workpiece vertically against a fence.
Tapering Jig
Allows you to cut precise angles (tapers) on the edges of boards.
Stacking Dado Sets
These allow you to create a dado of almost any width by adding or removing chippers.
Table Saw Dust Collection
A robust table saw dust collection system is vital for a clean workshop, improved air quality, and the longevity of your tools. Sawdust can obscure your cut line and also pose a fire hazard.
- Dust Port: Most table saws have a dust port, usually located at the bottom of the saw cabinet. Connect a shop vacuum or a dedicated dust collector to this port.
- Blade Guard Dust Collection: Many modern blade guards have integrated dust collection ports. These are highly effective at capturing dust and chips as they are generated.
- Cleanliness: Regularly clean the saw cabinet and surrounding area to prevent sawdust buildup.
Table Saw Kickback: Fathoming the Danger
Table saw kickback is the most significant danger associated with table saws. It occurs when the wood being cut is thrown back towards the operator with great force. This usually happens when the wood pinches the blade or binds.
Causes of Kickback:
- Blade Binding: When the kerf closes up and pinches the blade. This can happen if:
- The wood warps as it’s cut.
- The wood is not properly supported and the offcut falls, pinching the blade.
- The table saw fence is not parallel to the blade.
- The table saw miter gauge and the fence are used simultaneously for ripping.
- Blade Not Sharp: A dull blade requires more force, increasing the chance of binding.
- Improper Blade Height: A blade set too high can make kickback more severe.
- Feeding Wood Incorrectly: Twisting or pushing the wood at an angle can cause it to bind.
- Warped or Twisted Lumber: These pieces are more prone to binding.
- Ripping Narrow Pieces: As the piece gets closer to the blade, it’s harder to maintain control and keep hands clear.
- Turning Off the Saw with Wood Near the Blade: If you turn off the saw with the wood still in contact with the spinning blade, the residual momentum can cause kickback.
Preventing Kickback:
- Use a Riving Knife: This is your primary defense against kickback. Ensure it’s properly aligned and at the correct height.
- Use Blade Guards: Keep the blade guard in place whenever possible.
- Use Push Sticks and Blocks: Essential for keeping your hands out of the danger zone.
- Maintain a Parallel Fence: Regularly check and adjust your fence alignment.
- Never Use Fence and Miter Gauge Together: For ripping, always use the fence. For crosscuts, always use the miter gauge.
- Support Your Workpieces: Use outfeed tables or roller stands for long or heavy pieces.
- Don’t Cut Warped or Twisted Wood: If you must, use a table saw jig designed for such material or rip a slightly oversized piece first, then trim it down.
- Make Relief Cuts: For cutting long pieces where the wood might sag and pinch the blade, consider making shallow relief cuts ahead of the blade.
- Keep the Blade Sharp: A sharp blade cuts efficiently and reduces the risk of binding.
- Stand to the Side: Always position yourself to the side of the blade, not directly behind the workpiece.
Table Saw Setup: Getting It Right
A correct table saw setup is crucial for both accuracy and safety. This involves more than just plugging it in.
Blade Alignment
- Fence Alignment: With the saw turned off and unplugged, and the blade at its highest setting, check that the fence is perfectly parallel to the blade. A simple test involves marking a point on the blade’s edge and measuring the distance to the fence at the front and back of the blade. These measurements should be identical.
- Miter Gauge Slot Alignment: The miter gauge slots should also be parallel to the blade.
Blade Height Adjustment
- For Ripping: Set the blade so that the top of the teeth are about 1/4 to 1/2 inch above the workpiece. This maximizes efficiency while minimizing exposure.
- For Crosscutting: A slightly lower blade height can sometimes provide cleaner cuts, but always ensure it’s at least flush with the top of the workpiece.
- For Dadoes: Set to the desired depth of the groove.
Testing Cut Accuracy
Before making critical cuts, always test your table saw setup with scrap wood.
- Rip Test: Rip a board to a specific width, then measure the resulting piece.
- Crosscut Test: Make a square cut on a piece of scrap wood and check for squareness with a combination square.
- Bevel Test: Cut a bevel and check the angle with an angle gauge.
Maintaining Your Table Saw
Regular maintenance ensures your table saw operates safely and efficiently.
- Cleaning: Regularly clean the table, blade, and internal components. Remove sawdust and grime.
- Lubrication: Lubricate moving parts as recommended by the manufacturer.
- Blade Sharpening/Replacement: Keep your blades sharp. Dull blades are a major safety hazard.
- Accessory Check: Ensure your fence, miter gauge, and safety accessories (riving knife, guards) are in good working order.
Frequently Asked Questions (FAQ)
Q1: What is the most dangerous aspect of using a table saw?
A1: The most dangerous aspect is table saw kickback, where the wood is violently thrown back at the operator.
Q2: Can I use the fence and the miter gauge at the same time?
A2: No, you should never use both the table saw fence and the table saw miter gauge simultaneously for ripping. This is a major cause of kickback. Use the fence for ripping and the miter gauge for crosscuts.
Q3: How high should the table saw blade be set?
A3: For most cuts, the table saw blade should extend about 1/4 to 1/2 inch above the workpiece.
Q4: What is a table saw jig used for?
A4: A table saw jig is a custom-made device that aids in performing specific cuts or operations more safely, accurately, or efficiently. Examples include crosscut sleds, tenon jigs, and tapering jigs.
Q5: What should I do if I’m not sure how to make a cut?
A5: If you are unsure about a specific cut or technique, consult your table saw’s manual, watch reputable instructional videos, or seek guidance from an experienced woodworker. Never guess or take unnecessary risks.
Q6: Why is table saw dust collection important?
A6: Table saw dust collection is important for maintaining a clean work environment, improving air quality, protecting your lungs from fine dust particles, and reducing fire hazards.
Q7: What is a table saw push stick?
A7: A table saw push stick is a tool used to safely push wood past the blade, keeping your hands a safe distance away from the cutting edge.
By adhering to these principles of table saw safety, familiarizing yourself with your machine’s components, and practicing proper table saw cutting techniques, you can unlock the immense potential of your table saw while minimizing risks. Always prioritize safety, and enjoy the precision and versatility this essential woodworking tool offers.