
Image Source: i.ytimg.com
How To Replace Circuit Breakers In The Panel Safely: A DIY Guide
Can I replace a circuit breaker myself? Yes, if you are comfortable and follow strict safety precautions, a DIYer can replace a circuit breaker. Is it safe to replace a circuit breaker? It is safe if you completely shut off the main power to your electrical panel and take all necessary precautions. This guide will walk you through the process of replacing circuit breakers in your panel safely and effectively.
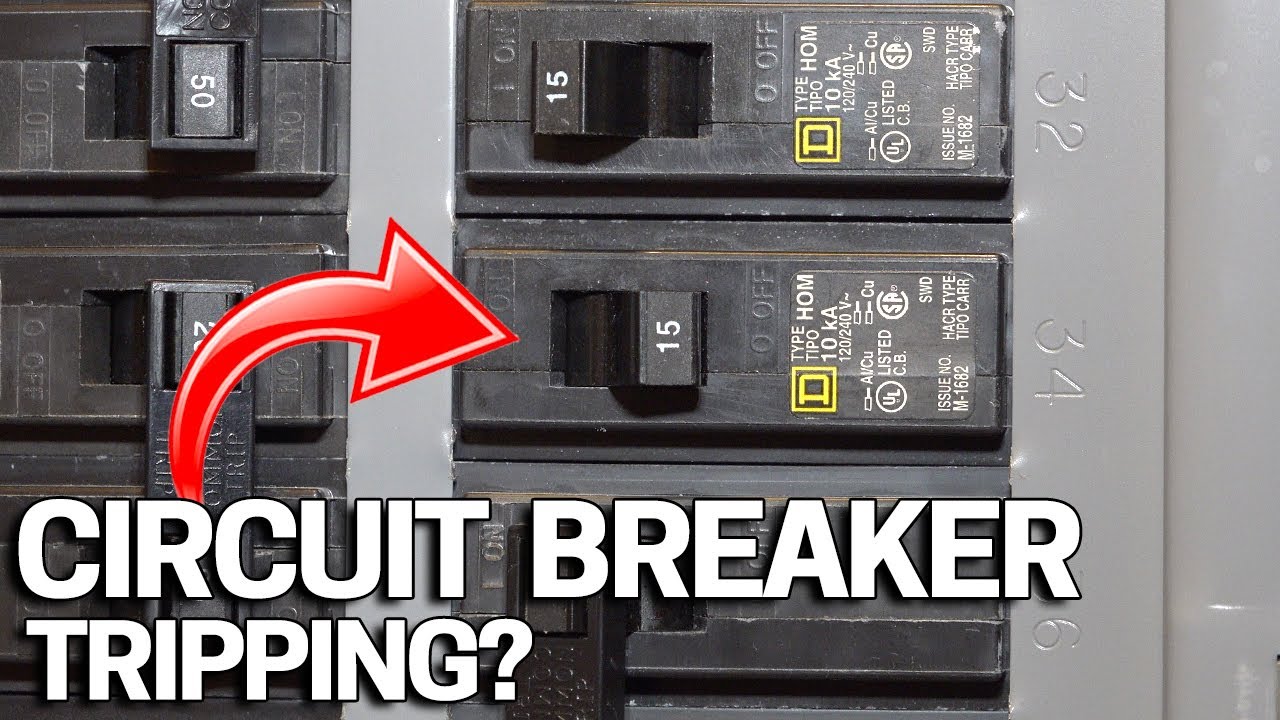
Faulty circuit breakers can lead to tripping breaker events, interrupting power to your home. A circuit overload is a common reason for a breaker to trip, but sometimes the breaker itself fails. Knowing how to safely replace a circuit breaker in your electrical panel (also known as a breaker box) can save you time and money. While older homes might still have a fuse box, this guide focuses on modern breaker panels. Always prioritize electrical safety when working with home electricals.
Why Replace a Circuit Breaker?
Circuit breakers are essential safety devices. They protect your home’s wiring and appliances from damage caused by electrical surges or circuit overload. When a breaker “trips,” it means it has interrupted the flow of electricity to prevent a dangerous situation. While frequent tripping of a single breaker often indicates an issue with the circuit it protects, a breaker that trips repeatedly even under normal load, or one that feels loose or won’t reset, might need replacement.
Here are common reasons to replace a circuit breaker:
- Persistent Tripping: If a breaker trips frequently without a clear overload, it might be faulty.
- Failure to Reset: A breaker that won’t stay in the “on” position is a strong indicator of failure.
- Physical Damage: Visible signs of burning, melting, or damage to the breaker itself necessitate replacement.
- Loose Connection: A breaker that feels wobbly or doesn’t seat firmly in the panel can be a fire hazard.
- Age and Wear: Like any mechanical device, circuit breakers can wear out over time.
Safety First: Essential Precautions
Working inside an electrical panel can be dangerous if proper safety precautions are not followed. Electricity is powerful and can cause severe injury or death. Never attempt this if you are unsure or uncomfortable at any stage.
Key Safety Steps:
- Turn Off the Main Power: This is the most critical step. Locate the main breaker in your breaker box and switch it to the “off” position. This cuts power to the entire house, including all circuits and individual breakers.
- Verify Power is Off: Use a non-contact voltage tester to confirm that there is no power at the breaker you intend to replace, and even in the main bus bars within the panel. Test the tester on a known live circuit first to ensure it’s working.
- Wear Appropriate Safety Gear:
- Safety Glasses: Protect your eyes from debris.
- Insulated Gloves: Provide an extra layer of protection.
- Rubber-Soled Shoes: Prevent electricity from traveling through you to the ground.
- Non-conductive Tools: Use tools with insulated handles.
- Work in a Dry Environment: Ensure the area around the electrical panel is dry. Water and electricity are a dangerous combination.
- Avoid Distractions: Focus solely on the task at hand. Inform family members not to interrupt you.
- Know Your Panel: Familiarize yourself with the layout of your breaker box and the purpose of each breaker. If you have a very old fuse box, the process will be different, and often replacement with a breaker panel is recommended.
- Do Not Touch Multiple Components at Once: Avoid touching the breaker you’re working on and a metal part of the panel simultaneously.
Tools and Materials You’ll Need
Before you begin, gather all the necessary tools and materials. Having everything ready will make the process smoother and safer.
Essential Tools:
- Non-Contact Voltage Tester: Crucial for verifying that power is off.
- Screwdrivers: Phillips and flathead screwdrivers, ideally with insulated handles.
- Wire Strippers/Crimpers: For preparing wires if needed (though often not required for a simple breaker swap).
- Needle-Nose Pliers: For manipulating wires and clips.
- Replacement Circuit Breaker: Make sure it’s the correct type and amperage for your panel.
Materials:
- New Circuit Breaker: The correct replacement for the old one. Ensure it’s compatible with your electrical panel manufacturer and series.
- Panel Cover Screws: Have a few spares in case the old ones are damaged.
- Optional: Insulating Tape: For added safety around wire connections if needed.
Identifying the Correct Replacement Breaker
Using the wrong type of breaker can be dangerous and damage your electrical system. It’s vital to select an exact match for the existing breaker.
How to Choose the Right Breaker:
- Brand and Series: Circuit breakers are not universally compatible. They are made by specific manufacturers (e.g., Square D, Eaton, Siemens, GE) and often belong to particular product series. Look for the brand name and series information printed on the side of the existing breaker.
- Amperage Rating: This indicates how much current the breaker can handle before tripping. It’s usually a number like 15, 20, or 30. Never replace a breaker with one of a higher amperage rating, as this can cause the wiring to overheat.
- Voltage Rating: Most household circuits use 120V or 240V breakers. Ensure the new breaker matches the voltage of the circuit.
- Number of Poles:
- Single-Pole Breakers: Control a single circuit (e.g., lights, outlets in a room). They occupy one slot in the panel.
- Double-Pole Breakers: Control two circuits simultaneously, often for high-draw appliances like water heaters, dryers, or ovens. They occupy two adjacent slots and have a handle tie.
- Triple-Pole Breakers: Used for three-phase power, less common in residential settings.
- Type of Breaker:
- Standard Breakers: The most common type.
- GFCI (Ground Fault Circuit Interrupter) Breakers: Provide protection against ground faults, essential for wet areas like kitchens and bathrooms. They will have a “Test” and “Reset” button.
- AFCI (Arc Fault Circuit Interrupter) Breakers: Detect dangerous arcing faults in wiring that can cause fires. They also have a “Test” and “Reset” button.
Table: Common Amperage Ratings and Their Uses
| Amperage Rating | Typical Usage |
|---|---|
| 15 Amp | Lighting, general-purpose outlets |
| 20 Amp | Kitchen outlets, bathroom outlets, some appliances |
| 30 Amp | Washing machines, dryers, water heaters |
| 40-60 Amp | Electric ranges, central air conditioning |
What if I can’t find the exact same breaker? While manufacturers often maintain compatibility within series, it’s best to find an identical replacement. If you cannot, consult an electrician or the panel manufacturer to confirm a compatible alternative.
Step-by-Step Guide to Replacing a Circuit Breaker
Follow these steps carefully. Remember, safety precautions are paramount.
Step 1: Turn Off the Main Power
This cannot be stressed enough. Locate the main breaker at the top or side of your electrical panel. Flip it to the “OFF” position. This will cut power to all circuits in your home, preventing a power outage on other circuits while you work.
Step 2: Verify Power is Off
- Use your non-contact voltage tester. Touch it to the terminals of the breaker you plan to replace. It should not light up or make a sound.
- Also, cautiously test the metal bus bars inside the panel where the breakers connect. They should also show no voltage.
Step 3: Remove the Panel Cover
Using your screwdriver, remove the screws holding the electrical panel cover in place. Carefully lift the cover off. It might be a bit stiff.
Step 4: Identify the Faulty Breaker
Locate the breaker you need to replace. It might be the one that keeps tripping breaker or shows physical signs of damage.
Step 5: Disconnect the Wires
- Single-Pole Breaker: The breaker will have a wire (usually black) connected to a screw terminal on its side. Loosen this screw and gently pull the wire off the terminal.
- Double-Pole Breaker: These breakers have two wires connected, one to each section. Loosen the screws on both terminals and detach the wires. There might also be a short wire connecting the two breaker poles if they are not integrated.
- Important: Ensure the wires are not touching anything conductive as you disconnect them.
Step 6: Release the Old Breaker from the Panel
Circuit breakers clip onto the bus bar of the electrical panel.
- To Remove: Pull the breaker handle downwards and then pull the breaker away from the bus bar. Some breakers may have a locking tab at the top or bottom. You might need to gently pry the breaker away from the panel’s interior. For some brands, you might need to push upwards on the breaker at the bus bar connection point and then pull it out.
- Tip: If it’s stuck, try wiggling it gently. Avoid excessive force that could damage the bus bar.
Step 7: Install the New Circuit Breaker
- Align: Position the new breaker so that its connectors align with the bus bar in the electrical panel.
- Clip In: Push the breaker firmly onto the bus bar. You should hear or feel a distinct “snap” as it locks into place. For double-pole breakers, ensure both sides connect securely to the bus bar.
Step 8: Reconnect the Wires
- Single-Pole Breaker: Connect the wire you removed back onto the screw terminal on the side of the new breaker. Tighten the screw firmly but do not overtighten, as this can strip the wire or terminal.
- Double-Pole Breaker: Reconnect the two wires to their respective screw terminals on the new double-pole breaker. Tighten the screws securely.
- Wire Condition: If the wire’s end looks damaged or corroded, you might need to strip a small amount of insulation to expose fresh copper and re-crimp a new terminal if necessary. This is where wire strippers and crimpers come in handy.
Step 9: Test the New Breaker (Before Replacing Cover)
- Gently flip the new breaker to the “ON” position.
- If it’s a GFCI or AFCI breaker, press the “Test” button. It should trip. Then press “Reset” to turn it back on.
- If the breaker trips immediately, double-check your wiring connections or you may have an issue with the circuit itself, indicating a deeper problem beyond a simple breaker replacement. If it stays on, proceed.
Step 10: Replace the Panel Cover
Carefully place the electrical panel cover back into position. Screw it securely in place.
Step 11: Restore Power
Go back to the main breaker and flip it to the “ON” position. Restore power to your home. Test the circuit that had the replaced breaker to ensure it’s working correctly.
Common Issues and Troubleshooting
Even with careful work, you might encounter problems. Here’s how to address them.
- New Breaker Trips Immediately:
- Cause: Incorrect wiring, short circuit in the appliance/device connected to the circuit, or a faulty new breaker.
- Solution: Double-check all wire connections. Ensure no bare wires are touching anything they shouldn’t. If it still trips, the new breaker might be defective, or there’s an underlying issue with the circuit.
- Breaker Won’t Seat Correctly:
- Cause: The breaker is not the correct type or is bent, or the bus bar is damaged.
- Solution: Ensure you have the correct replacement. Check for any obstructions or damage on the bus bar.
- Loose Wire Connection:
- Cause: Screw terminal not tightened enough.
- Solution: Turn off the main power again, and retighten the screw connection firmly.
When to Call a Professional Electrician
While replacing a single circuit breaker is often a manageable DIY task, there are situations where it’s best to call a qualified electrician.
- Uncertainty or Discomfort: If you feel anxious or unsure about any part of the process, do not proceed.
- Complex Panels: Older panels, or those with many different types of breakers (GFCI, AFCI, high-amperage), can be more intricate.
- Repeated Tripping: If you’ve replaced a breaker and it continues to trip, or if multiple breakers are tripping, there’s likely a more significant problem with your wiring or the overall system.
- Signs of Major Damage: If you see extensive charring, melting, or corrosion within the electrical panel, this indicates a serious issue requiring professional assessment.
- Replacing the Entire Panel: If your breaker box is outdated, undersized, or showing signs of wear, it’s time for a professional to replace the entire panel.
- Unfamiliar with Your Home Electricals: If you’ve recently moved into a new home and are unfamiliar with its electrical system, it’s wise to have a professional inspect it.
Frequently Asked Questions (FAQ)
Q1: How often should circuit breakers be replaced?
A1: Circuit breakers are designed to last a long time, often 20-30 years or more. They don’t have a fixed replacement schedule; they should be replaced when they show signs of failure or damage.
Q2: Can I replace a 15-amp breaker with a 20-amp breaker?
A2: No, this is extremely dangerous. Doing so can cause the wiring to overheat and start a fire, as the wires are only rated for 15 amps. Always replace a breaker with one of the same amperage rating.
Q3: What does it mean when a breaker trips?
A3: A tripping breaker indicates that the circuit has detected an unsafe condition, usually a circuit overload (too much power being drawn) or a short circuit. It interrupts the flow of electricity to protect your wiring and prevent fires.
Q4: My breaker keeps tripping. What should I do?
A4: First, identify the cause. Unplug all appliances on that circuit. If the breaker still trips with nothing plugged in, there might be an issue with the wiring itself or the breaker may need replacement. If it only trips when certain appliances are on, that appliance may be faulty or drawing too much power.
Q5: Is it okay to bypass a circuit breaker?
A5: Absolutely not. Bypassing or tampering with a circuit breaker is incredibly dangerous and voids the safety mechanism designed to protect your home from electrical hazards. This can lead to fires and severe electrical shock.
Q6: Can I replace breakers in a fuse box?
A6: A fuse box operates differently than a breaker panel. Fuses are sacrificial and melt to break the circuit. While you can replace blown fuses, if your home still has a fuse box, it’s generally recommended to upgrade to a modern breaker panel for better safety and convenience. The process for replacing a fuse is different from replacing a breaker.
Q7: What is the difference between a GFCI and AFCI breaker?
A7: A GFCI breaker protects against ground faults (electricity escaping the intended path and going to ground, which is dangerous for people). An AFCI breaker protects against arc faults (uncontrolled electrical sparks in wiring that can ignite fires). Many modern panels use breakers that combine both protections.
Q8: I accidentally touched metal while working. What should I do?
A8: If you touched metal and felt a shock, immediately turn off the main breaker if you can do so safely. If you feel unwell, seek medical attention. This is a serious warning sign to stop and call a professional electrician immediately.
By following this comprehensive guide and prioritizing electrical safety, you can confidently replace faulty circuit breakers and maintain the integrity of your home’s electrical system. Remember, when in doubt, always consult a qualified professional for your home electricals.