
Image Source: i.ytimg.com
How To Sharpen Circular Saw Blades Perfectly
Can you sharpen a circular saw blade at home? Yes, you absolutely can sharpen a circular saw blade at home, and doing so is a crucial part of circular saw blade maintenance. This skill allows you to save money, improve your cutting performance, and prolong the life of your blades, which is key to extending circular saw blade life. If your saw is struggling to cut through wood, producing rough edges, or even making screeching noises, it’s a clear sign your blade needs some attention. This guide will walk you through the process of saw blade sharpening, ensuring you get a perfectly sharp edge every time.
Why Sharpening Matters
A dull circular saw blade isn’t just an inconvenience; it’s a safety hazard and an impediment to quality work. When teeth are dull, they don’t cut cleanly. Instead, they tear through the material. This can lead to:
- Torn or Splintered Edges: Your cuts won’t be as clean, requiring more sanding and finishing work.
- Increased Effort: You’ll have to push harder to get the blade through the material, which can lead to kickback, a dangerous sudden upward and backward movement of the saw.
- Overheating: A dull blade requires more power and generates more heat, which can damage the blade itself and the material you’re cutting.
- Reduced Cutting Speed: The saw works harder, slowing down your project.
- Increased Wear on the Saw: The motor has to work harder, potentially shortening its lifespan.
Regularly sharpening your blades is an essential part of sharpening power tool blades and a smart investment for any woodworker or DIY enthusiast.
Getting Started: What You’ll Need
Before you dive into DIY saw blade sharpening, gather your supplies. The right tools make all the difference.
Essential Tools and Materials:
- Circular Saw Blade: The blade you intend to sharpen.
- Magnifying Glass or Loupe: To clearly see the teeth and any damage.
- Marking Pen: To mark the teeth you start with and track your progress.
- Vice or Clamp: To hold the blade securely while you work.
- Safety Glasses: Non-negotiable for eye protection.
- Work Gloves: To protect your hands from sharp edges and debris.
- Circular Saw Blade Sharpening Jig: While not strictly essential for basic sharpening, a good jig makes the process much more accurate and efficient.
- Sharpening Files: These are specialized files designed for sharpening saw teeth. The size and type of file will depend on the tooth profile of your blade. Common options include:
- Round Files: For gullets (the space between teeth) and concave tooth faces.
- Mill Files (Flat Files): For the face of the teeth.
- Needle Files: For very fine work or small blades.
- Bench Grinder with Grinding Wheel (Optional but Recommended for efficiency): Specifically, a thin cut-off wheel or a grinding wheel designed for metal. Be sure it’s the correct grit.
- Tooth Gauge or Protractor: To ensure consistent angles on your teeth.
- Rubbing Alcohol or Solvent: To clean the blade before and after sharpening.
- Soft Cloth or Rags: For cleaning.
Deciphering the Tooth Profile: The Key to Perfect Sharpening
Circular saw blades come with various tooth configurations, each designed for specific cutting tasks. The way you sharpen a blade depends heavily on its tooth profile.
Common Tooth Profiles:
- ATB (Alternate Top Bevel): Teeth are beveled alternately on the top edge. Excellent for crosscutting clean, splinter-free cuts.
- FTG (Flat Top Grind): Teeth have a flat top edge. Best for ripping (cutting with the grain) due to its aggressive cutting action.
- TCG (Triple Chip Grind): Features a chamfered or beveled tooth followed by a flat-topped tooth. Ideal for cutting harder materials like laminate, melamine, and non-ferrous metals.
- Hi-ATB (High Alternate Top Bevel): A more aggressive ATB grind with a steeper bevel angle.
- Combination Blades: These blades feature a mix of tooth profiles (e.g., ATB and FTG) to handle both rip and crosscuts effectively.
Tooth Angle Considerations:
- Rake Angle: The angle of the tooth face relative to the direction of cut. A more positive rake angle is more aggressive and better for ripping.
- Clearance Angle: The angle on the back of the tooth that prevents it from rubbing against the material. This is crucial for a clean cut.
The best way to sharpen circular saw blades is to restore the original factory angles. Using a sharpening jig for circular saws can help maintain these angles precisely.
Sharpening Methods: Files vs. Grinders
There are two primary methods for DIY saw blade sharpening: using files and using a grinder. Each has its pros and cons.
1. Filing: The Traditional Approach
Filing is a more manual but accessible method. It requires patience and a steady hand, but with practice, you can achieve excellent results. This is a great option for DIY saw blade sharpening if you don’t have access to power tools or prefer a more hands-on approach.
Steps for Filing:
- Clean the Blade: Wash the blade with soap and water or a solvent like rubbing alcohol to remove pitch, sap, and debris. A clean blade allows for precise filing.
- Secure the Blade: Mount the blade securely in a vice. Ensure it’s held by the arbor hole, not by the teeth. Using a clamp on the arbor hole edge is best if your vice jaws could damage the teeth.
- Identify the Starting Tooth: Choose a tooth to start with. You might want to mark it with a pen to track your progress.
- Select the Correct File: For ATB teeth, you’ll primarily use a round file to shape the gullet and the beveled face. For FTG teeth, a mill file is suitable for sharpening the flat top. Always choose a file that fits comfortably within the gullet of the tooth.
- Achieve the Correct Angle: This is where precision is key.
- For ATB Teeth: Insert the round file into the gullet. Position the file so it’s parallel to the cutting edge of the tooth. The file should touch the gullet and the top bevel of the tooth. Aim to restore the original bevel angle. Most ATB blades have a 15-20 degree bevel.
- For FTG Teeth: Use a mill file and place it flat on the top of the tooth. Use a smooth, consistent stroke to create a sharp, flat edge.
- File Consistently:
- Stroke Direction: File away from the cutting edge. For ATB teeth, this means filing from the inside of the gullet out towards the tip of the tooth.
- Pressure: Apply firm, consistent pressure on the forward stroke. Lift the file on the return stroke to avoid dulling the edge.
- Angle Consistency: Use a tooth gauge or protractor to check your angles periodically. Aim for the same angle on every tooth.
- Sharpen Every Tooth: Move to the next tooth, following the ATB pattern (sharpening one bevel, then the opposite bevel on the next tooth). For FTG, you sharpen each tooth similarly.
- Progress Through Teeth: Continue this process, moving around the blade. It’s helpful to count your strokes per tooth and try to apply the same number of strokes to each.
- Sharpen the Gullets: After sharpening the cutting edges, use a round file to smooth and shape the gullets. This improves chip clearance and reduces the chance of cracks forming.
- Deburr the Blade: After filing, there might be small burrs on the teeth. You can gently remove these by lightly dragging the file across the back edge of each tooth, or by using a fine-grit abrasive stone.
- Clean Again: Wipe down the blade thoroughly with a clean cloth and solvent to remove any metal filings.
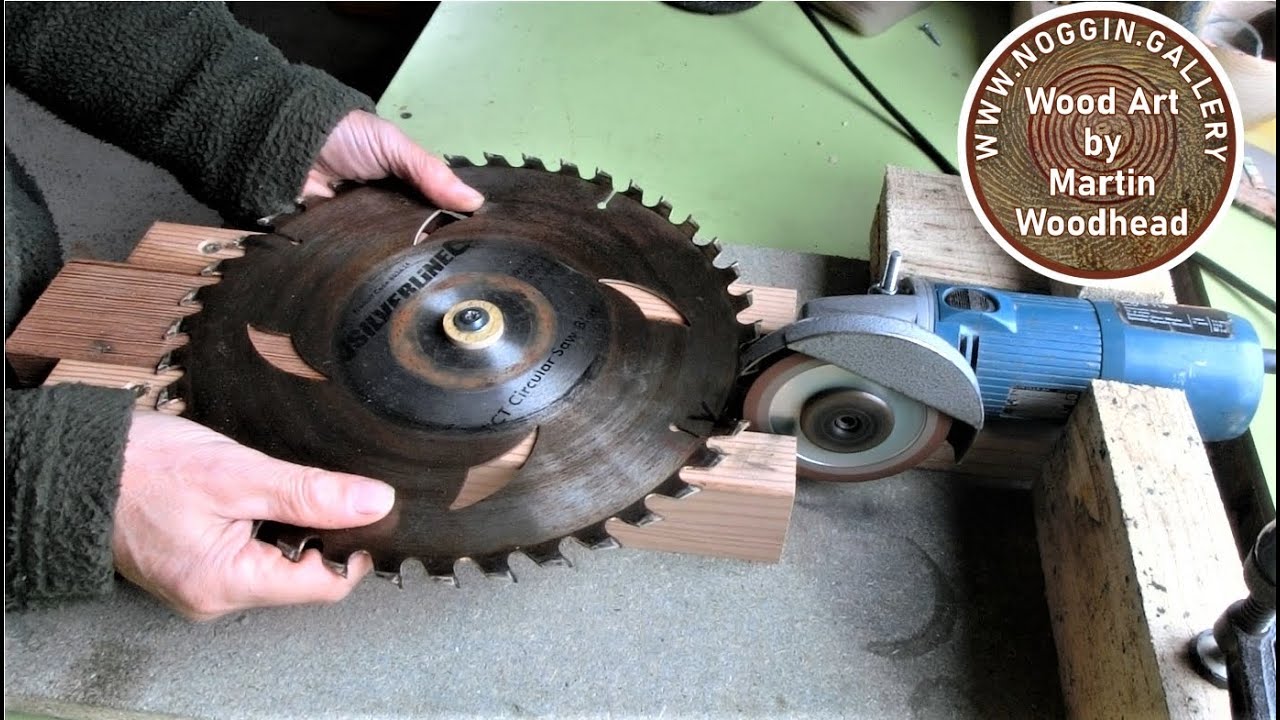
2. Grinding: The Faster, More Efficient Method
Using a bench grinder, especially with a specialized sharpening jig for circular saws, can significantly speed up the process and provide very consistent results. However, it requires more skill to avoid overheating and damaging the blade.
Steps for Grinding:
- Secure the Blade: Mount the blade securely in a vice.
- Set Up the Grinder: Use a thin cut-off wheel or a grinding wheel appropriate for metal. Many grinders have adjustable tool rests. If using a jig, follow its instructions for setting up the grinder.
- Position the Blade: If using a jig, mount the blade onto the jig according to its instructions. The jig will hold the blade at the correct angles for grinding.
- Grind the Teeth:
- ATB Teeth: Position the grinding wheel against the beveled face of a tooth. Move the wheel in a smooth motion, grinding away the dull metal. Crucially, do not let the tooth overheat. Overheating can anneal (soften) the steel, ruining the temper and making the teeth dull very quickly. A light touch and frequent dips in water to cool the blade are essential.
- FTG Teeth: Grind the flat top surface of the teeth.
- Maintain Angles: The jig should automatically maintain the correct grind angles. If you’re freehanding, a tooth gauge is vital.
- Work Systematically: Grind one side of all the teeth, then move to the other side if necessary. For ATB blades, you’ll grind one bevel on one tooth, then the opposite bevel on the next.
- Cooling is Key: Dip the blade in water frequently to prevent it from becoming too hot. You can often hear the grinding sound change as the metal heats up.
- Sharpen Gullets: After grinding the cutting edges, you may need to address the gullets with a file or a specialized grinding attachment if your grinder setup allows.
- Deburr: Lightly deburr the teeth as described in the filing section.
- Clean Thoroughly: Clean the blade with solvent to remove all grinding dust and residue.
Using a Sharpening Jig for Circular Saws
A sharpening jig for circular saws is an invaluable tool for both filing and grinding. These jigs are designed to hold the blade at precise angles, ensuring consistent sharpening across all teeth.
Benefits of a Jig:
- Accuracy: Maintains consistent tooth angles, which is critical for clean cuts.
- Speed: Can speed up the grinding process by holding the blade steadily.
- Ease of Use: Makes the process more manageable, especially for beginners.
- Repeatability: Allows you to reliably reproduce factory sharpness.
When purchasing a jig, ensure it’s compatible with the size of your circular saw blades and that it can accommodate the different tooth profiles you commonly use. Some jigs are designed for specific file sizes, while others are more versatile.
When to Consider a Professional Sharpening Service for Saw Blades
While DIY saw blade sharpening is achievable, there are times when a professional sharpening service for saw blades is the better option.
When to Outsource Sharpening:
- Severely Damaged Teeth: If teeth are chipped, bent, or missing, a professional can often repair or replace them. DIY filing or grinding might not be able to correct significant damage.
- Carbide-Tipped Blades: These blades have small carbide tips brazed onto the steel body. Sharpening these requires specialized grinding wheels and techniques to avoid damaging the carbide or the braze. While some advanced DIYers tackle this, it’s generally best left to professionals.
- Lack of Time or Patience: If you don’t have the time, patience, or the right tools, a professional service can deliver consistent results quickly.
- Specialty Blades: Blades with unique tooth configurations or those used for very specific materials might require expert knowledge.
- High-Value Blades: If you have expensive, high-performance blades, entrusting them to a professional can ensure they are sharpened to their peak performance without risk of damage.
A good sharpening service for saw blades will typically use automated machinery to ensure precise angles and consistent results. They can also check for blade flatness and runout.
Advanced Techniques and Tips for Extending Circular Saw Blade Life
Beyond just sharpening, a few extra steps can further enhance your blade’s performance and lifespan.
Tips for Extended Life:
- Use the Right Blade for the Job: Using an ATB blade for ripping will dull it faster than using an FTG or combination blade.
- Keep Blades Clean: Pitch and sap build-up make the blade work harder and dull faster. Clean your blades regularly with a suitable solvent.
- Store Blades Properly: Store blades so they don’t bump against other tools or surfaces. Blade cases or racks are ideal.
- Avoid Cutting Foreign Objects: Never cut through nails, screws, or other metal objects embedded in wood. This will instantly damage the teeth.
- Don’t Force the Cut: Let the blade do the work. Forcing it will dull the teeth and increase the risk of kickback.
- Check Blade Alignment: Ensure your saw’s blade is properly aligned with the fence and guard. Misalignment can cause uneven wear.
- Resharpen Before It’s Too Dull: The easier it is to sharpen a blade, the better the results. Waiting too long makes the sharpening process more difficult and can lead to more significant tooth damage.
How Many Times Can a Circular Saw Blade Be Sharpened?
This is a common question in circular saw blade maintenance. The answer depends on several factors:
- Blade Quality: Higher quality blades made from better steel can withstand more sharpening cycles.
- Tooth Design: Blades with more teeth or different tooth profiles might have varying sharpening capacities.
- Severity of Sharpening: How much metal is removed during each sharpening session. Aggressive sharpening to remove damage will reduce the number of cycles compared to light touch-ups.
- Carbide Tip Thickness (for carbide-tipped blades): The thicker the carbide tip, the more times it can be resharpened by a professional service.
- DIY vs. Professional Sharpening: Professionals often have machines that remove less material per sharpening compared to less precise DIY methods.
As a general rule, a good quality steel blade can typically be sharpened 5-10 times before the teeth become too small or worn to effectively resharpen, or the blade body itself is compromised. Carbide-tipped blades can often be resharpened many more times by professionals, as only the carbide tips are ground.
Troubleshooting Common Sharpening Issues
Even with the best intentions, you might encounter some problems.
Common Problems and Solutions:
- Uneven Teeth: This usually results from inconsistent filing or grinding angles. Re-evaluate your technique or jig setup.
- Overheating the Blade: This is a major concern when grinding. Ensure you are using a light touch, cooling the blade frequently in water, and not forcing the grinder.
- Not Sharp Enough: The file might be worn out, the angle is incorrect, or you haven’t removed enough material.
- Blade Wobble (Runout): This is often a sign of a bent blade or an improperly seated blade on the saw arbor, not usually a sharpening issue, but can be exacerbated by uneven sharpening.
- Damage to Carbide Tips: If you’re sharpening carbide-tipped blades with the wrong tools or techniques, you risk chipping or removing too much of the carbide.
Frequently Asked Questions (FAQ)
Q1: What is the best way to sharpen circular saw blades?
The best way depends on your skill level, available tools, and the type of blade. For most DIYers, using a quality sharpening jig for circular saws with appropriate sharpening files for saws offers a good balance of control and effectiveness. For carbide-tipped blades or if precision is paramount, a professional sharpening service for saw blades is often the most reliable option.
Q2: Can I use a regular metal file to sharpen a circular saw blade?
While you can use a regular metal file (like a mill file) for certain tooth profiles, specialized sharpening files for saws are highly recommended. These files are designed with specific tooth geometries and hardness to efficiently and accurately grind saw teeth, leading to a sharper, longer-lasting edge.
Q3: How do I know when my circular saw blade is too dull to sharpen?
If your saw is struggling to cut, producing rough or splintered edges, or if you have to force the blade through the material, it’s likely dull. For carbide-tipped blades, if the carbide tips are chipped, worn down to the metal backing, or broken, it’s time for professional sharpening or replacement.
Q4: How often should I sharpen my circular saw blades?
This depends on usage. For light DIY use, you might sharpen a blade every 6-12 months. For heavy use or if you notice a significant decrease in cutting performance, sharpen it sooner. Regularly cleaning your blades will also help them stay sharper longer.
Q5: Will sharpening my blade affect its balance?
Proper sharpening, especially when using a jig or following consistent techniques, should not significantly affect the blade’s balance. However, aggressive or uneven grinding, or if teeth are removed unevenly, can lead to imbalance. This is one reason why professional sharpening is often preferred for critical applications.
By following these guidelines and practicing patience, you can master the art of saw blade sharpening and ensure your circular saw performs at its best for years to come. This commitment to circular saw blade maintenance will save you money, improve your work quality, and enhance your safety in the workshop.