
Image Source: i.ytimg.com
How To Sharpen Mower Blade With Angle Grinder Easily
Yes, you can easily sharpen your mower blade with an angle grinder. This method is a quick and effective way to restore your blade’s cutting edge, ensuring a cleaner cut for your lawn and reducing stress on your mower.
A sharp mower blade is crucial for a healthy, beautiful lawn. A dull blade tears grass rather than cutting it, leading to ragged edges that are prone to disease and browning. Regularly sharpening your mower blade is a key part of mower blade maintenance that can significantly improve your lawn’s appearance and your mower’s efficiency. Many homeowners ask, “how to sharpen mower blades?” and using an angle grinder is a popular and efficient answer. This guide will walk you through how to sharpen a mower blade with an angle grinder, making the process straightforward and accessible. We’ll cover everything from choosing the right tools to achieving a razor-sharp edge. If you’ve been wondering about sharpening lawnmower blade techniques or seeking advice on grinding mower blades, you’re in the right place. This article will delve into the specifics of using an angle grinder for mower blade sharpening.
Why Sharpen Your Mower Blade?
A sharp blade does more than just make your lawn look good. It’s vital for the overall health of your grass. Think of it this way: a sharp knife slices cleanly through a tomato, while a dull one crushes it. The same applies to grass.
- Healthier Grass: Sharp blades make clean cuts, allowing grass to heal quickly. Dull blades tear grass, leaving it vulnerable to diseases and pests, which can result in brown patches and an unhealthy appearance.
- Better Lawn Appearance: Clean cuts mean a uniform, manicured look for your lawn. Torn grass often appears jagged and uneven.
- Reduced Mower Strain: A dull blade requires more power from your mower’s engine to cut through grass. This increased strain can lead to premature wear and tear on the engine, belt, and other components. Sharpening your mower blade can extend the life of your mower.
- Improved Fuel Efficiency: When your mower doesn’t have to work as hard, it uses less fuel.
- Faster Mowing: A sharp blade cuts more efficiently, potentially allowing you to mow your lawn faster.
Choosing the Right Angle Grinder and Accessories
When considering an angle grinder for mower blade sharpening, selecting the right tool and attachments is important. Not all grinders are created equal, and using the correct accessories will make the job safer and more effective.
The Angle Grinder
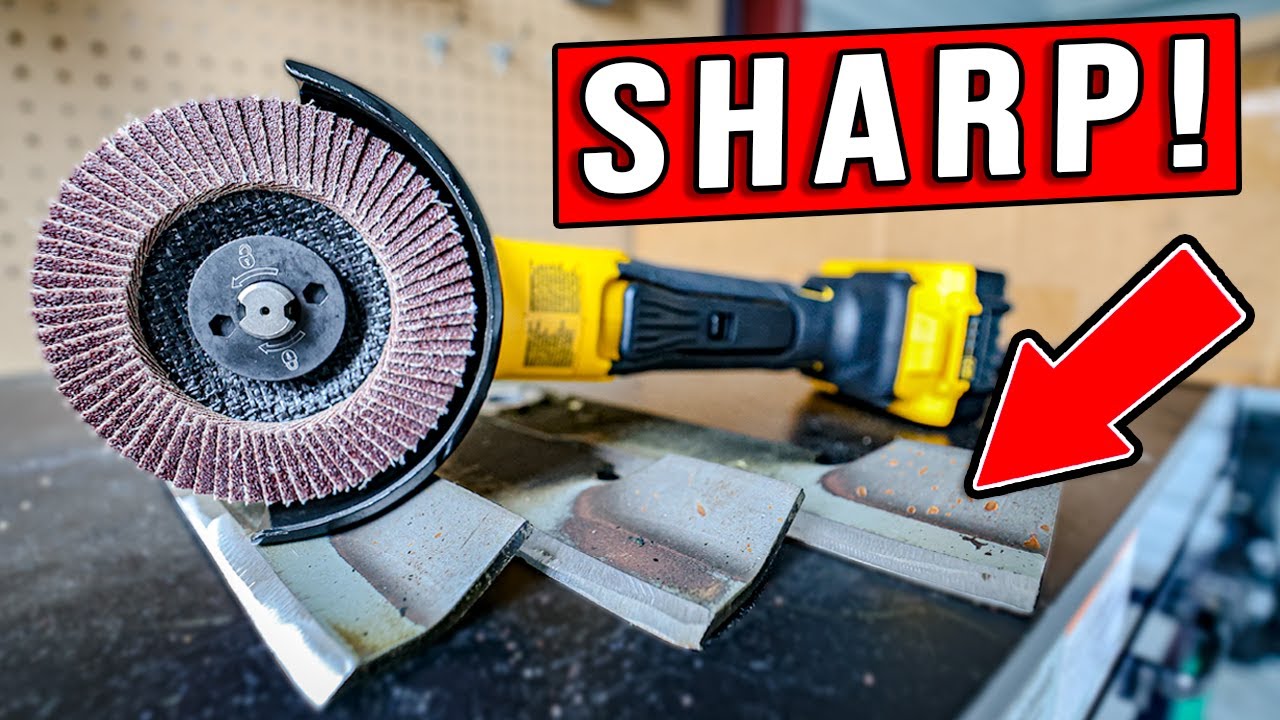
For mower blade sharpening, a corded angle grinder is generally preferred over a cordless one. Corded models offer consistent power, which is crucial for a smooth grinding process. Look for a grinder with a comfortable grip and a reasonable weight for your comfort during use. Horsepower is also a factor; more power means it can handle the metal more easily. A 4.5-inch or 5-inch grinder is typically sufficient for most lawnmower blades.
Essential Accessories for Mower Blade Sharpening
- Grinding Disc: This is the most critical accessory. You’ll want a good quality metal grinding disc. These discs are designed to remove material efficiently. For mower blades, a 60-grit or 80-grit disc is a good starting point. A finer grit disc can be used for finishing if desired.
- Flap Disc (Optional but Recommended): A flap disc, often made of aluminum oxide or zirconia, is excellent for smoothing and refining the edge after grinding. It helps remove any burrs and leaves a cleaner finish. A 60-grit or 80-grit flap disc is a good choice.
- Wire Wheel Brush: This is useful for cleaning the blade before and after sharpening, removing grass, dirt, and rust.
- Bench Vise or Clamp: You’ll need a secure way to hold the mower blade while you work. A sturdy bench vise is ideal. If you don’t have a vise, strong C-clamps can be used to attach the blade to a workbench.
Safety Gear – Non-Negotiable!
Safety is paramount when working with power tools. Never skip these items.
- Safety Glasses or Face Shield: Protect your eyes from flying debris and sparks. A full face shield offers the best protection.
- Gloves: Heavy-duty work gloves will protect your hands from sharp edges, heat, and debris.
- Hearing Protection: Angle grinders can be very loud. Earplugs or earmuffs are essential.
- Dust Mask or Respirator: Grinding metal creates fine dust particles that can be harmful to inhale.
- Flame-Resistant Clothing: Wear long sleeves and pants made of natural fibers (like cotton) to protect against sparks. Avoid synthetic materials that can melt.
- Sturdy Footwear: Protect your feet from falling objects.
Preparing Your Mower Blade for Sharpening
Proper preparation ensures a smooth and efficient sharpening process.
1. Removing the Mower Blade
- Safety First: Always disconnect the spark plug wire before attempting to remove the blade. This prevents the engine from accidentally starting.
- Secure the Mower: Place blocks of wood under the mower deck to keep it stable and prevent it from tipping.
- Access the Blade: You may need to tilt the mower. If tilting, tilt it so the carburetor side is facing upwards to prevent fuel or oil from leaking into the carburetor or muffler.
- Loosen the Blade Bolt: Use a socket wrench that fits the blade bolt. You might need a breaker bar for extra leverage. Often, the blade bolt is very tight. To prevent the blade from spinning while you loosen the bolt, you can use a block of wood to wedge between the blade and the mower deck, or have someone hold the blade firmly. For stubborn bolts, you might need to use a penetrating oil and let it sit for a while.
- Remove the Blade: Once loosened, carefully unscrew the bolt and remove the blade. Pay attention to the order of washers and the blade itself, as they will need to be reassembled in the correct order.
2. Cleaning the Blade
Before you start grinding, it’s essential to clean the blade thoroughly.
- Remove Debris: Use a wire brush or a scraper to remove any caked-on grass, mud, or other debris.
- Inspect for Damage: While cleaning, inspect the blade for any nicks, cracks, or bent sections. Minor nicks can often be ground out, but significant damage might require blade replacement. If you find cracks, it’s safer to replace the blade.
3. Securing the Blade for Grinding
This is where your vise or clamps come in.
- Vise Method:
- Open your bench vise wide enough to grip the blade.
- Grip the blade securely in the vise, ensuring the cutting edge you intend to sharpen is accessible and the blade is held firmly at an angle that allows you to work comfortably. It’s often best to clamp the blade by the flat part of the blade, away from the cutting edge.
- Clamp Method:
- If using clamps, secure the blade to a sturdy workbench. Use at least two C-clamps to hold the blade firmly. Position them to prevent any movement during grinding.
The Angle Grinder Sharpening Process: Step-by-Step
Now that everything is prepared, let’s get to the core of how to sharpen a mower blade with an angle grinder. This method focuses on restoring the original bevel angle.
Step 1: Identify the Bevel Angle
Most mower blades have a specific bevel angle designed for cutting grass efficiently. This angle is typically between 30 and 45 degrees. You’ll notice that the cutting edge is slightly angled. You want to maintain this original angle when sharpening. Look closely at the edge; you should see the original ground surface. Your goal is to re-establish this.
Step 2: Mount the Grinding Disc
- Safety First: Ensure the angle grinder is unplugged.
- Disc Installation: Attach the metal grinding disc to the angle grinder, following the manufacturer’s instructions. Make sure it’s securely tightened.
Step 3: Grinding the Blade – The Core Process
- Positioning: Hold the angle grinder firmly with both hands. Approach the blade at the correct bevel angle.
- Grinding Motion:
- Start by gently touching the spinning disc to the cutting edge of the blade, matching the existing bevel angle.
- Use a smooth, sweeping motion along the length of the cutting edge. Do not linger in one spot, as this can overheat and damage the blade’s temper.
- Work from the center of the blade towards the tip. This helps maintain the blade’s balance.
- Grind each side of the blade equally. Aim to remove the same amount of metal from both sides to keep the blade balanced. An unbalanced blade can cause excessive vibration, leading to wear on your mower.
- Cooling: Metal gets hot when ground. It’s a good idea to dip the blade in water periodically to cool it down. This prevents overheating, which can weaken the steel and reduce its ability to hold an edge. This is especially important if you are removing significant material.
- Checking Progress: Periodically stop grinding and examine the edge. You are looking for a consistent, sharp edge. You’ll see sparks flying as you grind.
- Dealing with Nicks: If you have small nicks, you might need to grind a little more aggressively in that area, but always try to maintain the overall bevel angle. For deeper nicks, you may need to use a coarser grit disc initially or consider if the blade is salvageable.
Step 4: Refining the Edge (Optional but Recommended)
- Switching Discs: Once you’ve established a good edge with the grinding disc, you can switch to a flap disc for a smoother finish.
- Flap Disc Technique: Use the same sweeping motion and bevel angle as before. The flap disc will remove less material but will refine the edge and help remove any burrs left by the grinding disc.
Step 5: Deburring and Balancing
- Burr Removal: After grinding and refining, there might be a slight burr on the underside of the cutting edge. You can often remove this with a few light passes of the grinding disc or flap disc, or with a file. A burr is a thin, rough edge that can break off easily and unbalance the blade.
- Blade Balancing: This is a critical step for mower blade maintenance. An unbalanced blade will cause your mower to vibrate excessively, potentially damaging bearings and the engine.
- Blade Balancer: The easiest way to check balance is with a dedicated blade balancer, which you can buy at most hardware stores. Place the center hole of the blade on the balancer. If one side dips down more than the other, it’s unbalanced.
- Balancing Method: If unbalanced, use the angle grinder (or a grinding wheel) to very lightly grind metal off the heavier side. Grind just a small amount, then recheck the balance. Repeat until the blade remains level on the balancer. You can also use a screwdriver or a nail through the center hole to check balance, but a dedicated balancer is more accurate. Grind small amounts to avoid removing too much material.
Reinstalling the Mower Blade
Once your blade is sharpened and balanced, it’s time to put it back on your mower.
1. Cleaning the Mower Deck and Blade Mounting Area
- Before reinstalling, clean the area around the blade spindle on the mower deck. This ensures a snug fit for the blade.
2. Reinstalling the Blade
- Correct Orientation: Ensure the blade is installed with the “grass side” or “cut side” facing downwards. The angled part of the blade should be pointing towards the ground. The blade also has an upward-facing part for lifting grass.
- Order of Components: Reinstall the blade in the same order that it was removed: bolt, any washers, the blade itself, and then any other washers and the bolt.
- Tightening the Bolt: Tighten the blade bolt securely. Use a torque wrench if you know the manufacturer’s recommended torque setting. If not, tighten it very firmly. Again, you might need to hold the blade to prevent it from turning as you tighten the bolt.
3. Final Checks
- Reconnect Spark Plug: Don’t forget to reconnect the spark plug wire.
- Test Run: Start your mower and listen for any unusual vibrations. A properly sharpened and balanced blade should result in a smooth operation.
Tips for Optimal Mower Blade Sharpening with an Angle Grinder
- Work in Sections: Don’t try to sharpen the entire blade in one go. Work in sections of a few inches at a time, moving along the blade.
- Keep the Grinder Moving: Constant movement is key to preventing overheating and creating an even edge.
- Light Pressure: Let the grinder do the work. Excessive pressure can overheat the blade and damage its temper.
- Listen to Your Grinder: If the grinder seems to be struggling, you might be applying too much pressure or the disc might be dull.
- Practice Makes Perfect: Your first few attempts might not be perfect. Don’t get discouraged. Mower blade maintenance gets easier with practice.
- Consider Replacement Blades: If your blade is severely damaged (bent, cracked, or heavily worn), it’s often more cost-effective and safer to replace it with a new one rather than trying to grind out significant damage.
Alternatives to Angle Grinder Sharpening
While an angle grinder is a fast and effective tool for mower blade sharpening, other methods exist:
- Bench Grinder: Similar to an angle grinder but stationary, offering more stability. Requires careful handling to maintain the correct angle.
- File: A manual file is the safest option for beginners. It requires more time and physical effort but allows for precise control and is less likely to overheat the blade. This is a good option for minor touch-ups.
- Blade Sharpening Jigs/Guides: These accessories can be attached to angle grinders or held separately to help maintain a consistent bevel angle. They are highly recommended for beginners to ensure accuracy.
- Professional Sharpening Services: Many lawnmower repair shops offer blade sharpening services. This is a convenient option if you prefer not to do it yourself.
Frequently Asked Questions About Mower Blade Sharpening with an Angle Grinder
Q: How often should I sharpen my mower blade?
A: It depends on your lawn and mowing frequency. A general guideline is to sharpen your blade at least once a year, typically at the beginning of the mowing season. If you have a large lawn, mow frequently, or frequently encounter tough weeds or debris, you might need to sharpen it every 25-50 hours of mowing time.
Q: Can I use a flap disc instead of a grinding disc?
A: You can, but a flap disc is generally better for refining an existing edge or for smoother finishing. A dedicated metal grinding disc is usually more effective for removing material and restoring a dull edge. Many people use a grinding disc first and then a flap disc to smooth the edge.
Q: How do I know if my blade is too dull to sharpen?
A: If the blade has significant nicks, cracks, or is excessively worn down, it may be time to replace it. Trying to sharpen a blade with severe damage can be time-consuming and may not result in a well-balanced or effective blade.
Q: Will sharpening my blade with an angle grinder ruin its temper?
A: Overheating the blade can indeed ruin its temper, making it softer and less able to hold a sharp edge. To prevent this, use light pressure, keep the grinder moving, and cool the blade in water periodically.
Q: What is the correct angle to hold the grinder when sharpening?
A: Aim to match the original bevel angle of the blade, which is typically between 30 and 45 degrees. Look at the existing ground edge for guidance.
Q: Is it safe to sharpen a mower blade with an angle grinder?
A: Yes, it is safe when performed with proper safety precautions. Always wear safety glasses, gloves, hearing protection, and appropriate clothing. Ensure the blade is securely clamped and the grinder is in good working condition.
By following these steps and prioritizing safety, you can effectively sharpen your mower blade with an angle grinder, leading to a healthier lawn and a better-performing mower. Regular mower blade maintenance is a simple yet impactful task that every homeowner can undertake.