
Image Source: i.ytimg.com
How To Test A Circuit Breaker With A Voltmeter Safely
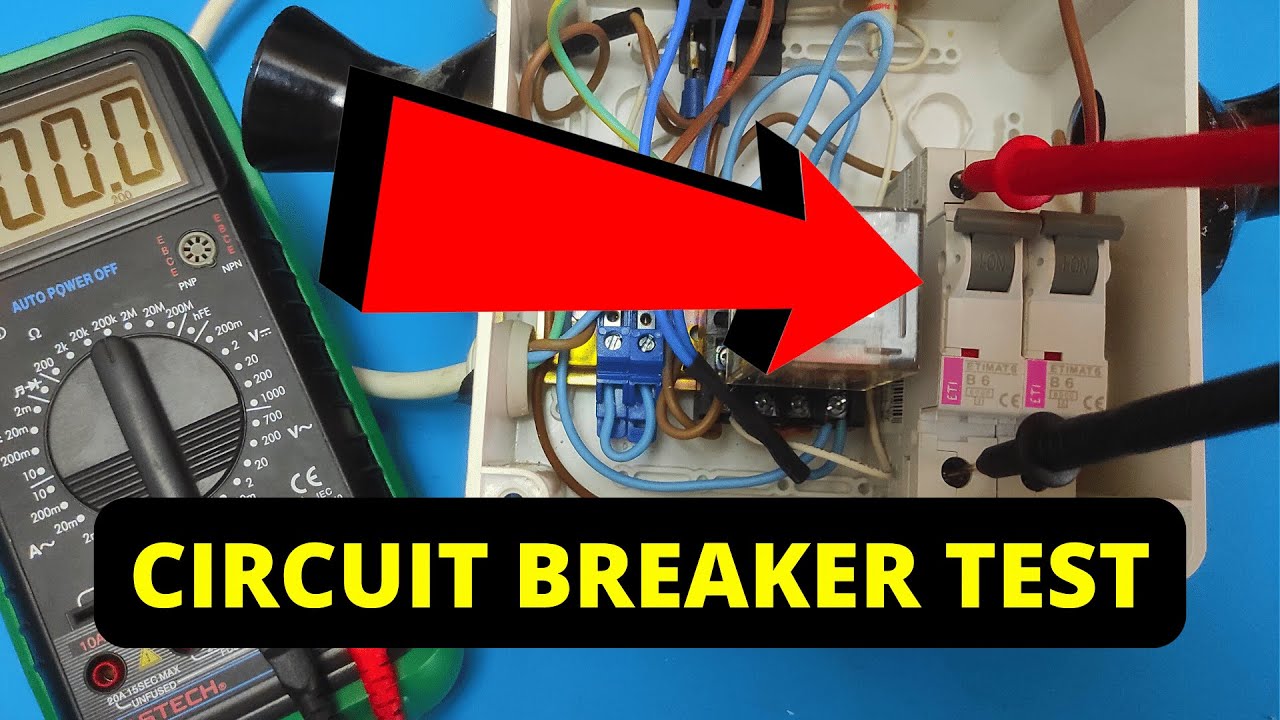
Can I test a circuit breaker with a voltmeter? Yes, you can test a circuit breaker with a voltmeter to check for the presence and absence of voltage, which is a key step in troubleshooting circuit breaker issues. This guide will walk you through the process of circuit breaker testing using a voltmeter, covering breaker resistance measurement and how to perform a voltmeter circuit check for fault finding electrical circuit situations. We’ll also discuss essential safety precautions breaker testing and how to use a multimeter circuit breaker capabilities.
Why Test A Circuit Breaker?
Circuit breakers are vital safety devices in your home’s electrical system. They protect your wiring from overloads and short circuits, preventing fires and damage. When a breaker “trips” or fails to deliver power to a circuit, it’s crucial to determine if the breaker itself is the culprit. Testing a circuit breaker helps you diagnose problems efficiently and safely. This process is a fundamental part of troubleshooting circuit breaker behavior.
What You’ll Need
- A Voltmeter or Multimeter: Ensure it’s rated for household voltages (e.g., 120V/240V AC). A multimeter offers more versatility with other testing functions.
- Screwdriver: For accessing the electrical panel cover.
- Safety Glasses: To protect your eyes.
- Insulated Tools: Tools with insulated handles are a must for electrical work.
- Non-conductive Ladder (if needed): For reaching high electrical panels.
Safety First: The Golden Rule
Working with electricity can be dangerous if not done correctly. Always prioritize safety.
Crucial Safety Precautions for Breaker Testing
- Never work on a live electrical panel without proper precautions. If you are unsure or uncomfortable, always call a qualified electrician.
- Turn off the main breaker before opening the electrical panel cover. This significantly reduces the risk of electrical shock.
- Wear safety glasses.
- Use insulated tools.
- Keep your work area dry. Water and electricity are a dangerous combination.
- Do not touch metal parts of the panel or wires directly.
- Know your equipment. Read the manual for your voltmeter or multimeter.
- Test your voltmeter on a known live source first (like a working outlet) before testing the breaker. This confirms your meter is working correctly.
- After testing, test your voltmeter on the known live source again. This is a crucial safety check.
Understanding Electrical Panels
Your electrical panel is the heart of your home’s electrical distribution system. It contains a main breaker and several smaller branch circuit breakers. Each breaker controls a specific circuit (e.g., lights in a room, outlets in the kitchen). Understanding the layout of your electrical panel voltage distribution is key.
How to Test a Circuit Breaker: Step-by-Step
Testing a circuit breaker with a voltmeter primarily involves checking for voltage at the breaker’s terminals. This can be done with the breaker in both the ON and OFF positions. We will cover two main scenarios: testing a breaker that has tripped and testing a breaker that appears to be functioning but you suspect is faulty.
Scenario 1: Testing a Tripped Circuit Breaker
If a circuit breaker has tripped (you’ll often see the handle in a middle or “OFF” position), you can test it to see if power is still reaching it.
Step 1: Turn off the Main Breaker
Locate the main breaker in your electrical panel and switch it to the OFF position. This de-energizes the entire panel, making it safer to work inside.
Step 2: Open the Panel Cover
Carefully remove the cover of your electrical panel. This usually involves unscrewing a few screws.
Step 3: Set Your Voltmeter
* If using a multimeter circuit breaker testing, set the dial to AC Voltage (V~ or VAC). Select a range slightly higher than your expected household voltage (e.g., 200V or 300V).
* If using a dedicated voltmeter, ensure it’s set for AC voltage.
Step 4: Test Your Voltmeter (Safety Check)
Touch the probes of your voltmeter to the terminals of a known working outlet or directly to the terminals of the main breaker (if it’s still ON for this test, otherwise use a known live source). You should get a reading of approximately 120V (or 240V between two hot legs). If not, your meter may be faulty, and you should not proceed.
Step 5: Locate the Tripped Breaker
Identify the breaker that has tripped. Note that some breakers, when tripped, have their handle in a position that is not fully ON or OFF, but rather in a middle detent.
Step 6: Test Voltage at the Breaker Terminals
* With the main breaker OFF, this step is primarily for checking if the breaker has continuity when it should have power. However, for safety, it’s best to perform the next critical voltage check with the main breaker ON.
* Turn the Main Breaker back ON. This re-energizes the busbars within the panel.
* Carefully touch one probe of your voltmeter to the screw terminal on the side of the tripped breaker (where the wire from the panel connects to the breaker).
* Touch the other probe to the neutral busbar (a metal bar with many wires connected to it, usually white or bare copper). You should read approximately 120V. This confirms that power is reaching the breaker.
* Now, touch the other probe to a ground connection (usually a metal bar with green screws or bare copper wires). You should also read approximately 120V.
* Crucially, turn the tripped breaker to the ON position. Be prepared for the possibility that the circuit might then work, or the breaker might immediately trip again.
* With the breaker now in the ON position, touch one probe to the breaker’s output terminal (where the circuit wire connects) and the other probe to the neutral or ground. You should now read approximately 120V. If you still read voltage on one side of the breaker but not the other after attempting to turn it ON, the breaker may be faulty.
Step 7: Test for Output Voltage
With the breaker in the ON position (if it allowed you to move it there), and assuming you still have power reaching the breaker, test the output terminal where the wire for the circuit connects. Touch one probe to this terminal and the other to neutral or ground.
* If you read ~120V, the breaker is likely passing power. The problem might be further down the circuit (e.g., a loose wire, a faulty appliance, or a problem in the outlet).
* If you read 0V, even though power is reaching the breaker, it indicates a faulty breaker that isn’t passing power.
Step 8: Turn Off the Main Breaker Again
Before touching anything else or reassembling, always turn the main breaker back OFF.
Scenario 2: Testing a Breaker That Hasn’t Tripped (But Might Be Faulty)
Sometimes a breaker doesn’t trip but fails to deliver power to its circuit, or you suspect it’s not protecting the circuit properly.
Step 1: Turn off the Main Breaker.
Step 2: Open the Panel Cover.
Step 3: Set Your Voltmeter (as described in Scenario 1).
Step 4: Test Your Voltmeter (as described in Scenario 1).
Step 5: Locate the Breaker in Question.
Step 6: Test Incoming Voltage
* Turn the Main Breaker back ON.
* Touch one probe of your voltmeter to the incoming terminal of the breaker you are testing (where power from the panel busbar connects).
* Touch the other probe to the neutral or ground busbar. You should read approximately 120V. This confirms that power is supplied to the breaker.
Step 7: Test Outgoing Voltage
* Ensure the breaker you are testing is in the ON position.
* Touch one probe of your voltmeter to the output terminal of the breaker (where the circuit wire connects).
* Touch the other probe to the neutral or ground busbar. You should read approximately 120V.
* **If you read ~120V on the input side but 0V on the output side, the breaker is faulty and needs to be replaced.** This is a common finding during **troubleshooting circuit breaker** issues. * **If you read ~120V on both the input and output sides, the breaker is likely functioning correctly** in terms of passing power. The problem lies elsewhere in the circuit.
Step 8: Turn Off the Main Breaker.
Step 9: Reassemble the Panel Cover.
Step 10: Turn the Main Breaker back ON.
Using a Multimeter for Continuity Test Breaker
A continuity test breaker using a multimeter is a way to check if the breaker itself is allowing current to pass through it when it’s supposed to. This is typically done with the breaker removed from the panel or at least with the power completely OFF.
Safety First: This test requires power to be OFF at the main breaker, and ideally, the breaker’s wires disconnected. If you are not comfortable with this, stick to voltage testing.
Step 1: Turn off the Main Breaker.
Step 2: Open the Panel Cover.
Step 3: Disconnect the Circuit Wire. Carefully unscrew and remove the wire connected to the output terminal of the breaker you want to test. Ensure the wire is safely insulated or moved away so it cannot accidentally touch anything.
Step 4: Set Your Multimeter for Continuity.
* Turn the multimeter dial to the continuity setting. This is usually indicated by a symbol that looks like a sound wave or a diode symbol. When the probes touch, the meter should beep or show a very low resistance reading.
Step 5: Perform the Continuity Test.
* Ensure the circuit breaker is switched to the ON position.
* Place one multimeter probe on the breaker’s input terminal (where the panel connects) and the other probe on the output terminal (where the circuit wire was connected).
* If the meter beeps or shows a very low resistance (near 0 ohms), the breaker has continuity and is likely good. This indicates it’s allowing current to flow through it.
* If the meter does not beep or shows a high resistance reading, the breaker is faulty and needs replacement.
Step 6: Test the Breaker in the OFF Position.
* Switch the circuit breaker to the OFF position.
* Repeat the continuity test. You should not get a beep or a low resistance reading. If you do, the breaker is faulty as it’s allowing current to pass even when it’s supposed to be off.
Step 7: Reconnect and Turn Off Main Breaker.
* Reconnect the circuit wire to the breaker terminal.
* Turn the main breaker OFF before reassembling the panel cover.
Breaker Resistance Measurement
While a direct breaker resistance measurement isn’t the primary method for testing a breaker’s functionality in the field, the continuity test essentially checks for very low resistance. A breaker is designed to have extremely low resistance when it’s closed (ON) and infinite resistance when it’s open (OFF) or tripped. Testing resistance in this manner is best done with the breaker de-energized and ideally disconnected.
When to Suspect a Faulty Breaker
- Frequent Tripping: If a breaker trips repeatedly even when the circuit is not overloaded.
- Failure to Reset: If the breaker handle will not stay in the ON position.
- No Power to the Circuit: If an outlet or light connected to a specific breaker has no power, and the breaker is not tripped.
- Warm or Hot to the Touch: A breaker that feels unusually warm or hot to the touch, even when not tripped, can indicate internal issues.
- Visible Damage: Any signs of burning, discoloration, or physical damage to the breaker.
What is a Live Circuit Voltage Test?
A live circuit voltage test is precisely what we described in the voltmeter scenarios: testing for voltage while the circuit is energized. It’s crucial for diagnosing why a circuit isn’t working. By checking voltage at different points, you can pinpoint where the power is being interrupted.
- Testing the incoming side of the breaker: Confirms power is reaching the breaker.
- Testing the outgoing side of the breaker: Confirms the breaker is passing power.
- Testing at the outlet/fixture: Confirms the entire circuit is live.
Fault Finding Electrical Circuit
Using a voltmeter is a cornerstone of fault finding electrical circuit issues. By systematically checking for voltage:
- At the service entrance: To ensure power is coming into the house.
- At the main breaker: To confirm power distribution.
- At the breaker for the affected circuit: To see if power is reaching the circuit.
- At the breaker’s output: To see if the breaker is passing power.
- At the outlets/fixtures on that circuit: To check if power is reaching the end-user.
Each step helps isolate the problem. If you have voltage at the breaker’s input but not its output, the breaker is the likely cause. If you have voltage at the output but no power at the outlet, the issue is in the wiring between the breaker and the outlet.
Replacing a Circuit Breaker
If you’ve tested a breaker and determined it’s faulty, it can be replaced. However, this is a task that many homeowners prefer to leave to a qualified electrician. The process involves:
- Turning off the main breaker.
- Removing the old breaker: This typically involves unsnapping it off the panel’s busbar and unscrewing the wire connected to it.
- Installing the new breaker: Snapping it onto the busbar and screwing the wire onto its terminal.
- Turning the main breaker back on.
Always ensure you replace a faulty breaker with one of the exact same amperage and type. Using an incorrect breaker is a serious safety hazard.
Frequently Asked Questions (FAQ)
-
Q1: Can I test a circuit breaker with a simple voltage tester (like a non-contact voltage tester)?
- A1: A non-contact voltage tester can indicate the presence of voltage but cannot reliably tell you if a breaker is passing power correctly or measure actual voltage levels. A multimeter or a dedicated voltmeter is necessary for accurate circuit breaker testing.
-
Q2: What does it mean when a circuit breaker handle is in the middle position?
- A2: This typically indicates that the breaker has tripped due to an overload or short circuit. Some breakers also have a “test” button that, when pressed, will move the handle to this tripped position.
-
Q3: If my breaker trips, should I just reset it?
- A3: If a breaker trips, you can reset it by firmly pushing the handle to the OFF position and then back to the ON position. However, if it trips again immediately or frequently, there is an underlying problem (overload, short circuit, or a faulty breaker) that needs to be addressed.
-
Q4: How do I know what amperage my circuit breaker should be?
- A4: The amperage rating of a circuit breaker is stamped on its face. It should match the wire gauge it is protecting. For example, a 15-amp breaker is typically used with 14-gauge wire, and a 20-amp breaker with 12-gauge wire. Replacing a breaker with a higher amperage rating than what the wiring can safely handle is extremely dangerous and can lead to fires.
-
Q5: When should I call an electrician for circuit breaker issues?
- A5: You should always call a qualified electrician if:
- You are uncomfortable or unsure about any step of the testing or replacement process.
- You suspect a serious electrical problem, such as flickering lights, sparking, or a burning smell.
- The main breaker keeps tripping.
- You need to replace a breaker and are not confident in doing so.
- A5: You should always call a qualified electrician if:
By following these steps and prioritizing safety, you can effectively test your circuit breakers and perform basic electrical troubleshooting. Remember, when in doubt, always consult a professional electrician.