
Can you use a skill saw as a table saw? Yes, with the right setup and safety precautions, you can effectively adapt a skill saw to function similarly to a table saw for various cutting tasks.
Many DIY enthusiasts and woodworkers often find themselves needing the precision of a table saw but only have a skill saw (also known as a circular saw) in their toolkit. The good news is, with a little ingenuity and a focus on safety, you can achieve impressive results by converting your skill saw into a makeshift table saw. This guide will walk you through the process of making a table saw with a skill saw or making a table saw with circular saw, detailing various methods, essential jigs, and crucial safety considerations to help you create your own DIY table saw from skill saw.
This approach is ideal for those looking for a portable table saw with skill saw capabilities, allowing you to take your cutting station wherever your projects lead you. We’ll explore how to build a circular saw table saw station or a skill saw work station for ripping that significantly expands the versatility of your basic circular saw.
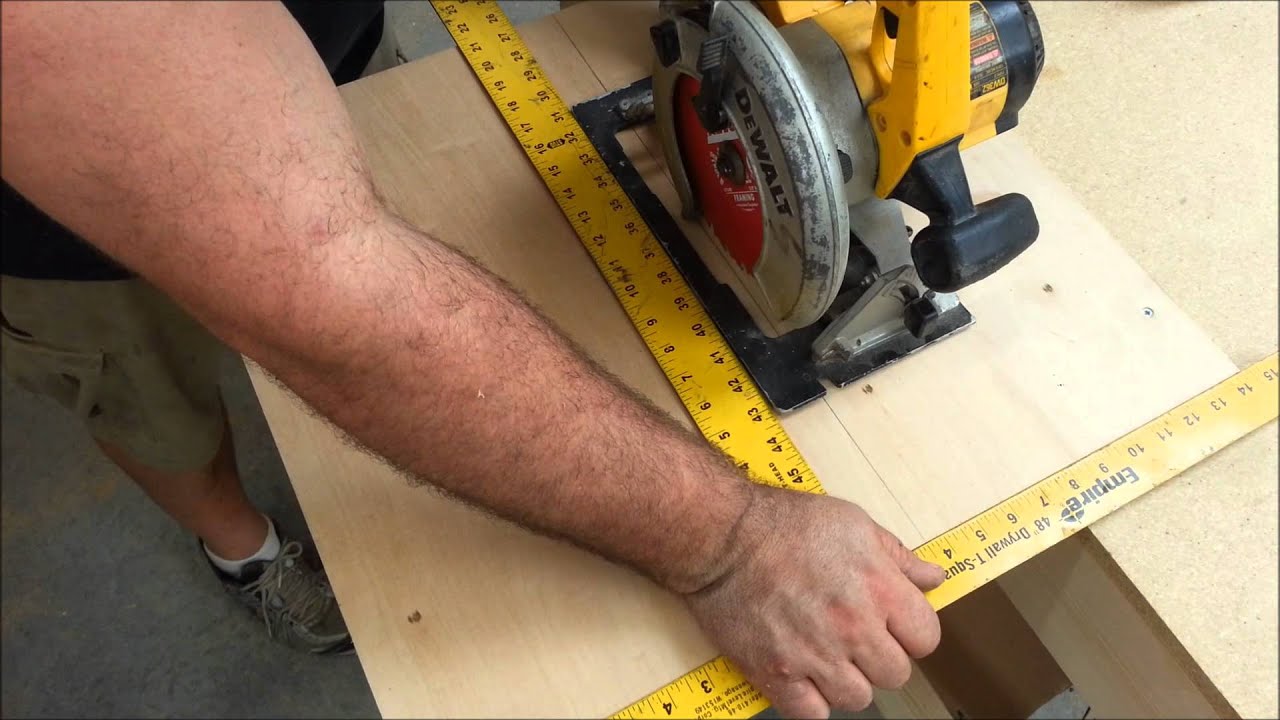
Image Source: i.ytimg.com
The Appeal of a Skill Saw Table Saw Conversion
A table saw offers unparalleled control and accuracy for making long, straight cuts, often referred to as “ripping.” A standard skill saw, while powerful, requires a steady hand and often a guiding jig to achieve similar results. The desire to bridge this gap is what drives the interest in a skill saw table saw conversion.
Here are some key benefits of adapting your skill saw:
- Cost-Effectiveness: Purchasing a dedicated table saw can be a significant investment. Utilizing an existing skill saw is a much more budget-friendly option for achieving table saw-like functionality.
- Portability: Many DIY table saw setups using a skill saw are designed to be portable, making them perfect for job sites or workshops with limited space.
- Versatility: Once you have a good setup, you can tackle a wider range of projects, from cutting large sheets of plywood to making smaller, precise pieces.
- Skill Development: Building your own cutting station is a rewarding project in itself, enhancing your woodworking skills and creativity.
Essential Components for Your Skill Saw Station
Before we dive into the “how-to,” let’s identify the core components you’ll need for a successful circular saw to table saw setup.
The Skill Saw (Circular Saw)
This is your primary cutting tool. Ensure your skill saw is in good working order. Key features to look for include:
- Adjustable Depth of Cut: Crucial for setting the blade depth accurately.
- Bevel Adjustment: Allows for angled cuts if your project requires them.
- Powerful Motor: A higher wattage motor will make ripping thicker materials easier.
- Good Blade: A sharp, clean blade appropriate for the material you’re cutting is essential for smooth, safe cuts.
The Work Surface
This will be the “table” part of your setup. It needs to be flat, sturdy, and large enough to support your workpiece.
- Materials: Plywood (3/4 inch is ideal), MDF, or a sturdy workbench can serve as the base.
- Dimensions: Aim for a surface that is at least 2-3 feet wide and 3-4 feet long, or larger depending on the materials you typically work with.
The Saw Mount and Blade Access
This is where the magic happens – securely attaching your skill saw so the blade protrudes through the work surface.
- Mounting System: This can be a custom-built bracket, a simple plywood cutout, or a specialized jig. The key is to hold the saw firmly and prevent it from shifting during operation.
- Blade Slot: A precise slot needs to be cut into the work surface for the saw blade to pass through.
Fencing and Guides
These are critical for guiding your material and ensuring straight, consistent cuts. This is where jigs come into play.
- Rip Fence: A movable fence that runs parallel to the blade, allowing you to set the width of your cut.
- Crosscut Sled: A jig used for making precise crosscuts (cuts perpendicular to the grain). While not strictly a “table saw” feature, it’s a valuable addition to any cutting station.
Support and Stability
The entire setup needs to be stable to prevent movement and ensure safety.
- Legs/Base: A sturdy base or legs to elevate the work surface to a comfortable working height.
- Clamps: Essential for securing workpieces and the saw itself.
Method 1: The Simple Plywood Station (DIY Table Saw from Skill Saw)
This is one of the most straightforward ways to create a circular saw to table saw setup. It’s a great starting point for those new to this kind of project.
Steps for Construction:
- Choose Your Base Material: Select a flat, sturdy piece of plywood, preferably 3/4 inch thick. The size will depend on your needs, but a 2ft x 3ft or larger piece is a good starting point.
- Mark the Saw Position: Place your skill saw upside down on the plywood base. Position it so the blade will be centered where you want your cutting line to be. Ensure there’s enough space around the blade for the material you’ll be cutting.
- Trace the Blade and Base Plate: Carefully trace the outline of the saw’s base plate (the part that rests on the material). Then, trace the saw blade itself.
- Cut the Blade Slot: This is a critical step. You need to cut a slot for the blade to protrude. The width of this slot should be just wide enough for the blade to pass through freely without excessive wobble. It’s often best to start with a slightly narrower slot and widen it as needed.
- Tip: Use your skill saw with a guide to make the initial cut for the blade slot, ensuring it’s straight.
- Cut the Base Plate Opening: Carefully cut out the traced outline of the saw’s base plate. This opening will allow the saw to sit flush with the surface.
- Mount the Skill Saw:
- Option A (Simple): Position the skill saw so its blade protrudes through the slot. Use sturdy C-clamps to firmly secure the saw’s base plate to the plywood surface. Ensure the saw cannot move in any direction.
- Option B (More Secure): Create a plywood or MDF sub-base that fits into the larger opening. Mount your skill saw to this sub-base, and then secure the sub-base into the main surface. This provides a more robust mounting solution.
- Create a Rip Fence System:
- Simple Guide: You can attach a strip of wood (a “cleat”) to the base with a slot that allows it to slide along the edge of your workbench or a fixed guide on the base.
- Adjustable Fence: For a more professional setup, create an adjustable fence. This typically involves two parallel strips of wood. One is fixed to the table, and the other is attached with slots and knobs or screws, allowing it to slide back and forth to set your cutting width. You’ll need a way to lock it securely in place.
- Add Supports: Build a sturdy base or legs to elevate your cutting surface to a comfortable working height. Ensure the entire structure is stable.
Method 2: The Circular Saw Table Saw Station with a Dedicated Fence
This method builds upon the simple plywood station by incorporating a more robust and adjustable fence system, transforming it into a more functional circular saw table saw station.
Key Enhancements:
- T-Track System: Incorporating T-tracks into the work surface allows for easily adjustable and repositionable fences, miter gauges, and other accessories.
- Robust Rip Fence: A dedicated rip fence, often made from aluminum extrusion or hardwood, offers greater stability and precision. This is crucial for accurate skill saw ripping jig functionality.
- Table Extension: Adding extensions to your work surface can provide more support for larger pieces of material.
Steps for Building an Enhanced Station:
- Construct the Main Table: Use a large, flat piece of 3/4-inch plywood or MDF for the table surface. You can even laminate two pieces together for added rigidity.
- Cut the Blade Slot and Saw Opening: Follow steps 2-5 from Method 1.
- Mount the Saw Securely: A more advanced method involves creating a mounting plate from a thicker material (like 1/2-inch MDF or even metal if you have the tools) onto which you can permanently mount your skill saw. This plate is then secured to the table surface. Ensure the saw is perfectly perpendicular to the table.
- Install T-Tracks: Cut dados (grooves) into the table surface using a router or a skilled saw with a dado blade. Install T-tracks into these dados. This allows your fence system to slide smoothly and be locked down precisely.
- Build an Adjustable Rip Fence:
- Materials: High-quality hardwood (like oak or maple) or aluminum extrusions are excellent choices for a fence.
- Mechanism: The fence should have a base that slides in the T-track. A common design uses a slotted piece of wood that attaches to the fence body, allowing it to be clamped to the T-track. You can add a measurement scale to the fence for quick adjustments.
- Alignment: Ensure the fence is perfectly parallel to the saw blade. You can use a dial indicator or a ruler for precise alignment.
- Consider a Miter Slot: If you have a router, you can also create a miter slot parallel to the blade slot. This allows you to use a miter gauge for accurate crosscuts.
- Build a Stable Base: Construct a robust base with legs to ensure the entire station is stable and at a comfortable working height. Consider adding wheels for portability.
Essential Jigs for Your Skill Saw Table Saw
Jigs are the secret weapon for maximizing the utility and safety of your skill saw work station for ripping. They help guide your material and ensure precise cuts.
The Skill Saw Jig for Table Saw Use
This refers to the overall setup that allows your skill saw to function as a table saw. However, there are specific jigs you can build to enhance its capabilities.
1. The Rip Fence Jig
As discussed, this is crucial. A well-built rip fence jig is essentially the guiding component that makes your skill saw act like a table saw.
Features of a Good Rip Fence Jig:
- Smooth Sliding: The fence should glide effortlessly along the table or guide.
- Secure Locking: It must lock firmly in place without shifting.
- Parallel Alignment: Crucial for straight rips.
- Measurement Scale: Aids in setting cut widths accurately.
2. The Crosscut Sled
While your skill saw station is designed for ripping, a crosscut sled allows for safe and accurate crosscuts, mimicking a miter gauge or crosscut fence on a traditional table saw.
How to Build a Crosscut Sled:
- Base: A flat piece of plywood or MDF, slightly larger than your saw’s throat plate.
- Runners: Two strips of hardwood or plastic that precisely fit into your miter slots (if you installed them) or a dedicated groove. These runners keep the sled aligned with the blade.
- Fence: A sturdy fence attached perpendicularly to the runners. Ensure this fence is perfectly square to the blade slot.
- Blade Guard/Stop: Optionally, you can add a stop block to the fence to control the cut length or a small blade guard.
Using the Crosscut Sled:
Place your material against the sled’s fence and slide the entire sled across the blade for a clean, square cut.
3. The Panel Cutting Jig
For cutting large sheets of plywood or other sheet goods, a panel cutting jig can be a lifesaver. This often involves a long, straight guide that attaches to the sheet goods and a roller guide for your skill saw to follow.
Benefits:
- Provides a long, stable guiding surface.
- Reduces fatigue by allowing you to stand and push the saw.
- Ensures long, straight cuts on large panels.
4. The Dado Jig (Advanced)
While more complex, you can create a jig that allows your skill saw to make dado cuts (grooves) by setting the blade depth and guiding the saw with a fence. This is a more advanced adaptation and requires careful calibration.
Safety First: Essential Precautions
This is paramount. Working with a power tool, especially when it’s been modified or set up in a new way, carries inherent risks. Strict adherence to safety protocols is non-negotiable.
Personal Protective Equipment (PPE)
Always wear:
- Safety Glasses or Face Shield: To protect your eyes from sawdust and flying debris.
- Hearing Protection: Skill saws are loud; earplugs or earmuffs are essential.
- Dust Mask or Respirator: To protect your lungs from fine wood dust.
- Sturdy Footwear: To protect your feet.
- Close-Fitting Clothing: Avoid loose clothing that could get caught in the blade.
Operational Safety Guidelines
- Never Force the Cut: Let the saw do the work. Forcing the blade can lead to kickback or blade binding.
- Keep Blades Sharp and Clean: Dull blades are dangerous and produce poor cuts.
- Ensure the Saw is Securely Mounted: Any movement of the saw can lead to an accident. Double-check all clamps and fasteners.
- Proper Blade Depth: Set the blade depth so it extends just slightly (about 1/8 to 1/4 inch) below the material being cut. This minimizes the risk of kickback.
- Blade Guard Use: Ensure your skill saw’s blade guard is functional and in place. Do not remove or modify it.
- Stable Work Surface: The entire station must be stable and not wobble.
- No Loose Material on the Table: Keep the table surface clear of debris.
- Keep Hands Away from the Blade: Maintain a safe distance from the cutting path at all times.
- Use Push Sticks and Blocks: For smaller pieces or when reaching near the blade, use push sticks or push blocks to guide the material safely.
- Beware of Kickback: Kickback occurs when the wood is suddenly thrown back towards the operator. This can happen if the blade binds in the wood, the wood twists, or the cut closes on the blade. Always stand to the side of the blade path, not directly behind it.
- Unplug When Adjusting: Always unplug the saw before making any adjustments, changing blades, or cleaning.
- Work in a Well-Lit Area: Good lighting is crucial for visibility.
- Read Your Saw’s Manual: Familiarize yourself with the specific operating instructions and safety features of your skill saw.
Specific Safety for Skill Saw as Table Saw Conversion:
- Blade Alignment: Ensure the blade is perfectly perpendicular to the table surface. A slight misalignment can lead to binding and kickback.
- Fence Parallelism: Regularly check that your rip fence is perfectly parallel to the blade.
- Throat Plate Fit: The opening for the blade should be as snug as possible. A large gap can allow small offcuts to fall into the mechanism or cause material to snag.
- No Overhanging Workpiece: Do not let the workpiece extend too far past the edge of the table.
- Avoid Small Pieces: This setup is not ideal for cutting very small pieces of wood. Use dedicated jigs or traditional table saw methods for those.
Advanced Techniques and Considerations
Achieving Precision Cuts
- Calibration: Regularly calibrate your fence and any crosscut sleds to ensure accuracy.
- Material Support: For long or heavy pieces, ensure adequate support both on the infeed and outfeed sides of your cutting station. Roller stands are invaluable.
- Blade Choice: Use the right blade for the material. A fine-tooth blade is best for plywood and melamine, while a coarser blade might be better for rough lumber.
Adding Features
- Dust Collection: While more complex, you can integrate a dust collection port into your station’s base to improve air quality.
- Blade Brake: Some skill saws have a brake that quickly stops the blade. This is a valuable safety feature.
- Magnetic Blade Holder: A simple magnet mounted to the side of the station can be handy for holding spare blades.
When to Consider a Real Table Saw
While a skill saw conversion is a fantastic DIY solution, it’s important to recognize its limitations. For very high-volume production, extremely precise joinery, or when safety is a paramount concern with complex cuts, a dedicated table saw is often the superior choice. However, for the hobbyist or occasional user, a well-built skill saw station can serve admirably.
Frequently Asked Questions (FAQ)
Q1: Is it safe to use a skill saw as a table saw?
A: Yes, it can be safe if you take the necessary precautions. The key is a secure mounting system for the saw, a stable work surface, and strict adherence to all safety guidelines, including using appropriate personal protective equipment and understanding the risks of kickback.
Q2: What kind of wood is best for building the table saw station?
A: 3/4-inch plywood or MDF are excellent choices. They are flat, stable, and easy to work with. For critical components like the fence, hardwoods like oak or maple offer greater durability and stability.
Q3: How do I ensure the rip fence is parallel to the blade?
A: You can use a ruler or measuring tape to measure the distance from the blade to the fence at both the front and back of the blade. Adjust the fence until these measurements are identical. For greater precision, a dial indicator can be used.
Q4: Can I cut dadoes with this setup?
A: Yes, with some advanced techniques and careful setup. You’ll need to set the blade depth precisely and potentially use a specialized jig to guide the saw for consistent groove width. Always ensure the wood is firmly held and that you have a clear understanding of the process to avoid kickback.
Q5: What is the advantage of a T-track system on my station?
A: T-tracks allow for quick and easy attachment and adjustment of fences, miter gauges, stops, and other accessories. They provide a versatile and professional way to customize your workstation.
Q6: How do I prevent the saw from moving during operation?
A: Use heavy-duty C-clamps or bolt the saw’s base plate to a sturdy sub-base. Ensure all mounting hardware is tightened securely. For more permanent setups, consider routing a recessed area for the saw’s base plate.
Q7: What kind of blade should I use?
A: For general ripping and crosscutting of plywood and softwoods, a 40-tooth general-purpose blade is usually suitable. For finer cuts on hardwoods or plywood, consider a 60-tooth or even 80-tooth blade. Always ensure the blade is sharp and clean.
Q8: How do I make long rip cuts safely?
A: Use a stable rip fence and ensure the workpiece is supported throughout the cut. A clamp on the outfeed side can help prevent the offcut from falling and binding the blade. A zero-clearance insert (a small piece of thin material fitted around the blade) can also help support the wood and prevent tear-out.
By following these detailed instructions and prioritizing safety, you can successfully convert your skill saw into a highly functional table saw, opening up a world of new woodworking possibilities.