
What is a tile saw? A tile saw is a power tool designed specifically for cutting tiles, most commonly using a rotating diamond blade that is cooled by water. Can I cut ceramic tile with a tile saw? Yes, you absolutely can, and it’s one of the primary uses for this versatile tool, making tile cutting much easier and more precise. Who is a tile saw for? Tile saws are used by both DIY enthusiasts and professional tile installers to achieve clean, accurate cuts for various tiling projects.
Cutting tiles might seem daunting, especially when you’re aiming for those perfectly straight lines or intricate curves. But with the right tools and techniques, you can tackle any tiling job with confidence. This guide will walk you through everything you need to know to master the use of a tile saw, ensuring your projects look professionally finished.
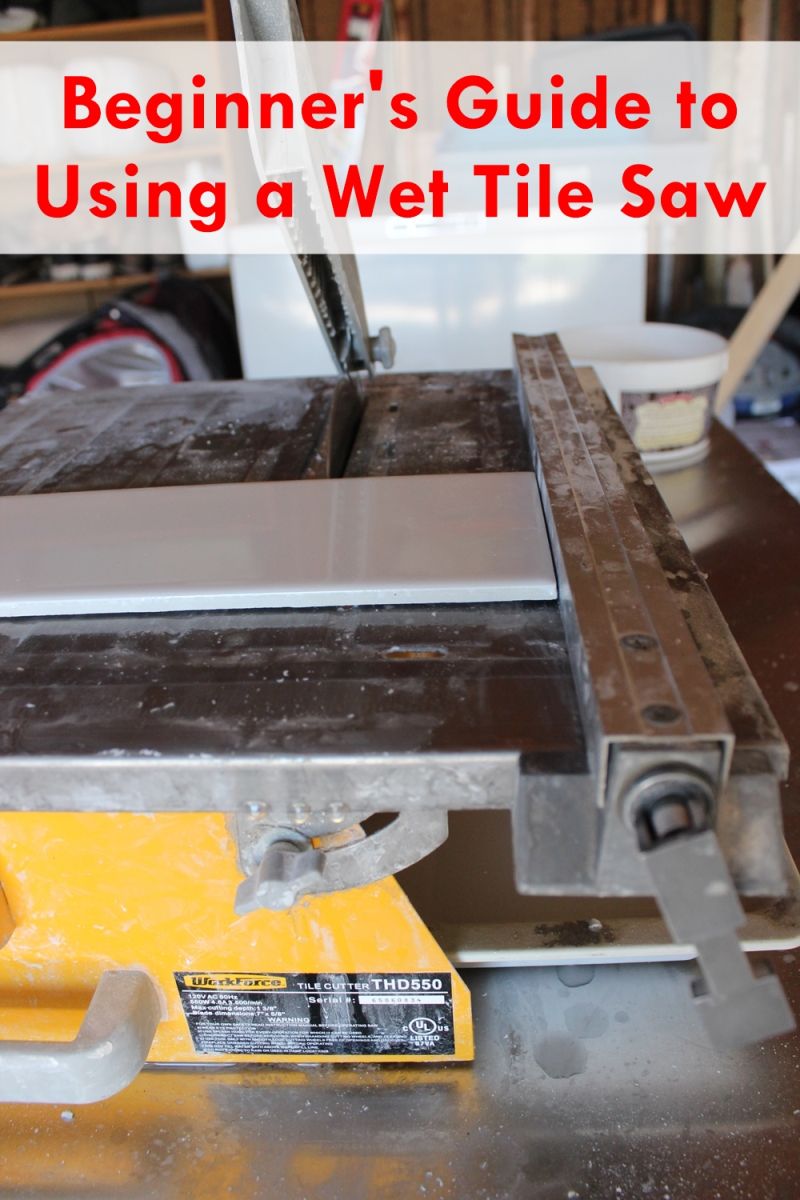
Image Source: cdn.homedit.com
Getting to Know Your Tile Saw
Before you start cutting, it’s important to familiarize yourself with the parts of a tile saw and how they work together. This will not only make operation safer but also more effective.
Key Components of a Tile Saw
- Motor: This is the powerhouse of the saw, driving the rotation of the blade. Motors can vary in power, measured in horsepower (HP). Higher HP motors can handle thicker and harder tiles more easily.
- Blade Arbor: This is the shaft where the diamond blade is mounted. It’s connected to the motor and spins the blade at high speeds.
- Diamond Blade: This is the heart of the tile saw. Unlike standard saw blades, diamond blades have a metal rim embedded with industrial diamonds. These diamonds are incredibly hard and wear away the tile material as the blade spins, allowing for a clean cut. Blades are categorized by the type of tile they’re best suited for (e.g., ceramic, porcelain, natural stone) and their grit.
- Water Reservoir: Essential for cooling the blade and controlling dust. The water reservoir keeps the blade lubricated and washes away debris, preventing the blade from overheating and becoming damaged. It also drastically reduces airborne dust particles, making the cutting process safer and cleaner.
- Pump: A small pump circulates water from the reservoir to the blade. A constant flow of water is crucial for optimal performance and longevity of the diamond blade.
- Cutting Table/Platform: This is where you place the tile to be cut. It slides or moves under the blade, guided by a tile cutting guide or a miter system.
- Water Deflectors/Splash Guards: These are positioned around the blade to contain the water spray, keeping your workspace drier and safer.
- Miter Gauge/Rip Fence: Some saws come with adjustable guides that help you make precise straight or angled cuts.
Types of Tile Saws
Tile saws come in various forms, each suited for different needs:
| Saw Type | Description | Best For |
|---|---|---|
| Wet Saw | The most common type, using a water-cooled diamond blade. | Most tile cutting tasks, including straight and angled cuts. |
| Scoring Saw | Uses a carbide wheel to score the tile, which is then snapped. | Straight cuts on ceramic and some porcelain tiles. |
| Angle Grinder | Can be fitted with a diamond blade for tile cutting, but less precise. | Small cuts, grout removal, and basic tile cutting. |
| Nail Gun Saw | A specialized, high-speed saw for cutting very hard materials like porcelain. | Advanced users and very dense tiles. |
For most DIY projects and even many professional jobs, a wet saw is the go-to tool.
Essential Safety Precautions
Safety is paramount when operating any power tool, and a tile saw is no exception. Working with a spinning blade and water requires careful attention to detail.
Before You Start
- Read the Manual: Always read the manufacturer’s instruction manual for your specific tile saw model. It contains vital information about operation, maintenance, and safety.
- Personal Protective Equipment (PPE):
- Safety Glasses/Goggles: Protect your eyes from water spray and flying debris.
- Gloves: Wear sturdy, water-resistant gloves to protect your hands from sharp edges and water.
- Ear Protection: While not as loud as some power tools, the motor can still be noisy, especially over extended periods.
- Closed-Toe Shoes: Essential to protect your feet from dropped tiles or equipment.
- Secure Your Workspace: Ensure the tile saw is on a stable, level surface. Clear the area around the saw of any tripping hazards.
- Electrical Safety:
- Use a Ground Fault Circuit Interrupter (GFCI) outlet or extension cord. This is crucial when working with water and electricity to prevent shocks.
- Keep electrical cords away from the water reservoir and any wet areas.
- Never operate the saw with wet hands or while standing in water.
During Operation
- Water Level: Always ensure the water reservoir is adequately filled before and during operation. Check the water level periodically.
- Blade Guard: Never operate the saw with the blade guard removed or damaged.
- Feed Rate: Don’t force the tile through the blade. Let the diamond blade do the work. A steady, consistent feed rate will give cleaner cuts.
- Keep Hands Clear: Maintain a safe distance between your hands and the spinning blade at all times. Use the provided handles or push blocks if necessary.
- Tile Stability: Ensure the tile is stable on the cutting table and not wobbling.
- Dust Control: While a wet saw minimizes dust, it’s still good practice to work in a well-ventilated area.
After Use
- Clean Up: Turn off and unplug the saw. Drain the water reservoir and clean the saw thoroughly. Remove any tile debris from the blade and the cutting table.
- Blade Maintenance: Inspect the diamond blade for any damage or excessive wear.
Preparing Your Tile Saw for Action
Proper preparation is key to achieving perfect cuts and ensuring the longevity of your equipment.
Filling the Water Reservoir
- Locate the water reservoir at the base of your tile saw.
- Fill it with clean water. Some professionals recommend adding a small amount of dish soap or a specialized blade coolant. This can help reduce surface tension and improve lubrication, leading to cooler cuts and extending blade life. However, check your saw’s manual, as some manufacturers advise against additives.
- Ensure the water level is sufficient to keep the blade adequately cooled throughout your cutting session.
Installing the Diamond Blade
- Blade Selection: Choose the right diamond blade for your tile type. A general-purpose blade works for most ceramic tiles, but porcelain, stone, and glass may require specialized blades for best results and to prevent chipping.
- Installation Process:
- Ensure the saw is unplugged.
- Locate the blade arbor.
- Remove the old blade (if any) by unscrewing the arbor nut. You might need a wrench.
- Place the new diamond blade onto the arbor, ensuring it’s seated correctly. The direction of rotation is usually indicated on the blade and the saw.
- Tighten the arbor nut securely, but do not overtighten.
Setting Up the Tile Cutting Guide
Most tile saws come with a tile cutting guide, rip fence, or miter gauge.
- Straight Cuts: Use the rip fence or miter gauge to guide the tile against the blade for perfectly straight cuts. Adjust the guide to the desired width.
- Angled Cuts (Miters): Many saws allow you to adjust the angle of the cutting table or the blade itself for miter cuts. Set your desired angle using the built-in guides. Ensure the angle is locked firmly in place before cutting.
Techniques for Perfect Tile Cutting
Now that your saw is prepped and safety measures are in place, let’s dive into the techniques for achieving those flawless cuts.
Making Straight Cuts
Straight cuts are the most common type of tile cutting.
- Mark Your Cut Line: Use a pencil or marker to clearly mark the cutting line on the tile. For precise cuts, measure carefully and mark both ends of the line.
- Position the Tile: Place the tile on the cutting table, aligning the marked line with the blade. Ensure the tile is flat against the table and firmly against the tile cutting guide or rip fence.
- Start the Saw: Turn on the saw and let the blade reach its full speed.
- Feed the Tile: Gently and steadily push the tile through the blade. Do not force it. Let the blade do the cutting. Maintain consistent pressure.
- Complete the Cut: Continue pushing the tile until it has passed completely through the blade.
- Turn Off the Saw: Once the cut is finished, turn off the saw and wait for the blade to stop completely before removing the cut tile pieces.
Cutting Curves and Shapes
Cutting curves requires a different approach, often involving multiple small cuts or a specialized blade.
Method 1: Incremental Cuts for Curves
This is the most common method for achieving curved cuts with a standard wet saw.
- Mark the Curve: Draw your desired curve onto the tile.
- Make Relief Cuts: Make several straight cuts from the edge of the tile to points along your curve. These cuts act as “relief” and allow you to remove small sections of tile as you work.
- Nibble Away Material: With the saw running, carefully guide the tile so the blade cuts along the curve in small increments. You’ll essentially be nibbling away at the tile material.
- Smooth the Edge: After removing the bulk of the material, you can use a rubbing stone or a specialized tile file to smooth the curved edge.
Method 2: Using a Specialized Blade
Some wet saws can accommodate specialized blades designed for intricate cuts, such as a flexible or continuous rim diamond blade. These blades offer more control for curved cuts but may still require practice.
Scoring Tile for Straight Cuts (for Scoring Saws)
While this guide focuses on wet saws, it’s worth mentioning the scoring method for context.
- Marking: Mark your cut line on the tile.
- Scoring: Place the tile on a flat surface. Position the scoring wheel of the scoring saw on the edge of the tile along your mark. Apply firm, even pressure and pull the scoring wheel along the entire length of the tile. You should hear a distinct “scratching” sound. The goal is to create a deep, consistent score line.
- Second Score (Optional but Recommended): For very hard tiles, a second pass with the scoring wheel can ensure a deeper score.
- Snapping: Place the tile over a straight edge, with the score line centered on the edge. Apply quick, firm pressure to both sides of the score line to snap the tile. A specialized snap cutter might be used for this.
Advanced Techniques and Tips
Elevate your tile cutting game with these pro tips.
Diagonal and Bevel Cuts
- Diagonal Cuts: To cut a tile diagonally, simply set the tile cutting guide or miter gauge to 45 degrees and follow the standard straight cutting procedure.
- Bevel Cuts: Many wet saws allow you to tilt the cutting table or the blade assembly to create bevel cuts. This is useful for creating professional-looking edges, especially when tiling corners or edges that meet at an angle.
Cutting Hard Materials (Porcelain and Stone)
Porcelain and natural stone tiles are much denser and harder than ceramic.
- Use the Right Blade: A blade specifically designed for porcelain or stone is essential. These blades often have a more aggressive diamond grit or a continuous rim for a cleaner cut.
- Slower Feed Rate: Don’t rush porcelain. Feed the tile slowly and steadily. Forcing it can lead to chipping or blade damage.
- Ensure Adequate Water: Overheating is a bigger risk with harder tiles. Make sure the water flow is consistent and the reservoir is full.
Handling Small Pieces and Edges
- Use a Tile Cutting Guide/Rip Fence: For cutting off small edges or creating narrow strips, always use the rip fence or tile cutting guide to ensure accuracy and safety.
- Hold Small Pieces Securely: When cutting very small pieces, you might need to use a clamp or a push block to keep them stable and your fingers safe.
Troubleshooting Common Cutting Issues
- Chipping:
- Cause: Dull blade, forcing the tile, wrong blade for the material, inadequate water.
- Solution: Use a fresh, appropriate blade. Feed the tile slowly and smoothly. Ensure sufficient water.
- Jagged Cuts:
- Cause: Worn blade, unstable tile, inconsistent feed rate.
- Solution: Replace the blade. Ensure the tile is flat and stable. Maintain a consistent push.
- Blade Wobble:
- Cause: Loose arbor nut, damaged blade, bent arbor.
- Solution: Tighten the arbor nut. Inspect the blade for damage and replace if necessary. Check the arbor for straightness.
Maintaining Your Tile Saw
Proper maintenance will keep your tile saw running smoothly and ensure a longer lifespan for both the tool and its blades.
Regular Cleaning
- After Each Use: Drain and rinse the water reservoir. Clean out any sediment, tile dust, or debris. Wipe down the cutting table, splash guards, and motor housing.
- Blade Cleaning: Periodically remove the diamond blade and clean it with a stiff brush to remove embedded debris.
Water Pump and Filter
- Check the Pump: Ensure the water pump is functioning correctly and circulating water efficiently.
- Clean or Replace Filters: Some saws have a filter in the water system. Clean or replace it as recommended by the manufacturer to maintain optimal water flow.
Blade Inspection
- Wear and Tear: Regularly inspect your diamond blade for signs of wear, chipping, or glazing (where diamonds become coated and less effective).
- Replacement: Replace blades when they show significant wear or start producing poor cuts.
Frequently Asked Questions (FAQ)
Q1: How often should I change the water in the reservoir?
A1: It’s best to change the water every few hours of use, or whenever it becomes murky or dirty. This ensures proper cooling and prevents debris from recirculating and potentially damaging the blade or pump.
Q2: Can I use a regular saw blade on a tile saw?
A2: Absolutely not. Regular saw blades are not designed for cutting tile and will not work. They will likely be damaged, and more importantly, it’s a significant safety hazard. Always use a diamond blade specifically designed for tile cutting with your wet saw.
Q3: My tile is chipping badly. What can I do?
A3: Chipping is a common problem. Ensure you are using the correct diamond blade for your tile type. Feed the tile slowly and steadily. Make sure the water reservoir is full and the pump is working correctly to keep the blade cool. If the problem persists, the blade might be worn or damaged.
Q4: How do I ensure my straight cuts are perfectly straight?
A4: Utilize the tile cutting guide or rip fence that comes with your saw. Ensure it’s set correctly and locked in place. Align your tile precisely against the guide before starting the cut. A steady hand and consistent feed pressure are also crucial.
Q5: What is the best way to cut glass tiles?
A5: Glass tiles are delicate. Use a wet saw with a fine-grit, continuous rim diamond blade specifically designed for glass. Feed the glass very slowly and gently. Avoid any sudden movements or forcing the material. Some prefer a specialized glass cutter for straight lines.
By following these guidelines and practicing the techniques, you’ll be well on your way to mastering your tile saw and achieving professional-looking results on all your tiling projects. Happy cutting!