
Can you use a wet saw to cut porcelain tile? Yes, a wet saw is the ideal tool for cutting porcelain tile, ceramic tile, and stone. Who should use a wet saw? Anyone needing precise and clean cuts on tile, from DIYers to professional tilers.
A wet saw is an invaluable tool for anyone tackling a tiling project, from laying a new backsplash in your kitchen to installing a stunning mosaic in your bathroom. It’s designed to make clean, precise cuts on a variety of materials, making your tiling jobs look professional. But like any powerful tool, it requires a bit of knowledge and practice to use effectively and safely. This guide will walk you through everything you need to know to master your wet tile saw, ensuring perfect cuts every time.
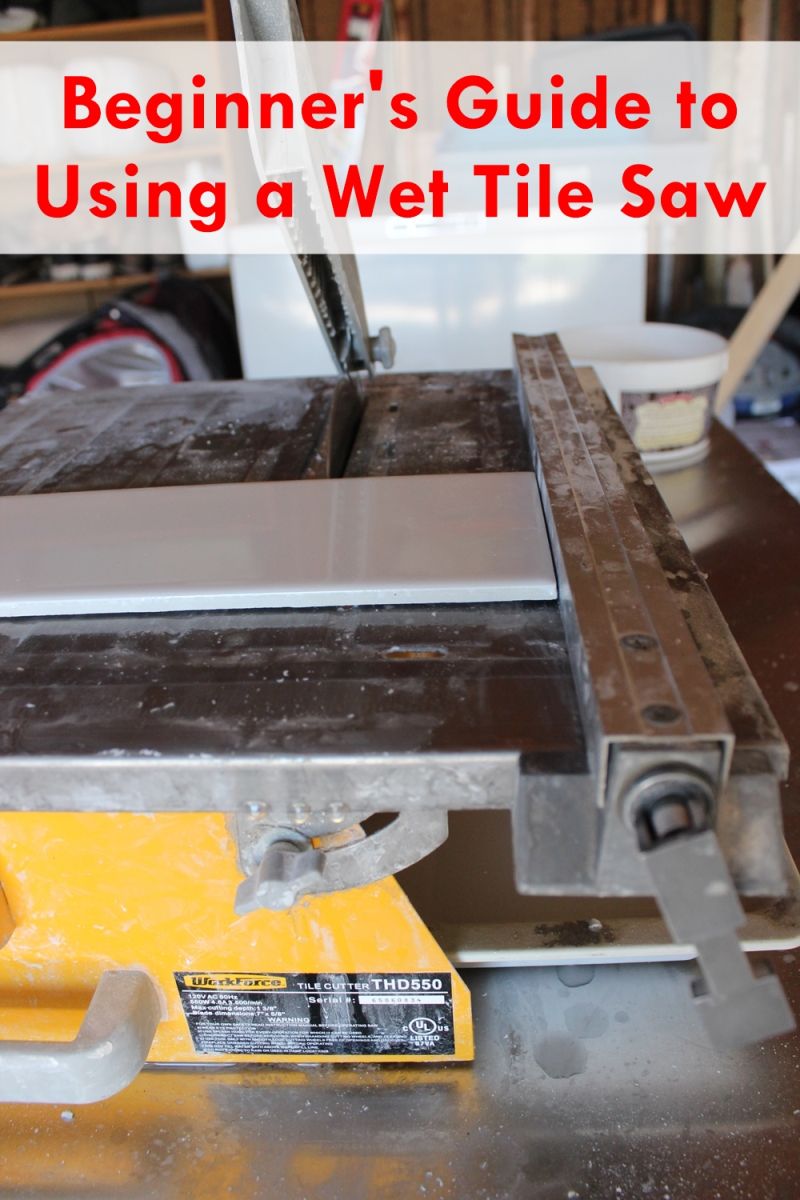
Image Source: cdn.homedit.com
What is a Wet Saw?
At its core, a wet saw is a specialized power saw that utilizes a continuous flow of water to cool the cutting blade and lubricate the cut. This is crucial because cutting tile generates a lot of friction and heat, which can quickly dull or even damage a standard saw blade not designed for such materials. The water also washes away the tile dust (silica dust, which is harmful to inhale), making the process safer and cleaner.
The Anatomy of a Wet Saw
Before we dive into the “how,” let’s familiarize ourselves with the main parts of a typical wet tile saw:
- Motor: The powerhouse that spins the blade.
- Blade: The cutting component. Different blades are designed for different tile materials.
- Water Reservoir: Holds the water that circulates to the blade.
- Pump: Circulates water from the reservoir to the blade.
- Table/Cutting Surface: Where you place the tile to be cut.
- Rip Guide: A fence that helps you make straight cuts parallel to the edge of the tile.
- Mitre Guide: Used for making angled or diagonal cuts.
- Splash Guard: Helps contain water spray.
Blade Selection: The Right Tool for the Job
Choosing the correct blade is paramount for efficient and clean tile cutting. Blades are typically made of diamond, as it’s one of the hardest materials known, capable of cutting through tough ceramic and stone.
Types of Wet Saw Blades
- Continuous Rim Blades: These blades have a smooth, uninterrupted cutting edge. They are ideal for delicate materials like glass, porcelain, and ceramic tiles, producing very clean, chip-free edges.
- Segmented Blades: These blades have notches or “segments” along the cutting edge. These segments help to break up the material being cut, making them excellent for thicker, harder materials like stone, granite, and quarry tiles. They also help to reduce heat build-up.
- Diamond Mesh Blades: A newer innovation, these blades offer a mesh-like cutting surface that allows for faster cutting and reduced heat. They can handle a wide range of materials, including tough porcelain and natural stone.
Factors to Consider When Choosing a Blade
- Tile Material: The hardness and thickness of your tile are the primary factors. Porcelain requires a more robust blade than basic ceramic.
- Cut Type: If you’re primarily making straight cuts, most blades will suffice. For intricate cuts or very delicate tiles, a continuous rim blade is usually best.
- Blade Diameter and Arbor Size: Ensure the blade you choose matches your tile saw‘s specifications. Common sizes are 7-inch and 10-inch blades, with arbor sizes typically ½-inch.
- Brand Reputation: Investing in a quality blade from a reputable brand will often lead to better performance and longevity.
Table: Blade Selection Guide
| Tile Material | Recommended Blade Type | Reason |
|---|---|---|
| Ceramic (Wall/Floor) | Continuous Rim or Segmented | Generally softer, but continuous rim offers cleaner edges. |
| Porcelain | Continuous Rim or Diamond Mesh | Very hard; requires a sharp, high-quality blade for clean cuts. |
| Natural Stone (Marble, Granite) | Segmented or Diamond Mesh | Hard and dense; segmented blades help with heat dissipation and speed. |
| Glass Tiles | Continuous Rim | Delicate; requires a smooth, chip-free cut. |
| Quarry Tiles | Segmented | Often thicker and denser than ceramic. |
Setting Up Your Wet Saw for Success
Proper setup is crucial for both safety and achieving those perfect cuts.
Filling the Water Reservoir
- Locate the Reservoir: Most wet tile saws have a pull-out tray or a built-in compartment for the water reservoir.
- Use Clean Water: Always use fresh, clean water. Avoid using dirty water from previous projects, as it can clog the pump and reduce cooling efficiency.
- Fill Appropriately: Fill the reservoir to the marked line or until the pump is fully submerged. Overfilling can lead to excessive splashing. Some users add a small amount of dish soap (a drop or two) to the water. This can help reduce the surface tension of the water, allowing it to spread more evenly over the blade and reduce splashing. However, use this sparingly as too much soap can create excessive foam.
- Check the Pump: Ensure the pump is submerged and the intake is clear of debris.
Mounting the Blade
Safety First! Always unplug the wet tile saw before changing the blade.
- Remove Old Blade (if applicable): Loosen the blade bolt or nut using the appropriate wrench. Be careful, as the old blade might be sharp.
- Install New Blade: Position the new blade onto the arbor. Pay close attention to the direction of rotation arrows on the blade and ensure they match the direction of the saw’s motor. The side of the blade designed for cutting should face the direction of travel.
- Tighten the Blade Bolt/Nut: Securely tighten the blade bolt or nut. Do not overtighten, as this could damage the blade or arbor.
Initial Test Run
Before you start cutting your actual tiles, it’s a good idea to run the saw for a minute or two. This allows the water to circulate properly, wetting the blade and ensuring the pump is working efficiently. Check for any unusual noises or vibrations.
Mastering Tile Cutting Techniques
With your wet saw set up and ready, it’s time to learn the techniques for achieving those flawless cuts.
Making Straight Cuts
This is the most common type of cut and is essential for fitting tiles along walls, floors, or around obstacles.
- Mark Your Cut Line: Use a pencil or marker to clearly mark the line where you want to cut the tile. For precision, consider marking on the back of the tile where the blade will exit.
- Align the Tile: Position the tile on the saw’s table. Align the marked cut line with the blade. You can often use the rip guide for support and alignment, sliding the tile against it until the blade is precisely on your mark.
- Start the Saw: Turn on the wet tile saw. Allow the blade to reach full speed before starting the cut.
- Feed the Tile: Gently and steadily push the tile into the spinning blade. Do not force it. Let the blade do the work. Keep a firm grip on the tile, especially as you approach the end of the cut.
- Complete the Cut: Continue feeding the tile through the blade until the cut is complete. Release the trigger and allow the blade to stop spinning before removing the cut tile.
- Observe the Blade: Always keep an eye on the blade’s path and ensure it’s following your marked line accurately.
Diagonal Cuts (Mitre Cuts)
Diagonal cuts, often referred to as mitre cuts, are used for creating patterns, fitting tiles into corners, or for decorative effects.
- Mark Your Cut Line: As with straight cuts, clearly mark your desired cut line on the tile.
- Adjust the Mitre Guide: Most wet tile saws have an adjustable mitre guide or a tilting table. Set this to the desired angle (e.g., 45 degrees).
- Align the Tile: Place the tile on the table and against the mitre guide. Ensure the marked cut line aligns precisely with the blade at your chosen angle.
- Proceed with Cutting: Follow the same feeding technique as for straight cuts: start the saw, let the blade reach speed, and gently feed the tile through the blade.
Making Cuts in Tight Spaces or Around Obstacles
Sometimes, you need to cut notches for pipes, electrical boxes, or other fixtures.
- Plunge Cuts: For cuts that don’t go all the way through the tile, you’ll need to perform a plunge cut.
- Mark the starting and ending points of your cut.
- Position the tile so the blade is just touching the starting point.
- Start the saw and slowly lower the blade into the tile until you reach the desired depth or the ending point.
- Carefully raise the blade.
- Specialized Blades: For very intricate cuts, consider using a blade with a thinner kerf (the width of the cut) or a more flexible design if available for your saw.
- Practice: These cuts require the most precision. It’s advisable to practice on scrap tiles first.
Safety Precautions: Staying Safe While Cutting Tile
Safety precautions are non-negotiable when operating any power tool, and a wet tile saw is no exception.
- Read the Manual: Always read and follow the manufacturer’s instructions for your specific wet tile saw.
- Wear Safety Glasses: Protect your eyes from water spray, tile chips, and dust. Even with the water, small debris can fly.
- Wear Hearing Protection: While wet saws are generally quieter than dry saws, prolonged exposure to the motor and blade noise can still be damaging.
- Wear Gloves: Protect your hands from water and potentially sharp tile edges.
- Secure Work Area: Ensure the saw is on a stable, level surface. Keep the area around the saw clear of clutter.
- Keep Hands Clear: Never place your hands near the spinning blade. Always use the table and guides for feeding the tile.
- Unplug When Not in Use or Adjusting: Always disconnect the power before cleaning, maintenance, or blade changes.
- Avoid Loose Clothing: Wear snug-fitting clothing. Remove jewelry and tie back long hair.
- Ventilation: While the water minimizes dust, ensure good ventilation, especially if working indoors.
- Electrical Safety: Ensure your power outlet is grounded. Keep the power cord away from water.
Wet Saw Maintenance: Keeping Your Tool in Top Shape
Regular wet saw maintenance is essential for its longevity, performance, and safety.
After Each Use:
- Drain the Water Reservoir: Turn off and unplug the saw. Carefully remove the water reservoir tray and empty all water and debris.
- Clean the Reservoir: Rinse the reservoir thoroughly to remove any settled tile dust or sludge.
- Wipe Down the Saw: Use a damp cloth to wipe down the saw’s exterior, including the table, guides, and splash guards. Remove any water droplets.
- Check the Pump Intake: Ensure the pump’s water intake is clear of any debris that could hinder its operation.
- Inspect the Blade: Check the blade for excessive wear, chips, or buildup. Clean it if necessary with a stiff brush and water.
Periodic Maintenance:
- Check Water Pump: Ensure the pump is functioning correctly. If it seems weak or is not circulating water, the intake might be clogged, or the pump may need replacement.
- Lubricate Moving Parts: Some models may have parts that benefit from occasional lubrication. Refer to your manual for recommendations.
- Inspect the Power Cord: Check the power cord for any signs of damage.
- Blade Alignment: Periodically check that the blade is running true and is properly aligned with the table.
- Table and Guides: Ensure the cutting table and guides are clean, straight, and function smoothly.
Storing Your Wet Saw
- Dry Storage: Store your wet tile saw in a dry, protected area.
- Blade Protection: Consider removing the blade and storing it separately in its original packaging or a protective case to prevent damage or rust.
Tips for Achieving Flawless Cuts
- Practice Makes Perfect: Before tackling your main project, practice cutting tile on scrap pieces. This helps you get a feel for the saw’s speed, feed rate, and how different tiles react.
- Score the Tile: For some very hard tiles, lightly scoring the tile along your cut line with a glass cutter before sawing can help create a cleaner break, especially on the exit side.
- Don’t Force the Feed: A common mistake is trying to push the tile too quickly. Let the blade do the cutting. Forcing it can cause blade binding, chipping, or even damage to the motor.
- Maintain a Steady Feed Rate: Consistent pressure and speed are key to smooth cuts.
- Watch for Binding: If the tile feels like it’s catching or the blade is struggling, ease off the pressure slightly. This can happen if the cut is too tight or the blade is dull.
- Edge Support: For larger tiles, ensure you have adequate support on the infeed and outfeed sides of the saw to prevent the tile from tipping or breaking during the cut.
- Cooling is Key: Always ensure the blade is adequately cooled by the water. If you see excessive steam, the water level might be too low or the pump isn’t working efficiently.
Frequently Asked Questions (FAQ)
Q1: Can I use a regular saw blade on a wet saw?
A1: No, absolutely not. A wet tile saw requires a specialized diamond blade designed for wet cutting. Standard saw blades will not cut tile effectively and can be very dangerous when used with water and tile.
Q2: How often should I change the water in the reservoir?
A2: It’s best to change the water after each significant cutting session, or at least daily if you’re working over multiple days. This prevents sediment buildup and ensures efficient cooling.
Q3: My saw is making a lot of noise. What could be wrong?
A3: Unusual noise can indicate several issues:
* Blade: The blade might be dull, damaged, or not mounted correctly.
* Motor Bearings: Bearings in the motor might be worn.
* Loose Parts: Check if any components are loose.
* Water Pump: A struggling pump can sometimes make noise.
Always unplug the saw before investigating any mechanical issues.
Q4: What is silica dust and why is it dangerous?
A4: Silica dust is a very fine powder created when cutting materials like tile, stone, and concrete. Inhaling silica dust can lead to serious lung diseases, including silicosis. This is why the water system on a wet tile saw is so important – it suppresses the dust. Always wear a dust mask even with a wet saw for maximum protection.
Q5: Can I cut wood with a wet saw?
A5: No. A wet tile saw is specifically designed for tile and stone. Using it to cut wood will damage the blade and can be dangerous. Wood cutting requires different types of saws and blades.
Q6: How do I keep my cuts straight?
A6: Use the rip guide consistently. Ensure the tile is pressed firmly against the guide throughout the cut. Practice your feeding technique to maintain a steady, straight path. Some users also mark their cut lines on both sides of the tile for better visual guidance.
By following these guidelines, you’ll be well on your way to achieving professional-looking results on your next tiling project. Happy cutting!