
Can I use a wet tile saw for glass? Yes, you can use a wet tile saw for glass with the right blade and careful handling. Using a wet tile saw is the best way to cut ceramic, porcelain, and even some stone tiles cleanly and precisely. What is a wet tile saw and why is it used? A wet tile saw is a power tool that uses a spinning diamond blade cooled by water to cut through hard materials like tile. This water spray cools the blade, reducing friction and dust, and also lubricates the cut for a smoother finish.
This guide will walk you through everything you need to know for effective and safe tile cutting. We’ll cover the essential wet saw safety precautions, tile cutter setup, how to make different types of cuts, and important wet saw maintenance tips.
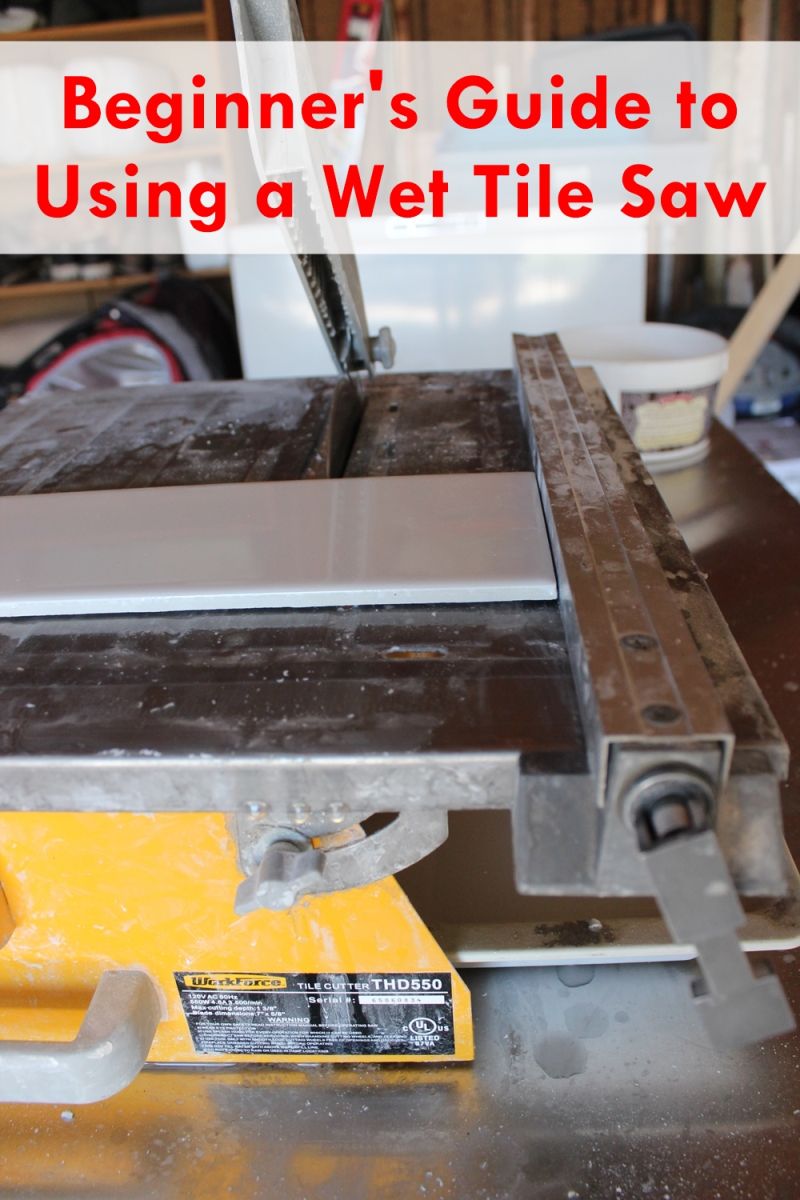
Image Source: cdn.homedit.com
Preparing Your Wet Tile Saw for Action
Before you even think about cutting, proper tile cutter setup is crucial. This ensures your saw works efficiently and, more importantly, safely.
Choosing the Right Blade
The heart of your wet tile saw is its diamond blade. Not all diamond blades are created equal, and using the wrong one can lead to poor cuts or even damage to the tile and the saw.
Blade Types and Their Uses
- Continuous Rim Blades: These blades have a smooth, unbroken edge. They are ideal for cutting softer materials like ceramic tiles and glass. They produce very clean, chip-free edges.
- Segmented Blades: These blades have notches or “segments” along their edge. These segments help to break up water and debris, cooling the blade more effectively and preventing it from getting clogged. They are excellent for harder materials like porcelain, stone, and quarry tile.
- Turbo Rim Blades: These blades have a wavy or corrugated edge. They offer a good balance between the smooth cut of a continuous rim and the cooling of a segmented blade. They are versatile and can be used for a variety of tile types.
Blade Selection Factors
- Tile Material: Always match your blade to the tile you are cutting. Harder tiles need more aggressive blades, while softer tiles benefit from smoother blades.
- Cut Type: For very precise, clean edges, a continuous rim is often best. For general-purpose cutting, a turbo or segmented blade can be more forgiving.
- Blade Diameter: Ensure the blade diameter is compatible with your wet tile saw model.
Assembling and Filling the Water Reservoir
The water reservoir is vital for cooling the blade and reducing dust.
Filling the Reservoir
- Locate the Reservoir: Most wet tile saws have a removable tray or a built-in reservoir underneath the cutting table.
- Use Clean Water: Always use clean water. Dirty water can clog the pump and affect the saw’s performance.
- Fill Adequately: Fill the reservoir to the manufacturer’s recommended level. This is usually indicated by a fill line. Insufficient water will lead to overheating.
- Check the Pump: Ensure the water pump is submerged and functioning correctly. You should see water being pumped up to the blade.
Water System Checks
- Pump Operation: Turn on the saw briefly to ensure the pump is circulating water to the blade.
- Hose Connections: If your saw has a separate water feed hose, check that it’s securely connected and not kinked.
Safety First: Essential Protective Gear
Wet saw safety starts with protecting yourself. Never compromise on personal protective equipment (PPE).
Mandatory PPE
- Safety Glasses: Absolutely essential. Water and tile debris can fly at high speeds. Always wear impact-resistant safety glasses that fully enclose your eyes. Regular eyeglasses are not sufficient.
- Hearing Protection: Wet tile saws can be loud. Earplugs or earmuffs will protect your hearing, especially during extended use.
- Dust Mask/Respirator: Even with the water, some fine dust particles can be generated, particularly with certain types of tile or grout. A dust mask or respirator adds an extra layer of protection.
- Waterproof Gloves: Keep your hands dry and protected from sharp edges and vibration.
Footwear
- Closed-Toe, Slip-Resistant Shoes: Protect your feet from dropped tiles and ensure stability on potentially wet floors.
Setting Up Your Work Area
A safe and organized work area is key to successful tile cutting.
Location Considerations
- Ventilation: While a wet saw significantly reduces dust, it’s still good practice to work in a well-ventilated area.
- Power Source: Ensure you have a GFCI (Ground Fault Circuit Interrupter) protected outlet nearby. Water and electricity are a dangerous combination.
- Stable Surface: Place the saw on a sturdy, level surface. Avoid wobbly tables or uneven ground.
- Water Management: Have a plan for managing the water and slurry that will accumulate. Buckets or a hose connection might be needed for cleanup.
Saw Placement
- Accessibility: Position the saw so you can comfortably feed and guide the tile.
- Clearance: Ensure there’s enough space around the saw for you to move freely and safely.
Mastering the Art of Tile Cutting
Once your saw is set up and you’re geared up, it’s time to learn the techniques for precise tile cutting.
Making Straight Cuts
This is the most common type of cut and requires a steady hand and proper blade contact.
Cutting Procedure
- Position the Tile: Place the tile flat on the cutting table, ensuring it’s stable against the fence or any guides.
- Align the Cut Line: For most saws, you align the blade with your cut line by gently moving the tile under the blade before turning on the saw. Some saws have a cutting arm that moves the blade over the tile.
- Start the Saw: Turn on the wet tile saw and allow the blade to reach full speed.
- Feed the Tile: Gently and steadily push the tile through the spinning diamond blade. Do not force the tile. Let the blade do the work.
- Maintain Contact: Keep the tile in firm contact with the cutting surface and the blade’s path.
- Complete the Cut: Continue feeding the tile until the entire cut is made.
- Turn Off the Saw: Once the cut is complete, turn off the saw and wait for the blade to stop spinning completely before removing the cut tile pieces.
Tips for Clean Straight Cuts
- Steady Pressure: Avoid jerky movements. Smooth, consistent pressure is key.
- Don’t Force It: If the tile isn’t cutting easily, check your blade or ensure you have enough water. Forcing the tile can chip it or damage the blade.
- Avoid Backing Up: Once you start a cut, try to complete it in one continuous motion. Backing up can chip the edge.
Creating Bevel Cuts
Bevel cuts are used to create angled edges, often for decorative purposes or to create a smoother transition where tiles meet at corners.
Setting the Bevel Angle
- Adjustable Table: Many wet tile saws have a cutting table that can be tilted. Look for adjustment knobs or locking mechanisms.
- Marking the Angle: Most saws have degree markings to help you set the desired angle (e.g., 45 degrees).
- Lock Securely: Once the angle is set, ensure the table is locked firmly in place to prevent movement during the cut.
Executing Bevel Cuts
- Position Tile: Place the tile on the tilted cutting table.
- Align Carefully: Align the cut line with the blade, ensuring the angle is maintained.
- Feed Slowly: Bevel cuts often require a slower feed rate than straight cuts, especially on harder tiles.
- Watch for Blade Contact: Ensure the entire face of the blade is engaging the tile at the correct angle.
Making Miter Cuts
Miter cuts are two angled cuts that meet to form a corner, typically used for decorative borders or tile edges. This often involves two separate cuts at opposing angles.
Technique for Miter Cuts
- First Angle Cut: Make the first angled cut as you would a standard bevel cut.
- Reposition and Second Cut: Reposition the tile and set your saw’s angle to the opposite degree for the second cut. Feed the tile through to complete the miter.
Precision for Miter Cuts
- Accurate Angles: The accuracy of your miter joint depends entirely on how precisely you set and maintain your angles for each cut.
- Practice: Mitering can be tricky. Practice on scrap tiles to get a feel for the process before cutting your project tiles.
Performing Specific Tile Cutting Tasks
Beyond basic cuts, wet tile saws can handle specialized tasks.
Cutting Curves and Circles
While not all wet tile saws are designed for intricate curves, some can manage gentle arcs.
- Specialized Blades: Some saws can use specific blades designed for curves, or you can use a blade like a continuous rim and make a series of very short, straight cuts to approximate a curve.
- Steady Hand: This requires extreme care and a very slow, steady feed of the tile.
Making Small Cuts and Niche Shapes
For small cuts or to create notches for outlets or pipes, you might need to adjust your technique.
- Tile Scoring: For very small, precise pieces or intricate shapes, you might first use a tile scoring tool and snap the tile. However, for cleaner edges, the wet saw is often preferred.
- Controlled Feeding: Feed small pieces with extreme care, using your hands or a push stick to guide them close to the blade. Always keep your fingers well away from the blade’s path.
Cutting Different Tile Materials
- Ceramic: Easiest to cut, good with continuous or turbo blades.
- Porcelain: Denser and harder than ceramic. Requires a good quality segmented or turbo blade and steady pressure.
- Stone (Marble, Granite): Very hard materials. Use a blade specifically designed for natural stone, often a segmented or turbo blade with a good cooling system. Feed slowly.
- Glass: Requires a specific glass-cutting diamond blade (often continuous rim) and very gentle handling to prevent chipping or cracking.
Safety Procedures: A Deeper Dive
Wet saw safety is paramount. Let’s reinforce the critical aspects.
Pre-Operation Safety Checks
Before every use, perform these checks:
- Blade Condition: Inspect the diamond blade for any damage, cracks, or excessive wear. A damaged blade is dangerous.
- Water Level: Double-check the water reservoir is filled to the correct level.
- Blade Security: Ensure the blade is properly installed and securely fastened according to your saw’s manual.
- Electrical Connections: Verify that all power cords and connections are in good condition and that you are using a GFCI outlet.
- Work Area: Clear any clutter from around the saw. Ensure your path to the saw and away from it is unobstructed.
During Operation Safety Guidelines
- Never Reach Over the Blade: Keep your hands and body away from the blade’s path at all times.
- Use Push Sticks: For small tiles or difficult cuts, use a push stick to guide the tile.
- Do Not Force the Tile: Let the saw do the work. Forcing can cause kickback or chip the tile.
- Maintain Visual Contact: Always watch the tile and the blade as you cut.
- Be Aware of Kickback: This is when the tile is suddenly thrown back towards you. It can happen if the blade binds or if you try to force the tile. Maintain a firm grip on the tile.
- No Loose Clothing or Jewelry: These can get caught in the blade.
- Keep the Area Dry: Mop up any spilled water around the saw immediately.
Post-Operation Safety and Cleanup
- Wait for Blade Stop: Always wait for the blade to stop completely before reaching into the saw.
- Turn Off Power: Switch off the saw and unplug it.
- Clean the Saw: Remove excess water and tile slurry from the reservoir, blade guard, and cutting table. This is part of wet saw maintenance.
- Dispose of Slurry Properly: Tile slurry contains fine particles. Check local regulations for proper disposal. Do not pour it down drains if it can clog them.
- Dry and Store: Dry the saw and store it in a safe, dry place.
Essential Wet Saw Maintenance
Proper wet saw maintenance extends the life of your saw and ensures it operates safely and effectively.
Regular Cleaning
- After Each Use: Thoroughly clean the water reservoir, pump, and cutting deck. Remove all tile dust and debris.
- Pump Filter: Many saws have a pump filter that needs regular cleaning to prevent clogs.
Blade Care
- Clean the Diamond Blade: After use, rinse the diamond blade to remove any debris.
- Inspect for Wear: Regularly check your blade for wear. A dull blade will make cutting harder and can lead to poor results.
- Blade Replacement: Replace the blade when it becomes dull or damaged.
Water Pump and System
- Check Pump Intake: Ensure the pump intake is clear of debris to maintain proper water flow.
- Flush System: Periodically run clean water through the system to flush out any residual slurry.
General Saw Inspection
- Check for Loose Parts: Periodically inspect the saw for any loose screws, bolts, or guards.
- Lubrication: Some moving parts might require occasional lubrication; consult your owner’s manual.
Common Tile Cutting Challenges and Solutions
Even with the best practices, you might encounter issues. Here are some common problems and how to fix them.
Table 1: Common Wet Tile Saw Issues and Solutions
| Problem | Possible Cause(s) | Solution(s) |
|---|---|---|
| Chipped Tile Edges | Dull blade, forcing tile, wrong blade type, worn bearing | Use a sharp, appropriate blade; feed tile smoothly and without forcing; check for saw issues; try a continuous rim blade for delicate tiles. |
| Blade Binding/Stalling | Forcing tile, obstructed blade path, insufficient water | Feed tile gently; clear debris from blade path; ensure water reservoir is full and pump is working; check for warped tiles. |
| Excessive Water Spray | Incorrect blade guard position, worn blade | Adjust blade guard; consider a new diamond blade; ensure blade is securely mounted. |
| No Water Flow | Clogged pump, low water level, faulty pump | Check water reservoir level; clean pump intake and filter; replace faulty pump if necessary. |
| Uneven Cuts | Unstable saw, loose cutting table, improper tile feed | Ensure saw is on a stable surface; check cutting table for looseness; maintain a consistent feed rate and pressure. |
Advanced Tile Cutting Techniques
Once you’re comfortable with the basics, you can explore more advanced tile cutting methods.
Creating Grooves and Channels
Some specialized applications might require cutting grooves. This is typically done by making multiple parallel passes with the wet saw, or by using a blade with a specific groove profile if available.
Using an Extension Table
For cutting larger format tiles, an extension table can provide extra support, ensuring a safer and more accurate cut.
Frequently Asked Questions (FAQ)
Q1: How often should I change the water in my wet tile saw?
A1: For best results and to keep your blade cool, it’s recommended to change the water in your water reservoir every few hours of continuous use or when the water becomes visibly dirty or cloudy.
Q2: Can I use my wet tile saw for cutting stone countertops?
A2: Yes, but you need a diamond blade specifically designed for cutting stone (like granite or marble) and a powerful wet tile saw. Always check the saw’s specifications and the blade’s capabilities.
Q3: My blade seems to be drifting off my cut line. What’s wrong?
A3: This could be due to several factors: a worn blade, a loose blade arbor, a misaligned cutting fence, or uneven pressure on the tile. Double-check all these components.
Q4: Is tile scoring a good alternative to using a wet saw?
A4: Tile scoring followed by a snap is a quick method for straight cuts on ceramic and porcelain tiles, especially for DIYers. However, for harder materials, intricate cuts, or the cleanest edges, a wet tile saw is superior.
Q5: How do I maintain my wet tile saw if I don’t use it very often?
A5: Even with infrequent use, it’s important to perform wet saw maintenance. Clean the saw thoroughly after each use, dry it, and store it in a dry environment. Before storing for extended periods, run clean water through the system to flush it out.
Q6: What is the purpose of the water pump in a wet tile saw?
A6: The water pump circulates water from the water reservoir to the diamond blade. This serves two crucial functions: cooling the blade to prevent overheating and damage, and lubricating the cut for a smoother finish and to suppress dust.
By following these detailed steps and prioritizing wet saw safety, you’ll be well-equipped to achieve professional-quality tile cutting results for any project. Remember that practice makes perfect, so don’t be discouraged if your first few cuts aren’t flawless.