
Image Source: i.ytimg.com
Chainsaw Sharpener: How to Use and Get Results
What is a chainsaw sharpener? A chainsaw sharpener is a tool designed to restore the cutting edges of your chainsaw chain, making it more efficient and safer to use.
Keeping your chainsaw chain sharp is crucial for efficient and safe operation. A dull chain requires more force, leading to increased fatigue and a higher risk of kickback. Fortunately, with the right tools and techniques, you can easily learn how to sharpen chainsaw chain and maintain your equipment for optimal performance. This guide will walk you through the process, covering everything from selecting the right sharpener to achieving a professional-quality cut. Proper chainsaw maintenance extends the life of your chainsaw and ensures you can tackle any cutting task with confidence.
Why Sharpen Your Chainsaw Chain?
A sharp chainsaw chain is like a sharp knife – it cuts through wood with ease. A dull chain, however, struggles. It chews through wood, leaving ragged edges and requiring you to push harder. This not only makes your work more difficult but also puts unnecessary strain on your chainsaw’s engine and your own body.
Here’s why keeping your chainsaw chain sharp is so important:
- Efficiency: Sharp teeth bite into wood quickly and cleanly, allowing you to cut faster and with less effort.
- Safety: A dull chain is more prone to kickback, a sudden and violent upward and backward thrust of the chainsaw. Sharp chains reduce this risk significantly.
- Reduced Wear and Tear: When you don’t have to force a dull chain, you put less stress on the engine, clutch, and bar. This means fewer repairs and a longer lifespan for your equipment.
- Better Cut Quality: Sharp chains produce cleaner cuts, which is especially important for lumber or when you want a precise finish.
Identifying a Dull Chain
Before you grab your sharpener, it’s helpful to know when your chain needs attention. Look for these signs:
- Fine Sawdust: A sharp chain produces coarse sawdust. If you’re seeing a lot of fine, powdery dust, your chain is likely dull.
- Poor Cutting Performance: The chainsaw struggles to cut, requires excessive force, or deviates from a straight line.
- Chain Riding the Bar: The chain doesn’t seem to dig into the wood properly and may appear to “ride” on top of the cut.
- Screaming or Grinding Sounds: While not always indicative of dullness, an unusually loud or “screaming” sound during cutting can sometimes point to a chain that’s not cutting efficiently.
- Smoking Chain: Excessive heat generated by friction from a dull chain can cause the chain to smoke.
Choosing the Right Chainsaw Sharpener
There are several types of chainsaw sharpeners available, each with its own advantages. The best choice for you depends on your needs, budget, and preference.
Manual Chainsaw Sharpeners
Manual sharpeners are the most common and affordable option. They typically involve a file and a guide.
- Round Files: These are the most essential part of manual sharpening. They come in various diameters to match your chainsaw chain’s chainsaw chain pitch. The pitch refers to the distance between the drive links. Common pitches include .325, 3/8″, and .404″. Using the correct file size is crucial for proper sharpening.
- Chainsaw File Guide: This device helps you maintain the correct file angle chainsaw and depth. It typically has a slot for the round file and markers to ensure you’re filing at the recommended angle.
- Flat File: Used for setting the depth gauges (also called rakers).
- Bench Vise or Filing Clamp: To hold the guide and chain securely in place while you file.
Electric Chainsaw Sharpeners
Electric sharpeners offer speed and convenience. They use a grinding wheel that spins at high speed to sharpen the chain.
- Pros: Faster sharpening, consistent results with less effort.
- Cons: More expensive, can remove more metal if not used carefully, requires electricity.
- Types: Benchtop models that mount to a workbench and portable models that can be used in the field.
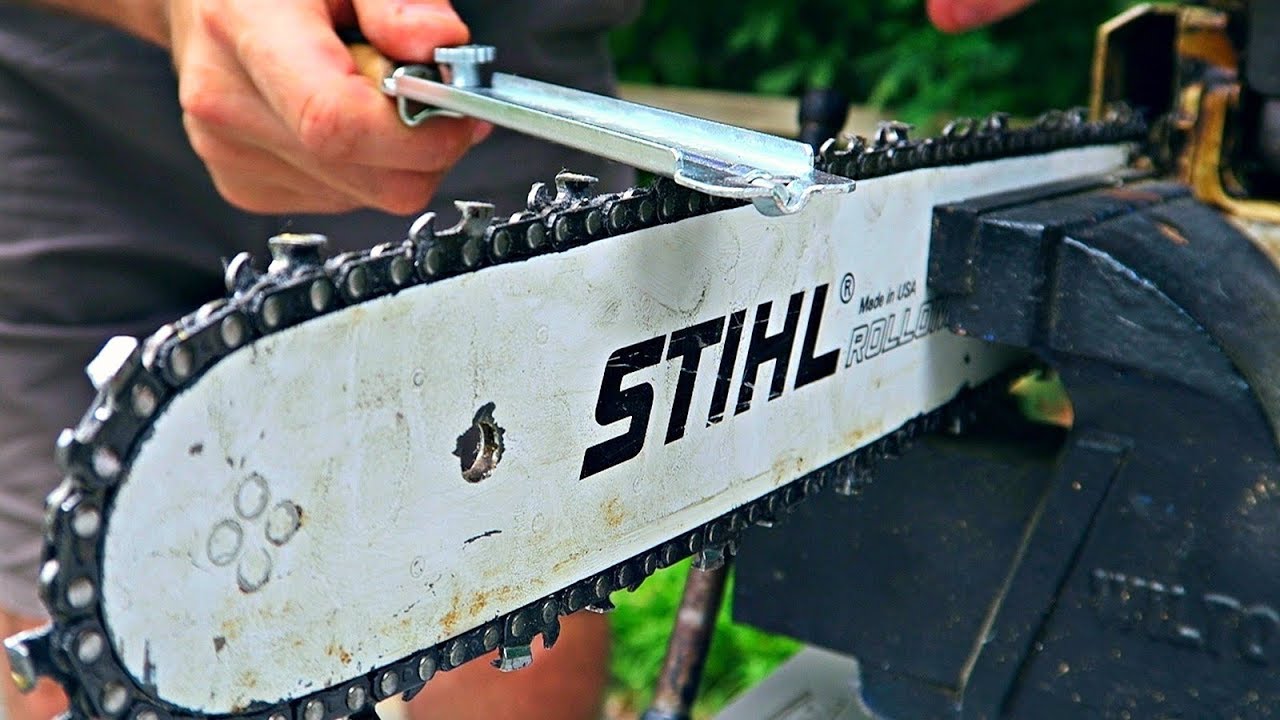
Sharpening Jig Chainsaw
A sharpening jig chainsaw is a more advanced manual sharpening system. It typically consists of a clamp that secures the chainsaw bar and chain, along with a guide mechanism that holds the file at the precise angle.
- Pros: Excellent for maintaining consistent angles, can be very accurate.
- Cons: Higher initial cost than a basic file and guide, can be slightly more complex to set up.
How to Sharpen Your Chainsaw Chain: A Step-by-Step Guide (Manual Method)
The manual method using a file and guide is the most common and cost-effective way to sharpen your chainsaw chain.
Step 1: Gather Your Tools
Before you begin, ensure you have the following:
- The correct size round file for your chain’s chainsaw chain pitch.
- A chainsaw file guide.
- A flat file (for depth gauges).
- A bench vise or a filing clamp to secure the chainsaw bar and chain.
- Gloves and eye protection.
- A clean cloth.
Step 2: Secure the Chainsaw
Place your chainsaw in a stable position. A bench vise is ideal for holding the chainsaw bar and chain securely. Clamp the bar firmly, ensuring the chain can still move freely but won’t shift while you’re filing. Alternatively, use a filing clamp specifically designed for this purpose.
Step 3: Identify the Starting Tooth
Find the shortest tooth on your chain. This will be your starting point. You will sharpen every tooth on one side of the chain, then switch to the other side.
Step 4: Set Up the File and Guide
- Place the chainsaw file guide over the tooth you are sharpening. Most guides have an indicator for the correct file angle chainsaw. The common angle is 25-35 degrees, depending on the chain type. Check your chainsaw’s manual for the manufacturer’s recommendation.
- Insert the round file into the guide. Ensure the file is seated correctly in the guide’s slot.
Step 5: File the Teeth
- Grasp the file firmly with both hands.
- Apply steady, even pressure as you pull the file towards the outer edge of the tooth.
- Move the file in a smooth, consistent stroke.
- Lift the file on the return stroke to avoid dulling the tooth.
- Count your strokes. Aim for consistency – typically 5-10 strokes per tooth, but this can vary depending on how dull the chain is.
Step 6: Sharpen All Teeth on One Side
Continue sharpening each tooth on one side of the chain, following your starting point. Ensure you maintain the same file angle chainsaw and the same number of strokes for each tooth.
Step 7: Switch to the Other Side
Once you’ve sharpened all the teeth on one side, move to the other side of the chain.
- Reposition the chainsaw bar and chain in the vise if necessary.
- Flip the chainsaw file guide to set the correct angle for the opposite side of the chain. The angle will be mirrored.
- Find the next tooth to sharpen on this side.
- Repeat the filing process, using the same number of strokes and consistent pressure as you did on the first side.
Step 8: Check the Depth Gauges (Rakers)
The depth gauges, or rakers, are the small metal pieces in front of each cutting tooth. They control how much wood the tooth can take off with each bite. If they are too high, the chain will cut inefficiently. If they are too low, the chain can cut too aggressively, leading to potential damage.
- Use a flat file and the depth gauge setting on your chainsaw file guide.
- Place the guide so the flat file rests on the depth gauge.
- File the depth gauge down until it is flush with the guide’s setting. You only need to file the top surface of the depth gauge.
- Repeat for all depth gauges on the chain.
Step 9: Clean and Test
- Wipe down the chain with a clean cloth to remove any metal filings.
- Carefully remove the chainsaw from the vise.
- Test the chain on a small piece of wood. It should cut smoothly and efficiently with minimal effort.
How to Sharpen Your Chainsaw Chain: Using an Electric Chainsaw Sharpener
Electric chainsaw sharpeners can significantly speed up the sharpening process.
Step 1: Set Up the Sharpener
- Follow the manufacturer’s instructions to set up your electric sharpener. This may involve mounting it to a workbench.
- Ensure you have the correct size grinding wheel installed for your chainsaw chain pitch.
Step 2: Secure the Chainsaw
As with the manual method, secure your chainsaw bar and chain in a vise or clamp.
Step 3: Position the Grinding Wheel
- Most electric sharpeners have a guide that helps you position the grinding wheel at the correct file angle chainsaw.
- Adjust the angle to match your chain’s specifications.
Step 4: Sharpen the Teeth
- Lower the grinding wheel onto the cutting tooth.
- Apply light, consistent pressure. Electric sharpeners remove metal quickly, so avoid pressing too hard, which can overheat and damage the tooth.
- Move the grinding wheel along the tooth’s cutting edge.
- Lift the wheel and move to the next tooth.
- Sharpen all teeth on one side, then switch to the other side, mirroring the angle and technique.
Step 5: Adjust Depth Gauges (if applicable)
Some electric sharpeners also have a mechanism to adjust depth gauges. If yours does, follow the manufacturer’s instructions. Otherwise, you’ll need to use a flat file for this step.
Step 6: Clean and Test
- Clean the chain and test its cutting performance.
Maintaining Your Chainsaw Chain: Beyond Sharpening
Sharpening is a vital part of chainsaw maintenance, but other factors also contribute to a well-performing chain.
Lubrication
Proper lubrication is essential for reducing friction and heat between the chain and bar.
- Check your chainsaw’s oil reservoir regularly. Ensure it’s filled with high-quality bar and chain oil.
- Look for oil on the bar when the chain is running. If you don’t see any, the oiler may be clogged or malfunctioning.
- Clean the oiler hole on the bar periodically.
Tension
Correct chain tension is critical for safety and performance.
- Too loose: The chain can derail from the bar, posing a serious risk of kickback.
- Too tight: It can cause excessive wear on the chain, bar, and drive sprocket, and can also lead to overheating.
- How to check: The chain should be snug against the bar but still able to be pulled by hand. When the bottom of the chain is just clear of the bar’s underside, it’s generally correct. Consult your chainsaw’s manual for specific tensioning instructions.
Cleaning
Regularly cleaning your chainsaw bar and chain removes sawdust and debris that can hinder lubrication and cause premature wear.
- After each use, wipe down the chain and bar with a cloth.
- Periodically use a brush to remove debris from the drive links and around the sprocket.
Chainsaw Chain Pitch and its Importance in Sharpening
As mentioned earlier, understanding your chainsaw chain pitch is fundamental to effective sharpening. The pitch is the spacing of the drive links. It’s usually stamped on the drive link or the bar itself.
| Common Chain Pitches | Typical Use | File Size Recommendation (Diameter) |
|---|---|---|
| 3/8″ Low Profile | Homeowners, light-duty cutting, smaller saws | 7/32″ |
| .325″ | Mid-range saws, homeowner and occasional pros | 3/16″ |
| 3/8″ | Professional use, larger saws, heavy-duty jobs | 7/32″ or 13/64″ |
| .404″ | Large saws, demanding professional logging | 7/16″ |
Using a file that is too small for your chain pitch will result in poor sharpening, and using one that is too large can damage the tooth. Always consult your chainsaw or chain manufacturer’s specifications.
Factors Affecting File Angle and Depth
The file angle chainsaw and the depth of your filing are critical for a sharp, effective chain.
- File Angle: This is the angle at which you hold the file relative to the top plate of the cutting tooth. Most chains are designed for a specific angle (usually between 25 and 35 degrees) to achieve optimal cutting performance. Deviating from this angle can lead to less efficient cutting or premature wear.
- Depth of Filing: This refers to how much material you remove from the cutting tooth with each stroke. Too little filing won’t restore the sharpness. Too much filing will shorten the life of the tooth and the chain. Consistency in the number of strokes per tooth is key.
The chainsaw file guide is your best friend for maintaining these precise angles and ensuring consistent results.
Common Mistakes to Avoid When Sharpening
Even with the right tools, it’s possible to make mistakes. Here are some common pitfalls to avoid:
- Using the Wrong File Size: This is a critical error that can ruin your chain.
- Inconsistent Filing Angles: This leads to uneven cutting and reduced efficiency.
- Over-Filing: Removing too much metal from the teeth will significantly shorten the life of your chain.
- Under-Filing: Not removing enough metal will leave the chain dull and inefficient.
- Forgetting the Depth Gauges: Dull depth gauges will prevent the chain from cutting effectively, even if the teeth are sharp.
- Not Securing the Chain Properly: A loose chain will make accurate filing impossible and can be dangerous.
- Sharpening Only One Side: Always sharpen both sides of the chain evenly.
Frequently Asked Questions (FAQ)
-
How often should I sharpen my chainsaw chain?
The frequency of sharpening depends on how you use your chainsaw. A good rule of thumb is to sharpen your chain every time you refuel, or when you notice a decline in cutting performance. For very demanding use, you might need to sharpen more often. -
Can I sharpen my chainsaw chain with just any file?
No, you need a file specifically designed for chainsaw chains and the correct size for your chain’s chainsaw chain pitch. A standard metal file is not suitable. -
What if my chain is severely damaged or missing teeth?
If your chain has missing teeth, is bent, or has significant damage, it’s usually best to replace the entire chain rather than attempt to sharpen it. -
How do I know if I’ve over-sharpened my chain?
If you’ve removed too much material from the teeth, they will appear very small, and the chain will wear out much faster. You might also notice the chain struggling to bite into the wood, similar to a dull chain, because the cutting edge isn’t pronounced enough. -
Does chain oil help with sharpening?
Chain oil is crucial for lubricating the chainsaw bar and chain during cutting, reducing friction and heat. It doesn’t directly help with the sharpening process itself, but it’s a vital part of overall chainsaw maintenance that keeps your equipment running smoothly.
By following these guidelines and practicing consistently, you can master the art of chainsaw sharpening and ensure your equipment is always ready for the job. A sharp chain is a safe chain, and a well-maintained chainsaw will serve you reliably for years to come.