
Can you get perfectly straight cuts with a track saw? Yes, absolutely! A track saw is your secret weapon for achieving incredibly straight, clean, and accurate cuts on a variety of materials, making it a favorite among professionals and serious DIYers. This guide will walk you through everything you need to know to master this powerful tool.
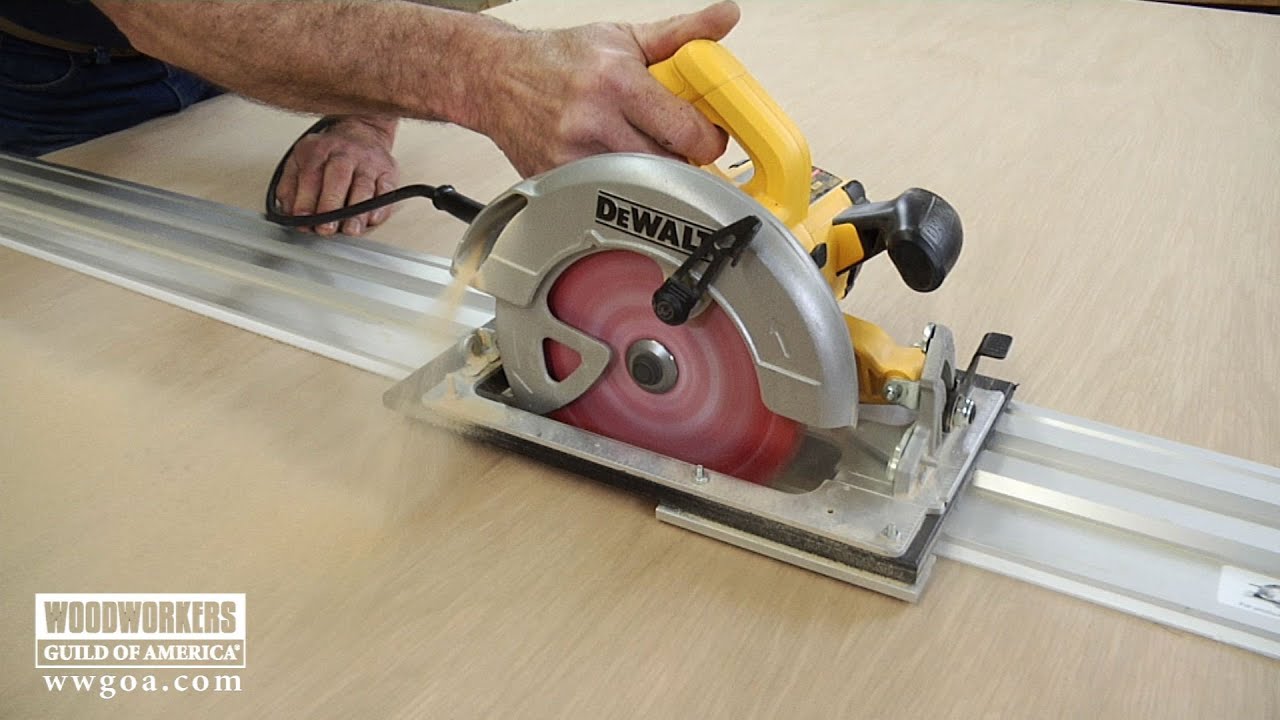
Image Source: i.ytimg.com
Track Saw Basics: What You Need to Know
A track saw, sometimes called a plunge saw or circular saw with a guide rail, is a specialized power tool designed for precise straight-line cuts. Unlike traditional circular saws that rely on the user’s steady hand and a separate straightedge for guidance, a track saw works in conjunction with a guide rail (or track) that it clips onto. This integrated system ensures unparalleled accuracy and significantly reduces the risk of off-course or jagged cuts.
What is a Track Saw?
At its core, a track saw is a high-quality circular saw with a flat base that mates securely to a guide rail. The saw blade is typically enclosed in a housing that runs within a slot on the track. This design means the saw is always precisely aligned with the track, guiding it along a perfect straight line.
Why Use a Track Saw?
Track saws offer several advantages over standard circular saws:
- Unmatched Accuracy: The guide rail system guarantees perfectly straight and repeatable cuts.
- Clean Cuts: They create very little tear-out, especially when used with the correct blade and anti-splinter strip.
- Plunge Cutting Capability: Many models allow you to plunge the blade into the material at any point, not just from the edge.
- Dust Collection: They are designed for efficient dust extraction, keeping your workspace cleaner and your lungs safer.
- Portability: They are generally more portable than table saws or panel saws, making them ideal for job sites or smaller workshops.
- Versatility: They can cut wood, laminate, melamine, MDF, acrylic, and even some metals with the right blade.
Can I Use a Track Saw for Rip Cuts?
Yes, you can definitely use a track saw for rip cuts (cuts parallel to the grain or the length of a board). In fact, this is one of its primary strengths. The guide rail allows you to set up a precise rip cut much more easily and accurately than with a standard circular saw and clamp.
Mastering Track Saw Setup: Precision Starts Here
Getting your track saw set up correctly is crucial for achieving those pro-level results. It’s not just about slapping the saw on the track; a few key adjustments make all the difference.
The Track Saw Guide: Your Foundation for Accuracy
The guide rail is the heart of the track saw system. It’s a precision-engineered aluminum extrusion that the saw glides along.
- Types of Tracks: Tracks come in various lengths, from short ones for smaller cuts to very long ones for sheet goods. Some systems also offer connecting pieces to create even longer tracks.
- Anti-Splinter Strip: Most tracks have an integrated rubber or plastic strip along the cutting edge. This strip is designed to be trimmed by the saw blade on the first pass, creating a perfect zero-clearance fit that prevents splintering on the cut edge.
Track Saw Setup Steps:
- Position the Track: Lay the track on your workpiece. Ensure the anti-splinter strip is on the side of the cut line that will be the “good” side of your material, as this is where the zero-clearance edge will be.
- Mark Your Cut Line: Accurately mark your desired cut line on the workpiece.
- Align the Track: This is the most critical step for accuracy.
- Zero-Clearance Edge Alignment: For the most precise cuts, align the edge of the anti-splinter strip directly on your cut line. This ensures the blade cuts exactly where you marked.
- Offset Measurement: If you’re not using the zero-clearance edge directly on the line, you’ll need to account for the offset. Most track saws have markings or an indicator on the saw body that shows the blade’s cutting position relative to the track. Measure this offset and place the track so that the track’s edge, plus the offset, lands on your cut line. For example, if the blade is 1/2 inch from the track edge, and you want to cut on your line, place the track so the track’s edge is 1/2 inch away from your cut line.
- Secure the Track: Clamp the track firmly to the workpiece. Use dedicated track saw clamps, C-clamps, or quick-release clamps. Ensure the clamps don’t interfere with the saw’s movement. Double-check that the track doesn’t shift during clamping.
- Set Saw Depth: Adjust the track saw’s depth setting. This is crucial for safety and cut quality.
Achieving Perfect Track Saw Cuts: Techniques and Tips
With your track saw set up, it’s time to make those beautiful cuts. A little practice and attention to detail will elevate your results.
Track Saw Depth Adjustment: The Key to Clean Edges
Proper depth adjustment is vital. You want the blade to cut just deep enough to go through your material, with minimal blade exposure below.
- General Rule: Set the depth to be about one blade thickness deeper than your material.
- Cutting Sheet Goods: For sheet materials like plywood or MDF, set the depth so the blade extends just past the material. This minimizes the amount of blade exposed below, reducing the risk of kickback and damage to any surface the workpiece might be resting on.
- Cutting Smaller Stock: For smaller pieces of lumber, you might need a slightly deeper cut, but always be mindful of what’s beneath the workpiece.
Making Your First Cut: The Initial Pass
The first cut you make with a new track system is important.
- Trim the Anti-Splinter Strip: With the track positioned so the anti-splinter strip is precisely on your marked cut line, make a shallow pass with the track saw. This trims the strip to perfectly match the saw’s blade path, creating that zero-clearance edge for all subsequent cuts.
- Set the Correct Depth: After trimming, set your saw depth as described above.
- Start the Saw: Ensure the saw is fully seated on the track and the power is on.
- Advance Smoothly: Push the saw smoothly and steadily along the track. Let the saw do the work; don’t force it.
- Complete the Cut: Continue until the blade exits the material completely.
- Retract and Power Off: Retract the blade back into its housing (especially if it’s a plunge saw) and then turn off the saw.
Advanced Track Saw Cutting Techniques:
- Plunge Track Saw Cuts: A plunge track saw allows you to start a cut anywhere on the material.
- Marking the Start/End: Clearly mark where you want the plunge cut to begin and end.
- Positioning: Place the track so the blade is positioned at the start of your cut line.
- Plunge: Engage the plunge mechanism and slowly lower the blade into the material until it reaches the set depth.
- Cut: Proceed to cut along the track as usual.
- Retract: Once at the end of the cut, retract the blade and power off.
- Cutting Large Panels: For large sheets, you might need to extend your track with connector pieces. Ensure the connection is seamless and the track remains perfectly straight. You may also need to use more clamps.
- Bevel Cuts: Most track saws can be tilted to make bevel cuts. When making bevel cuts, it’s crucial to re-check the depth setting and ensure the saw is properly seated on the track at the desired angle. The cutting depth will change with the bevel angle.
- Cutting from the Center Out: For very long cuts or when working with potentially unstable material, starting the cut from the center and cutting outwards towards each end can sometimes provide better support and reduce the risk of the offcut falling and binding the blade.
Track Saw Accessories: Enhancing Your Capabilities
The right track saw accessories can significantly improve your efficiency, accuracy, and safety.
Essential Track Saw Accessories:
- Track Saw Clamps: Specifically designed clamps for track saws provide a secure grip without interfering with the saw’s path.
- Track Connectors: If you need to make cuts longer than a single track, these allow you to join multiple tracks for a continuous, precise cut.
- Track Saw Dust Port Adapter: Connects your track saw’s dust port to your shop vacuum for effective dust collection.
- Anti-Jump Stop: These small devices attach to the track and prevent the saw from accidentally sliding backwards off the track.
- Circular Saw Blades: Using the correct blade for your material is paramount.
- Wood Blades: Vary in tooth count and configuration for different types of wood and cut quality.
- Laminate/Melamine Blades: Often have a higher tooth count and a specific grind to prevent chipping on these delicate surfaces.
- Fine-tooth Blades: For very clean, chip-free cuts, especially on veneered plywood or laminates.
- Track Saw Cases: Protect your investment and keep everything organized.
- Track Saw Zero-Clearance Inserts: Some systems offer replacement zero-clearance inserts for the saw base to further reduce tear-out on the top surface.
Track Saw Safety: Prioritizing Your Well-being
While track saws are generally safer than handheld circular saws due to their integrated guidance system, safety should always be your top priority.
Track Saw Safety Precautions:
- Read the Manual: Always read and follow the manufacturer’s instructions for your specific track saw and guide rail system.
- Wear Safety Glasses: Protect your eyes from dust and debris.
- Wear Hearing Protection: Power saws can be loud.
- Wear a Dust Mask or Respirator: Especially when cutting materials that produce fine dust like MDF or certain hardwoods.
- Ensure Proper Blade Guard Function: Never bypass or disable the blade guard.
- Secure Your Workpiece: Always clamp the track securely. Never try to hold the track with your foot or body.
- Check for Obstructions: Ensure there are no nails, screws, or other foreign objects in the path of the blade.
- Avoid Kickback:
- Use sharp blades.
- Ensure the workpiece is fully supported and not pinching the blade.
- Never force the saw; let it cut at its own pace.
- Ensure the anti-splinter strip is properly seated and trimmed.
- Disconnect Power: Always disconnect the power source before changing blades or performing maintenance.
- Keep the Area Clear: Maintain a clean and organized workspace. Remove any scrap material that could interfere with the cut or cause a tripping hazard.
- Cordless Track Saw Considerations: If you’re using a cordless track saw, be mindful of battery life and ensure you have a charged spare if you’re on a long job. Battery power can sometimes be less consistent than corded models, so start cuts smoothly.
Track Saw Accuracy: Achieving Professional Results
The track saw’s design inherently lends itself to exceptional accuracy. However, a few practices will further refine your results.
Factors Influencing Track Saw Accuracy:
- Track Alignment: As discussed, precise alignment of the track to your cut line is paramount.
- Blade Sharpness: A dull blade will wander and cause tear-out, directly impacting accuracy.
- Saw Condition: Ensure your track saw’s components are clean and functioning smoothly. Check that the saw glides freely on the track.
- Material Stability: Warped or unstable material can affect the cut, even with a track saw. Ensure your workpiece is flat and well-supported.
- User Technique: Smooth, consistent pressure during the cut prevents the saw from deviating.
Tips for Maximizing Track Saw Accuracy:
- Double-Check Measurements: Always measure twice, cut once.
- Use the Zero-Clearance Edge: Whenever possible, align the track’s anti-splinter strip directly on your cut line.
- Test Cuts: If you’re working with expensive material or a critical cut, make a test cut on scrap material first to verify your setup and blade.
- Maintain Your Track: Keep your guide rails clean and free of debris. Wipe them down periodically.
Cordless vs. Corded Track Saws: Which is Right for You?
The choice between cordless and corded track saws often comes down to convenience and power needs.
Cordless Track Saw Advantages:
- Portability: No cord means freedom to move around the job site without worrying about power outlets or extension cords.
- Convenience: Faster setup and takedown.
- Safety: Eliminates the trip hazard of a power cord.
Corded Track Saw Advantages:
- Consistent Power: Delivers uninterrupted, consistent power, which can be beneficial for long, demanding cuts.
- Potentially Lower Cost: Historically, corded models were less expensive.
- No Battery Management: No need to worry about charging or battery lifespan.
What to Consider:
- Job Site Location: If you work on many remote job sites, a cordless model is almost essential.
- Duration of Cuts: For very long or frequent cuts, consider the battery life of cordless models or the convenience of a corded saw.
- Existing Battery Ecosystem: If you already own tools from a specific brand, sticking with their cordless track saw can be cost-effective.
Frequently Asked Questions (FAQ)
Q1: How do I prevent splintering when cutting laminate with a track saw?
A1: Use a fine-tooth blade specifically designed for laminates. Ensure the anti-splinter strip on your track is properly trimmed to create a zero-clearance edge. You can also apply painter’s tape along the cut line, although a good blade and trimmed track are usually sufficient.
Q2: Can I use a track saw without the track?
A2: While some track saws can be used independently, they are designed to work with the track. Using them without the track negates their primary benefit of precision guidance and can lead to less accurate cuts, similar to a standard circular saw.
Q3: How do I store my track saw and tracks?
A3: Store your track saw in its case to protect it. Tracks should be stored flat and away from excessive heat or moisture to prevent warping. Many manufacturers offer wall-mounted racks for tracks.
Q4: What is the typical lifespan of a track saw blade?
A4: The lifespan of a blade depends heavily on the material being cut, the number of cuts, the quality of the blade, and proper usage. A good quality blade used for wood might last hundreds of cuts, while a laminate blade might wear out sooner on abrasive materials. Always replace dull blades promptly.
Q5: Can I cut metal with a track saw?
A5: Yes, with the correct metal-cutting blade and appropriate safety precautions (like a vacuum with a fine dust filter and potentially a slower RPM if the saw allows), you can cut metal. Ensure the track is securely clamped, and wear appropriate safety gear.
By following this comprehensive guide, you’ll be well on your way to using your track saw like a seasoned professional, achieving perfectly straight, clean, and safe cuts every time. Happy cutting!