
Can you tighten a circular saw blade yourself? Yes, you absolutely can tighten a circular saw blade yourself, and it’s a vital part of power tool maintenance that ensures safety and effective cutting. This guide will walk you through the process step-by-step.
A loose circular saw blade is a serious hazard. It can wobble, leading to uneven cuts, increased vibration, and potentially cause the blade to detach from the saw, posing a severe risk of injury. Ensuring your blade security is paramount before every use. This detailed guide focuses on the correct and safe way to achieve this.
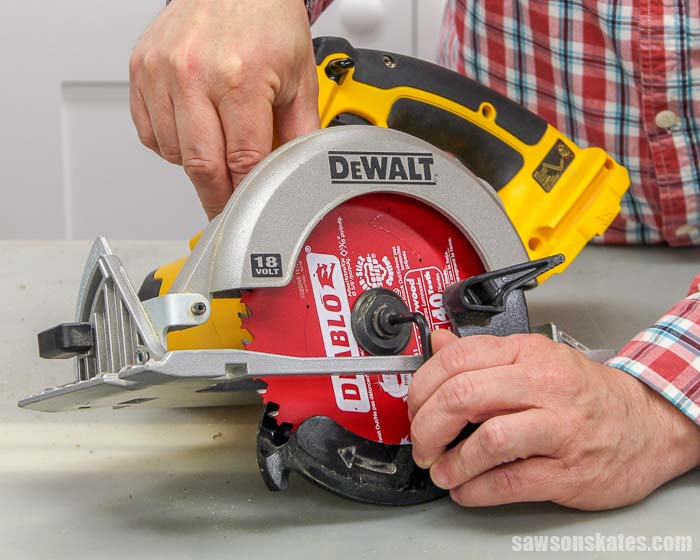
Image Source: sawsonskates.com
Why Proper Blade Tightening Matters
Before diving into the “how-to,” let’s briefly cover why this seemingly simple task is so important. A securely fastened blade:
- Ensures Safety: Prevents the blade from flying off during operation.
- Improves Cut Quality: Reduces wobble, leading to cleaner, straighter cuts.
- Extends Tool Life: Minimizes stress on the motor and bearings.
- Prevents Blade Damage: A loose blade can bind and break.
Gathering Your Tools and Preparing Your Saw
Before you start, ensure you have the necessary tools and have taken the proper safety precautions. This is crucial for any circular saw repair or maintenance.
Essential Tools for Blade Tightening
- Arbor Wrench or Spanner: Most circular saws come with a specific wrench designed to fit the arbor nut. If you’ve lost yours, you can usually find a universal replacement at hardware stores. This tool is key to the cutting disc tightener process.
- Work Gloves: To protect your hands from sharp edges and grease.
- Safety Glasses: Essential for protecting your eyes from flying debris.
- Cleaning Cloth: For wiping away dust and debris.
- Manufacturer’s Manual: Always refer to your saw’s manual for specific instructions.
Safety First: Unplugging and Securing
The most critical step before any saw blade replacement or tightening is to ensure the saw is unplugged.
- Disconnect Power: Always unplug the circular saw from the power source. For cordless saws, remove the battery pack. This is non-negotiable for your safety.
- Clear Your Workspace: Work in a well-lit, stable area. Ensure the saw is placed on a flat, firm surface.
- Wear Safety Gear: Put on your safety glasses and work gloves.
Locating the Blade and Its Fastening Mechanism
Every circular saw has a visible blade, but the mechanism that holds it in place might be covered.
The Blade Spindle and Arbor Nut
The blade spindle is the rotating shaft that the saw blade attaches to. At the end of the spindle, you’ll find the arbor nut. This nut is the primary component responsible for holding the blade in place. It threads onto the spindle and is tightened against the blade assembly.
The Blade Locking Mechanism
Most circular saws use a simple nut and washer system. However, some might have additional features as part of their blade locking mechanism.
- Outer Flange/Washer: This sits on the outside of the blade and often has a raised section that fits into a notch or keyway on the blade itself. This prevents the blade from spinning freely on the spindle when you tighten the nut.
- Inner Flange/Washer: This sits between the motor shaft and the blade.
- Arbor Nut: This is the final piece that threads onto the spindle.
The blade nut removal process involves loosening this nut.
Step-by-Step Guide: How to Tighten a Circular Saw Blade
Tightening a circular saw blade involves a specific sequence of actions to ensure the blade security is correct.
1. Removing the Blade Guard (If Necessary)
Some saws require you to retract or remove the lower blade guard to access the arbor nut.
- Locate the guard lift lever or button.
- Gently pull it to move the guard out of the way.
- Some guards may need to be unscrewed or unclipped entirely. Consult your manual if unsure.
2. Engaging the Spindle Lock (If Available)
Many circular saws have a spindle lock button. This is a crucial feature for saw blade replacement and tightening.
- Locate the spindle lock button, usually a small button or plunger on the side of the saw’s gearbox or motor housing.
- While applying slight pressure on the blade to prevent it from turning, press and hold the spindle lock button. This will immobilize the spindle, making it easier to loosen or tighten the arbor nut.
3. Loosening the Arbor Nut (If Changing the Blade)
If you are replacing the blade, you’ll first need to loosen and remove the existing arbor nut.
- Place the arbor wrench onto the arbor nut.
- Hold the spindle lock button down (if applicable).
- Turn the wrench counter-clockwise to loosen the nut.
- Important Note on Direction: Most arbor nuts are reverse-threaded. This means you turn them clockwise to loosen and counter-clockwise to tighten. However, always confirm this with your saw’s manual, as exceptions can exist. This is a common point of confusion during blade nut removal.
- Once loosened, unscrew the nut completely by hand.
- Remove the outer flange and the old saw blade.
4. Installing a New Blade (or Reinstalling the Old One)
Ensure the blade is installed with the correct side facing out. Most blades have an arrow indicating the direction of rotation. This arrow should point in the same direction as the saw’s motor rotation.
- Place the inner flange onto the blade spindle.
- Slide the new (or cleaned old) saw blade onto the spindle, aligning the center hole with the spindle. Ensure the rotation arrow is correct.
- Place the outer flange over the blade. The flange often has a matching notch or keyway that should align with a slot or pin on the blade or spindle.
- Ensure the outer flange is seated correctly.
5. Tightening the Arbor Nut
This is the core of ensuring blade security.
- Thread the arbor nut back onto the blade spindle by hand, turning it clockwise to tighten.
- Once hand-tight, use the arbor wrench to secure it further.
- Engage the spindle lock button again.
- Turn the wrench clockwise firmly to tighten the nut.
How tight should it be? You want it snug and secure, but not so tight that you damage the threads or the components. Over-tightening can strip threads or warp the blade. A good rule of thumb is to tighten it until it resists further turning with firm pressure. Imagine tightening a jar lid – firm, but not brute force.
6. Reinstalling the Blade Guard and Testing
- Reattach the blade guard if you removed it.
- Plug the saw back in or reinsert the battery.
- Carefully spin the blade by hand to ensure it moves freely and doesn’t rub against the guard or any other part of the saw.
- Briefly run the saw without cutting anything to listen for any unusual noises or vibrations, which might indicate the blade is still loose or improperly seated.
Frequently Asked Questions (FAQ)
What is the correct direction to tighten a circular saw blade?
In most cases, the arbor nut tightens in a clockwise direction. This is because the rotation of the saw blade naturally tries to loosen a standard thread. However, it is crucial to consult your saw’s manual, as some models might have different threading.
Can I use a regular wrench to tighten the arbor nut?
While a standard adjustable wrench might fit, it’s highly recommended to use the specific arbor wrench that came with your saw or a designated replacement. Standard wrenches can round off the corners of the arbor nut, making it difficult or impossible to loosen later and compromising the secure fit. This is a key aspect of proper power tool maintenance.
How often should I check my circular saw blade tightness?
It’s a good practice to check the blade security before every use. Vibrations during operation can sometimes loosen fasteners over time. This is an essential part of ensuring the blade locking mechanism remains effective.
My arbor nut is stuck. What should I do?
If the arbor nut is stuck, first ensure you are trying to loosen it in the correct direction (usually counter-clockwise, but confirm with your manual). If it’s still stuck, a penetrating lubricant might help, but use it sparingly. Ensure the spindle lock is fully engaged. If it persists, seeking professional circular saw repair might be necessary to avoid damaging the spindle.
Is there a specific torque setting for the arbor nut?
Most circular saws do not specify a precise torque setting for the arbor nut. The general guideline is to tighten it firmly until it resists further turning, ensuring it’s snug. Over-tightening can be more detrimental than under-tightening in some cases.
Troubleshooting Common Issues
Even with careful attention, you might encounter minor problems.
Blade Wobble
If you experience blade wobble after tightening:
* Re-check Tightness: Ensure the arbor nut is fully secured.
* Inspect the Blade: The blade itself might be warped or damaged.
* Examine Flanges: Ensure the inner and outer flanges are clean, straight, and properly seated. Debris on the flanges or spindle can cause misalignment.
* Check Spindle Lock: Make sure the spindle lock disengages fully and doesn’t interfere with the blade’s free rotation.
Difficulty Accessing the Arbor Nut
Some saws have enclosed guards.
* Consult Manual: Your saw’s manual will detail how to access the blade for saw blade replacement or tightening.
* Guard Design: Understand that some guards are designed to be minimally intrusive.
Stripped Threads on Arbor Nut or Spindle
This is a more serious issue that requires professional attention. Stripped threads mean the nut won’t properly grip the spindle, compromising blade security entirely. This falls under circular saw repair and usually requires replacing the spindle or nut.
The Importance of Regular Inspection
Tightening the blade is not a one-time task. It’s part of a broader commitment to power tool maintenance. Regularly inspect your saw for:
- Blade Condition: Look for chips, cracks, or excessive wear.
- Flange Condition: Ensure they are clean and undamaged.
- Spindle Cleanliness: Remove any sawdust or debris that might interfere with seating.
- Wrench Condition: Make sure your arbor wrench is in good condition and fits the nut correctly.
By following these steps diligently, you ensure your circular saw operates safely and efficiently, providing you with clean, accurate cuts for all your projects. Remember, a tight blade is a safe blade, and proper power tool maintenance is the key to longevity and performance.