
Image Source: i.ytimg.com
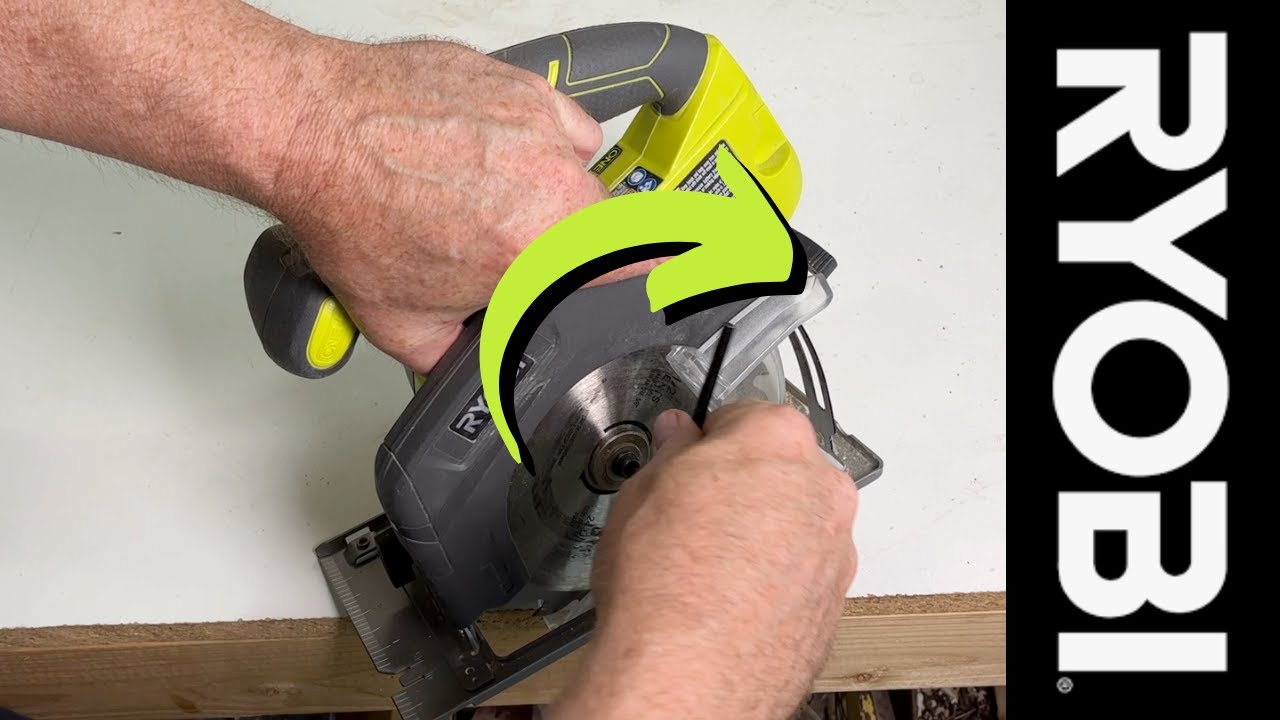
How To Change Ryobi Circular Saw Blade
Can I change the blade on my Ryobi circular saw myself? Yes, you absolutely can change the blade on your Ryobi circular saw yourself with basic tools and a little guidance. This is a fundamental aspect of Ryobi power tool maintenance that can save you time and money.
Keeping your Ryobi circular saw in top working condition is crucial for achieving clean, precise cuts. A dull or damaged blade can not only make your work harder but also pose a safety risk. Fortunately, Ryobi saw blade replacement is a straightforward process that most DIYers can tackle. This comprehensive guide will walk you through each step, ensuring you can perform changing circular saw blade duties like a pro. While this guide focuses on circular saws, the principles of safety and blade removal are similar for other Ryobi tools like the Ryobi miter saw blade, Ryobi jigsaw blade, and Ryobi reciprocating saw blade, though specific mechanisms may differ.
Gathering Your Tools and Materials
Before you dive into Ryobi saw disassembly or Ryobi saw blade installation, it’s essential to have the right tools and materials ready. This makes the process smoother and safer.
Here’s what you’ll need:
- New Ryobi Saw Blade: Ensure it’s the correct size and type for your specific Ryobi circular saw model and the material you’ll be cutting. Check your saw’s manual if you’re unsure.
- Spanner Wrench or Allen Wrench: Most Ryobi circular saws come with a specialized wrench or an Allen key designed to fit the arbor nut. This is the most critical tool for changing the blade on a Ryobi circular saw.
- Safety Glasses: Absolutely non-negotiable. Sawdust and small metal fragments can fly during blade changes.
- Work Gloves: These provide a better grip on the blade and protect your hands from sharp edges.
- Soft Cloth or Rag: For cleaning the blade arbor and surrounding areas.
- Compressed Air (Optional): Useful for blowing away dust and debris.
- Owner’s Manual: Always a good reference for your specific model’s procedures.
Prioritizing Safety: The First Step in Ryobi Tool Repair
Safety is paramount when dealing with any power tool, and changing circular saw blade is no exception. Always follow these safety precautions:
- Disconnect Power: Before doing anything, ensure the saw is unplugged from the power source. For cordless models, remove the battery. This is the single most important safety step.
- Allow Blade to Cool: If you’ve recently used the saw, the blade will be hot. Give it ample time to cool down before attempting removal.
- Secure the Saw: Place the saw on a stable, flat surface. You might want to clamp it down or have someone hold it steady, especially if you’re changing the blade on a benchtop model.
- Wear Safety Gear: Always wear safety glasses and gloves.
- Clear the Work Area: Remove any clutter or debris from around the saw and your workspace.
Deciphering the Blade Change Mechanism
Ryobi circular saws, like most power saws, employ a common method for securing their blades. The blade is held in place by an arbor nut that threads onto a central shaft (the arbor). To remove the old blade and install a new one, you need to loosen and remove this arbor nut.
The key to this process is often a spindle lock mechanism. This lock engages with the motor shaft, preventing it from turning while you loosen the arbor nut.
Locating the Spindle Lock
Most Ryobi circular saws have a spindle lock button or lever located near the blade housing.
- Button Type: This is typically a small, round button you press firmly inward.
- Lever Type: Some models might have a lever you push to engage the lock.
Consult your Ryobi owner’s manual if you have trouble finding it. Once engaged, the spindle lock will prevent the arbor shaft from spinning, allowing you to apply the necessary torque to the arbor nut.
Step-by-Step Guide: Changing the Blade on a Ryobi Circular Saw
Now that you’re prepared and understand the basic mechanism, let’s get to the actual Ryobi saw blade installation.
Step 1: Prepare Your Saw
- Unplug the Saw/Remove Battery: As stressed before, ensure the saw has no power connection.
- Position the Saw: Place the saw on a stable surface.
- Adjust the Shoe: Lower the saw’s shoe (the base plate) as far as possible to gain better access to the blade and arbor nut. Some saws have a depth adjustment lever for this.
Step 2: Engage the Spindle Lock
- Locate the Lock: Find the spindle lock button or lever.
- Press or Push: Firmly press the button or push the lever to engage the spindle lock. You should feel or hear it click into place. This will prevent the arbor shaft from turning.
Step 3: Loosen and Remove the Arbor Nut
- Fit the Wrench: Place the correct wrench (spanner or Allen key) onto the arbor nut. Ensure it’s seated securely to avoid stripping the nut.
- Turn Counter-Clockwise: Apply firm, steady pressure to turn the wrench counter-clockwise. This is the standard direction for loosening most threaded fasteners. Remember: “Righty tighty, lefty loosey.”
- Support the Saw: As you loosen the nut, you might need to use your other hand or a helper to keep the saw stable, even with the spindle lock engaged.
- Remove the Nut: Once the nut is loose enough, unscrew it completely by hand. Keep the arbor nut and any washers in a safe place; you’ll need them for the new blade.
Step 4: Remove the Old Blade
- Access the Blade: The blade is typically held between two flanges or washers. The outer flange might now be loose.
- Remove Outer Flange: Carefully slide off the outer flange.
- Slide Out the Blade: Gently slide the old blade off the arbor shaft. Be mindful of its sharpness. Blades can have different tooth orientations, so take note of how the old one was installed.
- Inspect the Arbor: While the blade is off, it’s a good time to inspect the arbor for any damage or excessive dirt. Clean it with a soft cloth.
Step 5: Install the New Ryobi Saw Blade
This is where Ryobi saw blade installation takes place. Proper orientation is key.
- Check Blade Direction: Most circular saw blades have teeth that are angled to cut on the “push” stroke (as the blade rotates away from you). Look for an arrow on the blade itself, which indicates the direction of rotation. This arrow should point in the same direction as the rotation of the saw when it’s running.
- Position the New Blade: Slide the new blade onto the arbor shaft, ensuring it sits flush against the inner flange. Make sure the teeth are facing the correct direction, matching the rotation arrow.
- Replace the Outer Flange: Place the outer flange back onto the arbor shaft, ensuring it also sits flush and properly against the blade.
- Thread the Arbor Nut: Screw the arbor nut back onto the shaft by hand, turning it clockwise. Ensure it threads smoothly without cross-threading.
Step 6: Tighten the Arbor Nut
- Engage Spindle Lock Again: Press the spindle lock button or push the lever to re-engage it.
- Tighten the Nut: Use your wrench to tighten the arbor nut firmly clockwise. You want it snug, but avoid over-tightening, which can damage the threads or the blade. A good rule of thumb is to tighten it until it’s snug, then give it another quarter to half turn.
- Release Spindle Lock: Once the nut is tight, release the spindle lock.
Step 7: Final Checks
- Spin the Blade: Manually spin the blade to ensure it rotates freely and doesn’t rub against the blade guard or any other part of the saw.
- Clean Up: Remove any sawdust or debris from the saw.
- Re-insert Battery/Plug In: Once you’re confident everything is in place, you can reconnect the power.
Selecting the Right Ryobi Saw Blade
Choosing the correct blade is as important as the replacement process itself. Ryobi offers a range of blades for different applications.
| Blade Type | Material | Teeth Per Inch (TPI) | Best For |
|---|---|---|---|
| General Purpose | Wood (plywood, dimensional lumber) | 24-40 | Everyday cuts, rip cuts, crosscuts |
| Fine Finish / Crosscut | Wood (hardwoods, softwoods, veneers) | 40-80 | Smooth, clean cuts with minimal splintering |
| Ripping Blade | Wood (softwoods, hardwoods) | 10-24 | Cutting with the grain (rip cuts), faster but rougher |
| Carbide-Tipped Wood | Wood, composite materials, some plastics | Varies | Durability, heat resistance, longer-lasting sharpness |
| Metal Cutting Blade | Ferrous and non-ferrous metals | Varies | Specialized blades designed for metal |
| Masonry/Concrete Blade | Concrete, brick, tile, stone | Diamond edge | Wet or dry cutting of hard materials |
| Specialty Blades | Laminates, plastics, composites, dry wall | Varies | Optimized for specific materials to reduce chipping/melting |
When performing Ryobi saw blade replacement, consider:
- Material: What will you be cutting most often?
- Cut Quality: Do you need a rough cut or a fine finish?
- Blade Speed: Higher RPM saws often benefit from more teeth for smoother cuts.
- Arbor Size: Ensure the new blade’s arbor hole matches your saw’s arbor shaft size (usually 5/8″ or 1″).
Common Issues and Troubleshooting Ryobi Tool Repair
Even with careful execution, you might encounter a few snags during Ryobi saw disassembly or Ryobi saw blade installation.
- Stripped Arbor Nut or Shaft: If the nut or shaft threads are damaged, you might not be able to loosen or tighten them properly. This often requires professional Ryobi tool repair or replacing the arbor assembly.
- Blade Wobbles: This can happen if the arbor nut isn’t tightened sufficiently, the blade is warped, or the arbor itself is bent. Ensure the nut is tight and check the blade for damage.
- Spindle Lock Won’t Engage: If the spindle lock button feels loose or doesn’t seem to lock the shaft, inspect it for debris or damage. Sometimes, a light tap can dislodge minor obstructions. If it’s broken, professional repair is needed.
- Blade Guard Obstruction: Make sure the blade guard is not binding on the new blade. Ensure the blade is correctly seated and the guard moves freely.
Beyond the Circular Saw: Blade Changes on Other Ryobi Tools
While the focus is on circular saws, it’s worth noting that changing circular saw blade principles extend to other Ryobi tools, albeit with variations.
- Ryobi Jigsaw Blade: Jigsaws typically use a tool-free blade clamp. You usually just pull a lever or twist a collar to release the old blade and insert a new one.
- Ryobi Reciprocating Saw Blade: Similar to jigsaws, reciprocating saws often feature a tool-less blade clamp. You’ll typically twist a collar or push a button to release the blade.
- Ryobi Miter Saw Blade: Miter saws are essentially larger circular saws. The process of loosening the arbor nut with a spindle lock and wrench is very similar, but the blade sizes are generally larger, and access might differ slightly due to the miter saw’s design.
Regularly inspecting and maintaining your blades, whether it’s a Ryobi miter saw blade or a Ryobi jigsaw blade, is a vital part of Ryobi power tool maintenance.
Maintaining Your Ryobi Tools for Longevity
Proper Ryobi tool maintenance goes beyond just changing blades. It ensures your tools last longer and perform optimally.
- Cleanliness: Keep your tools clean, especially the motor housing and blade areas. Dust and debris can affect performance and generate excess heat.
- Lubrication: Some tools may require occasional lubrication of moving parts, but always refer to your manual before applying any lubricants.
- Storage: Store your tools in a dry, protected environment.
- Regular Inspections: Periodically check cords, batteries, guards, and all moving parts for wear and tear.
Conclusion: Empowering Your DIY Projects
Changing the blade on a Ryobi circular saw is a fundamental skill that empowers you to tackle a wider range of projects. By following these steps, prioritizing safety, and using the correct tools, you can efficiently perform Ryobi saw blade replacement and keep your Ryobi tools in peak condition. Remember that proper maintenance, including selecting the right Ryobi saw blade for the job, will not only improve your cutting results but also contribute to the longevity and safety of your equipment. Whether you’re a seasoned pro or a weekend warrior, mastering this aspect of Ryobi tool repair will undoubtedly enhance your woodworking experience.
Frequently Asked Questions (FAQ)
Q1: How often should I change my Ryobi circular saw blade?
A1: The frequency of blade changes depends on usage and the material being cut. If you notice dullness, increased effort required for cuts, rougher finishes, or burning marks on the wood, it’s time for a Ryobi saw blade replacement. For general woodworking, a sharp blade can last for many hours of cutting.
Q2: Can I use a blade from a different brand on my Ryobi circular saw?
A2: Yes, you can use blades from other reputable brands as long as they are the correct diameter and have the correct arbor hole size (typically 5/8 inch for most Ryobi circular saws) and are designed for circular saws. Always check the specifications.
Q3: What does TPI mean on a saw blade?
A3: TPI stands for “Teeth Per Inch.” A higher TPI generally means more teeth on the blade, resulting in smoother cuts but slower cutting speeds. A lower TPI means fewer teeth, leading to faster cuts but a rougher finish.
Q4: My spindle lock button is stuck. What should I do?
A4: First, ensure the saw is unplugged and the battery is removed. Try wiggling the button gently while applying slight pressure. Sometimes, a small amount of compressed air can dislodge debris. If it remains stuck, it may indicate a mechanical issue requiring professional Ryobi tool repair.
Q5: How do I know if my Ryobi saw blade is installed in the correct direction?
A5: Most saw blades have an arrow on the blade face indicating the direction of rotation. This arrow should point in the same direction as the saw blade spins when it’s powered on. The teeth should also be angled to cut on the push stroke (away from you).