
When you rip wood with a table saw, the blade cuts a long, straight line through the material, separating it into narrower pieces. This fundamental process is crucial for countless woodworking projects, allowing you to transform larger boards into the precise dimensions you need. This guide will delve deep into the intricacies of table saw ripping technique, ensuring you can achieve accurate and safe results every time you rip cuts on table saw.
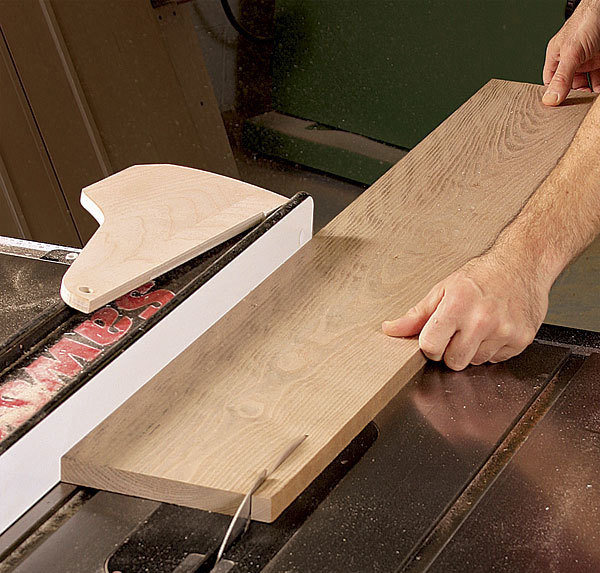
Image Source: images.finewoodworking.com
The Core Principle of Ripping Wood
At its heart, ripping with a table saw is about controlled separation. The spinning blade, a series of sharpened teeth, acts like a very aggressive saw, slicing through wood fibers. The magic of a table saw lies in its ability to guide this cut precisely. Unlike a handheld circular saw where you follow a line, the table saw uses its built-in fence to maintain a constant distance from the blade, ensuring a straight and consistent cut. This fence is the key to achieving straight cuts table saw users rely on.
Preparing for the Rip Cut
Before you even think about turning on the saw, meticulous preparation is paramount for successful wood cutting with table saw. This ensures not only accuracy but also your safety.
Fence Setup for Table Saw Rip: The Foundation of Accuracy
The rip fence is your guide. It’s a parallel fence that moves along a track, setting the distance between the blade and the fence itself. This distance dictates the width of your ripped piece.
- Alignment is Key: The rip fence must be perfectly parallel to the blade. If it’s not, your cuts will be neither straight nor parallel to the original edge of the wood. Check this by moving the fence from the front of the table to the back. The distance should remain identical.
- Secure and Stable: Once aligned, lock the fence firmly in place. Any movement during the cut will compromise the accuracy. Most modern table saws have robust locking mechanisms.
- Distance Matters: Measure the distance from the blade to the fence using a tape measure or a dedicated jig. Double-check your measurement to ensure the desired width.
Blade Height for Ripping Wood: A Crucial Adjustment
The height of the blade is a critical factor that influences both the cut quality and safety.
- The Ideal Height: For ripping, the general rule of thumb is to set the blade so that the top of the highest tooth is approximately 1/8 inch to 1/4 inch above the surface of the wood.
- Why This Height?
- Efficient Cutting: This height allows each tooth to engage the wood cleanly and efficiently, leading to a smoother cut.
- Reduced Binding: Too high a blade can increase the risk of kickback, as more of the blade is exposed and can catch the wood. Too low, and you’ll be making more of a “scoring” action, which is inefficient and can lead to rougher edges.
- Better Control: A slightly exposed blade offers better control during the feed.
Choosing the Right Blade for Ripping: The Cutting Edge
The type of blade you use significantly impacts the quality and efficiency of your rip cuts.
- Rip Blades vs. Crosscut Blades:
- Rip Blades: These blades have fewer teeth (typically 24-30 teeth for a 10-inch blade) with larger gullets (the spaces between teeth). The larger gullets help clear wood dust and chips more effectively, preventing the blade from overheating and binding, which is crucial for ripping. The teeth are often angled more aggressively to cut through the grain of the wood quickly.
- Crosscut Blades: These have more teeth (60 or more) with smaller gullets. They are designed for cutting across the grain, creating a cleaner finish with less tear-out. Using a crosscut blade for ripping can lead to slower cuts, overheating, and a higher risk of binding.
- Tooth Count and Material: For general ripping, a blade with around 24-30 teeth is a good starting point. High-quality blades made from carbide-tipped steel will maintain their sharpness longer and provide better performance.
- Blade Kerf: The kerf is the width of the cut made by the blade. Blades come in standard kerf (around 1/8 inch) and thin kerf (around 3/32 inch). Thin kerf blades require less power from the saw and produce less waste, but they might not be suitable for all saws or all ripping tasks if the saw lacks sufficient power.
The Table Saw Ripping Technique: Step-by-Step
Now that your saw is set up, let’s detail the actual process of how to rip lumber on table saw.
The Initial Engagement
- Position the Wood: Place the piece of lumber against the rip fence, ensuring the edge you want to rip from is firmly seated against it.
- Blade Engagement: With the saw running at full speed, carefully feed the wood into the spinning blade. Do not force the wood; let the blade do the work.
Controlling Wood During Rip Cuts: Maintaining Stability
This is where you’ll truly master table saw safety for ripping and achieve those perfect cuts.
- Push Sticks and Push Blocks: These are your essential safety tools.
- Push Sticks: Used when the wood is narrow, keeping your fingers well away from the blade. They have a hooked end to grip the wood.
- Push Blocks: Larger and more stable, they provide downward pressure and forward momentum, especially useful for wider pieces. Look for blocks with rubber bottoms for better grip.
- Maintain Contact: Always keep the wood firmly against the rip fence throughout the entire cut. If the wood drifts away from the fence, it will not cut straight.
- Even Feed Rate: Feed the wood at a consistent pace. Too fast can cause burning or blade binding; too slow can lead to an uneven cut or burning from prolonged contact with the blade.
- Stand to the Side: Never stand directly behind the blade. Position yourself to the side of the saw’s path to avoid any potential kickback.
- Support Long Boards: For long pieces of lumber, ensure you have adequate support at both the infeed and outfeed ends of the table saw. An outfeed table or roller stand is highly recommended.
Completing the Cut
- Full Blade Through: Continue feeding the wood until the entire piece has passed through the blade.
- Wait for Blade Stop: Do not reach for the cut-off piece or the main board until the blade has come to a complete stop.
- Remove Safely: Carefully remove the cut pieces from the saw table.
Achieving Straight Cuts Table Saw Mastery
Achieving perfectly straight cuts isn’t just about the setup; it’s also about technique and understanding potential pitfalls.
Dealing with Imperfections in the Wood
- Warped or Cupped Wood: Ripping warped or cupped wood presents a challenge.
- Best Practice: If possible, flatten the wood before ripping. A jointer or planer is ideal.
- Table Saw Approach: If you must rip it as is, try to orient the wood so that the warp doesn’t cause the wood to lift off the fence or the table. You may need to apply steady pressure with a push block to keep it against the fence and table. Expect a less-than-perfect result and plan to clean up edges with a jointer or hand plane.
- Twisted Wood: Similar to warped wood, twist is difficult to manage on a table saw. Again, pre-flattening is the best solution.
Preventing Burning
Burning occurs when the wood is in contact with the blade for too long or when the blade is dull.
- Sharp Blade: Ensure your blade is sharp and clean.
- Correct Blade Type: Use a blade designed for ripping.
- Proper Feed Rate: Avoid feeding too slowly.
- Adequate Blade Height: As discussed, the correct blade height promotes efficient cutting.
Kickback: The Table Saw’s Greatest Danger
Kickback is when the wood is violently thrown back towards the operator. It’s a serious hazard.
- Causes of Kickback:
- Wood not held firmly against the rip fence.
- The cut-off piece pinching the blade.
- Wood pinching the blade due to internal tension.
- Blade hitting a knot or nail.
- Blade height being too high.
- Prevention is Key:
- Always use the rip fence.
- Never cut freehand.
- Use a riving knife or splitter. This is a crucial safety device that follows the blade, keeping the kerf open and preventing the wood from pinching the blade.
- Use push sticks and push blocks.
- Never reach over the blade.
- Ensure the blade is sharp and the correct type.
- Support long or heavy pieces.
- Be aware of wood tension. If a board is under tension, ripping it can cause it to spring open and pinch the blade. Sometimes, making a relief cut on the opposite side of the board can help.
Table Saw Safety for Ripping: A Comprehensive Approach
Safety should always be your top priority when operating a table saw.
- Read Your Manual: Familiarize yourself with your specific table saw’s features and safety recommendations.
- Eye and Ear Protection: Always wear safety glasses and hearing protection.
- No Loose Clothing or Jewelry: Avoid anything that could get caught in the blade. Tie back long hair.
- Keep Your Hands Away from the Blade: Use push sticks and blocks religiously.
- Clear the Work Area: Remove any scrap wood or debris from the saw table.
- Know Your Saw’s Limits: Don’t try to rip material that is too large or too awkward for your saw to handle safely.
- Never Turn Your Back on the Saw: Maintain awareness of the machine at all times.
- Unplug When Changing Blades or Making Adjustments: Always disconnect power before making any modifications to the saw.
Advanced Ripping Techniques and Considerations
Once you’re comfortable with the basics, you might explore more advanced techniques.
Ripping Narrow Stock
When ripping very narrow pieces of wood, standard push sticks might not be sufficient.
- Specialized Push Blocks: Use push blocks with handles that extend forward to maintain control.
- Jigs and Fixtures: For extremely narrow or repeated ripping of the same width, consider building a zero-clearance insert with a jig attached, or a dedicated ripping jig that slides along the fence.
Ripping Plywood
Plywood requires specific considerations due to its layered construction.
- Blade Choice: A plywood blade with a higher tooth count (60-80 teeth) is often recommended for cleaner edges and to prevent delamination.
- Support: Plywood can be heavy and unwieldy. Always ensure adequate support to prevent it from sagging and binding the blade.
- Zero-Clearance Insert: Using a zero-clearance insert on your table saw greatly reduces tear-out on plywood.
Table Saw Ripping Jig for Tapered Cuts (Advanced)
While most rip cuts are straight, some projects require a slight taper. This is typically achieved with a tapering jig that attaches to the rip fence and guides the wood at an angle. However, for simple tapers, precise measurement and careful feeding against the fence with a push block can sometimes suffice, though this is more advanced and requires significant practice.
Maintaining Your Table Saw for Optimal Ripping
Regular maintenance ensures your table saw performs safely and accurately.
- Blade Cleaning: Keep your blades clean. Resins and pitch build-up can affect cut quality and increase friction.
- Lubrication: Lubricate moving parts as per your saw’s manual.
- Fence Alignment Checks: Periodically re-check the alignment of your rip fence to the blade.
- Dust Collection: A good dust collection system is vital for a cleaner shop and better visibility.
Frequently Asked Questions (FAQ)
Q1: What is the best blade for ripping oak on a table saw?
A1: For ripping hardwood like oak, a dedicated rip blade with 24-30 teeth is ideal. These blades have larger gullets to clear chips and an aggressive tooth angle for efficient cutting through dense wood.
Q2: Can I rip boards that are not perfectly flat with a table saw?
A2: While it’s challenging and less safe, you can attempt to rip slightly warped or cupped boards. The key is to maintain constant contact with both the rip fence and the table using a push block. However, for best results and safety, it’s recommended to flatten the wood with a jointer or planer before ripping.
Q3: How do I prevent my wood from burning when ripping?
A3: Burning typically occurs due to a dull blade, using the wrong type of blade, feeding too slowly, or the blade height being incorrect. Ensure your blade is sharp, use a dedicated rip blade, feed at a consistent rate, and set the blade height to about 1/8 to 1/4 inch above the wood.
Q4: What is the most important safety feature when ripping?
A4: The most critical safety feature for ripping is a riving knife or splitter. It stays close to the blade and keeps the kerf open, preventing the wood from pinching the blade and causing kickback. Always use one if your saw is equipped. Push sticks and push blocks are also essential safety tools.
Q5: How do I rip very thin strips of wood on a table saw?
A5: Ripping thin strips requires extra care. Use a specialized push block that provides good control and keeps your fingers well away from the blade. Consider using a zero-clearance insert to support the thin piece better and prevent it from falling through the gap. Some woodworkers also use jigs designed for ripping very narrow stock.
Mastering the art of ripping with a table saw is a journey that combines precise setup, careful technique, and an unwavering commitment to safety. By following these guidelines and practicing consistently, you’ll be well on your way to achieving those perfect, straight cuts that are the hallmark of quality woodworking.