
Can you mount a power strip to the wall without using screws? Yes, you absolutely can! There are many effective and secure ways to attach a power strip to your wall without drilling holes. This is fantastic news for renters, anyone who dislikes DIY, or people who simply want a cleaner, more adaptable setup for their electronics. Gone are the days of unsightly cords and bulky power strips cluttering your desk or floor. With the right methods, you can create a tidy, organized space and keep your essential devices powered up with ease.
This comprehensive guide will walk you through various techniques for no-drill power strip mounting. We’ll explore the best products and strategies to ensure your power strip is mounted easily & securely. From simple double-sided tape for electronics to specialized adhesive cable clips and robust Command strips for power strip applications, we’ve got you covered. Let’s dive into how to achieve a neat and functional setup for all your power needs.
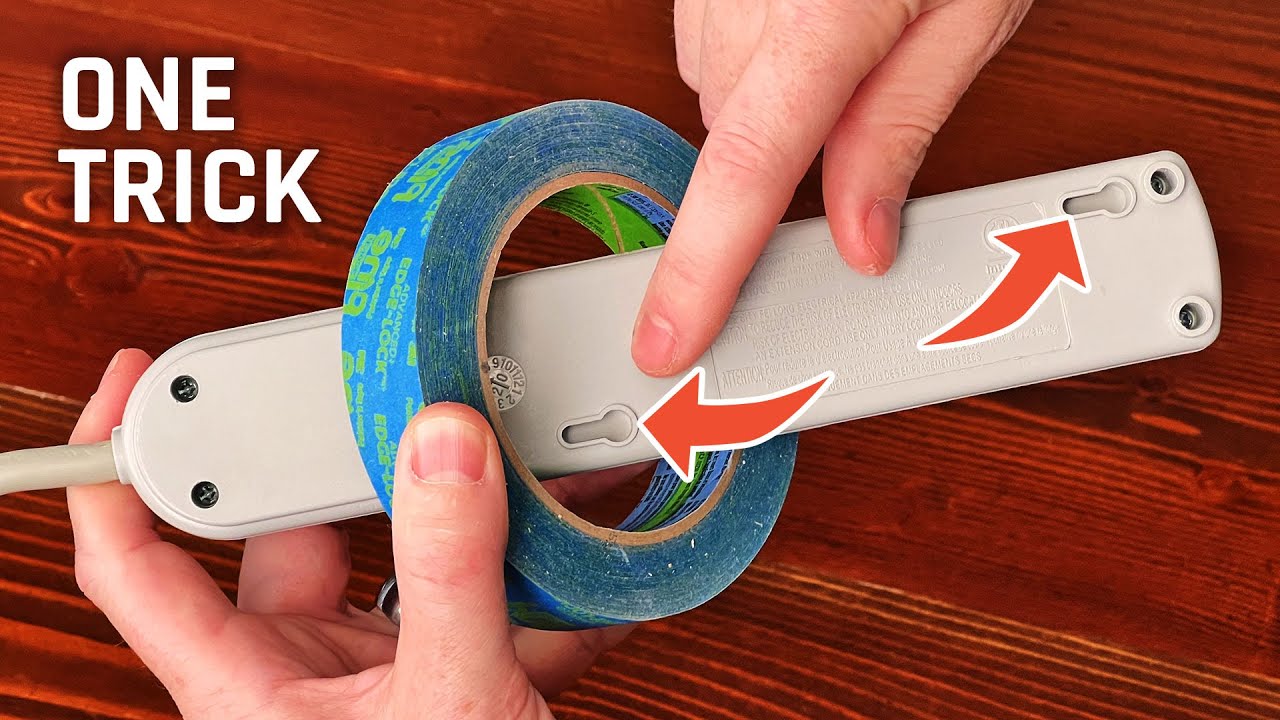
Image Source: i.ytimg.com
The Benefits of Screw-Free Power Strip Mounting
Mounting your power strip without screws offers a host of advantages. It’s not just about avoiding holes in your walls; it’s about flexibility, aesthetics, and ease of use.
- No Damage to Walls: This is the primary benefit. You can avoid drilling, patching, and painting, which is ideal for renters or those who like to redecorate frequently.
- Quick and Easy Installation: Most screw-free methods take mere minutes to implement. No special tools or skills are required.
- Flexibility and Relocatability: Need to move your power strip? No problem! Adhesive solutions can often be removed cleanly, allowing you to reposition the strip as your needs change.
- Clean Aesthetics: A mounted power strip reduces cable clutter on your desk or floor, creating a tidier and more visually appealing environment.
- Safety: Keeping power strips off the floor can prevent tripping hazards and protect them from spills or vacuum cleaners.
Popular Methods for Wall Mounting Power Strip Adhesive Solutions
When it comes to wall mounting power strip adhesive solutions, several reliable options stand out. These products are designed to hold weight and stick firmly to various wall surfaces.
1. Heavy-Duty Adhesive Strips
Heavy-duty adhesive strips are a game-changer for mounting items like power strips. These are typically strong, double-sided strips that provide a powerful bond without the need for nails or screws.
- How they work: These strips use a potent adhesive that creates a strong mechanical bond with the surface. They are often made of foam or a similar flexible material that can conform to minor surface imperfections, ensuring better contact and a more secure hold.
- Choosing the right strips: Look for strips specifically rated for the weight of your power strip, plus the added weight of plugged-in adapters and cables. Brands like Command™ offer heavy-duty options that are also designed for easy, damage-free removal.
- Application:
- Clean the Surface: Thoroughly clean the wall area where you want to mount the power strip with rubbing alcohol. Ensure it’s completely dry.
- Clean the Power Strip: Clean the back of the power strip as well.
- Apply the Strips: Peel the backing off one side of the adhesive strip and apply it firmly to the back of the power strip.
- Position and Press: Carefully position the power strip on the wall. Press firmly for at least 30 seconds to ensure good adhesion.
- Wait: For maximum strength, allow the adhesive to cure for at least an hour (or as recommended by the product instructions) before plugging anything into the power strip.
2. Command Strips for Power Strip Mounting
Command™ products are specifically designed for damage-free hanging and mounting. Their range of strips is perfect for a secure power strip wall attachment.
- Why Command Strips?
- Damage-Free Removal: The unique stretch-release technology allows you to remove the strips cleanly without damaging paint or drywall.
- Weight Ratings: Command™ offers various strip types with different weight capacities, from lightweight to heavy-duty.
- Versatility: They work on a variety of surfaces, including painted walls, wood, tile, and metal.
- Types of Command Strips to Consider:
- Command™ Heavy Duty Strips: These are ideal for heavier power strips and multiple adapters. They can hold up to 16 pounds per set.
- Command™ Wire Shelving Strips: While designed for shelves, their strong adhesive and hook design can be adapted to hold some power strips.
- Command™ Medium or Large Utility Strips: These are often used for hanging tools and can work well for smaller, lighter power strips.
- Installation Steps:
- Surface Preparation: Clean the wall and the power strip with isopropyl alcohol and let it dry.
- Apply to Power Strip: Attach the Command™ strips to the back of your power strip, following the product’s instructions. Ensure you use enough strips to adequately support the power strip’s weight.
- Press and Hold: Remove the backing from the strips attached to the power strip. Press the power strip firmly against the wall for 30 seconds.
- Mounting: If the strips have a wall-side component, press the power strip firmly into place and then pull down on the tab to release the adhesive from the wall.
- Wait for Curing: Allow the adhesive to bond for at least one hour before use.
3. Double-Sided Tape for Electronics
For lighter power strips or those with a flat, smooth back, high-quality double-sided tape for electronics can be a simple and effective solution.
- Types of Tape:
- Foam Tape: This is a good choice as the foam can compress and conform to surfaces, creating a strong bond. Look for foam tapes with a high-density rating.
- Heavy-Duty Mounting Tape: Many brands offer specific mounting tapes designed for heavier items.
- Considerations:
- Surface Adhesion: Not all double-sided tapes stick well to all surfaces. Test in an inconspicuous area first.
- Weight Capacity: Always check the product’s weight limit.
- Removability: Some heavy-duty tapes can be difficult to remove without damaging the wall. Look for products that explicitly state they are removable.
- Application:
- Clean Surfaces: Ensure both the wall and the power strip are clean and dry.
- Apply Tape: Cut the double-sided tape to the appropriate size and apply it to the back of the power strip.
- Press Firmly: Remove the backing and press the power strip firmly against the wall for the duration recommended by the tape manufacturer.
4. Reusable Mounting Putty
While not as permanent or robust as adhesive strips, reusable mounting putty can be a temporary solution for very lightweight power strips or for holding cables in place.
- What is it? Mounting putty is a pliable, adhesive substance that can be molded to stick objects to surfaces. It’s typically non-toxic and washable.
- Best Uses:
- Securing lightweight power strips that don’t have many bulky adapters.
- Temporarily holding cables against a wall or desk edge.
- When you need to frequently reposition items.
- Limitations:
- Lower Weight Capacity: It won’t hold heavy power strips securely.
- Durability: The adhesive can wear out over time or with frequent repositioning.
- Temperature Sensitivity: Extreme heat or cold can affect its sticking power.
- Application:
- Knead the Putty: Knead a small amount of putty until it’s pliable.
- Apply to Power Strip: Press small pieces of putty onto the back of the power strip.
- Press to Wall: Press the power strip firmly against the wall.
Specialized Solutions for a Tidy Setup
Beyond basic adhesives, several products are designed specifically for organizing cables and mounting power strips.
1. Adhesive Cable Clips
Adhesive cable clips are small but mighty tools for managing cords. While they don’t typically hold the entire power strip, they are essential for keeping the wires neat and preventing them from dangling.
- How to Use Them with a Mounted Power Strip:
- Mount your power strip: Use one of the adhesive methods described above.
- Route the cords: Plug in your devices and then use adhesive cable clips to guide the cords neatly along the wall or under a desk.
- Secure the excess: Use clips to bundle or secure any excess cable length.
- Types of Clips:
- Adhesive Backed Clips: These have a sticky pad to attach to walls, furniture, or the underside of desks.
- Cable Management Sleeves: While not clips, these can bundle multiple cables together neatly.
2. Stick-on Power Strip Holders
You can find specialized stick-on power strip holders or brackets that use strong adhesive backing. These often have a channel or clip to hold the power strip securely in place.
- How they work: These holders typically consist of a plastic bracket with an integrated adhesive pad. The power strip slides or snaps into the bracket.
- Advantages:
- Secure Fit: They provide a more structured and secure way to hold the power strip than just tape.
- Easy Insertion/Removal: Many allow you to easily slide the power strip in and out, which is convenient for cleaning or replacing the strip.
- Cable Management: Some designs include features for managing cables.
- Where to find them: Look online or in electronics stores. They are often marketed as “power strip mounts” or “cable management organizers.”
- Installation:
- Clean Surfaces: Ensure the wall and the back of the holder are clean.
- Apply Holder: Peel the backing from the adhesive on the holder and press it firmly against the wall for the recommended time.
- Mount the Power Strip: Once the holder is securely attached, slide your power strip into it.
3. Power Strip Wall Organizer Solutions
Beyond simple mounting, you can find integrated power strip wall organizer units. These are often enclosed boxes or sleek mounting systems that house the power strip and its cords, offering a very clean look.
- Types of Organizers:
- Cable Management Boxes: These are decorative boxes where you can place your power strip and excess cord, with openings for cables to enter and exit. Many have adhesive strips or keyhole slots for mounting.
- Mountable Cable Trays: These can be mounted to the wall with adhesive and provide a platform to hold the power strip and cables off the floor.
- Benefits:
- Ultimate Tidiness: They hide unsightly cables and power strips.
- Dust Protection: Enclosed boxes can protect your power strip and plugs from dust.
- Enhanced Aesthetics: They contribute to a minimalist and organized look.
- Installation: Follow the specific mounting instructions for the organizer, which usually involve strong adhesive strips or a combination of adhesive and keyhole mounts.
Choosing the Right Adhesive for Your Needs
Selecting the appropriate adhesive is crucial for a successful and secure mount. Here’s a breakdown to help you decide.
Factors to Consider:
- Weight of the Power Strip: This is the most critical factor. A simple, small power strip requires less holding power than a surge protector packed with large adapters. Always check the weight capacity of the adhesive product and compare it to the weight of your power strip with all plugged-in devices.
- Wall Surface: Different adhesives perform better on different surfaces.
- Painted Drywall: Most strong adhesives work well here, especially Command™ strips.
- Tile or Glass: Ensure the adhesive is rated for smooth, non-porous surfaces.
- Wood: Clean wood surfaces generally offer good adhesion.
- Textured Surfaces: These can be challenging. Foam tapes or those with conformable adhesives might be necessary.
- Environment:
- Humidity: High humidity areas (like bathrooms) might require specific water-resistant adhesives.
- Temperature: Extreme temperatures can affect adhesive performance.
- Longevity vs. Removability: Do you need a permanent solution, or do you want the flexibility to remove and reposition? Command™ strips are excellent for removability, while some heavy-duty tapes might be more permanent.
Weight Capacity Comparison (General Estimates)
| Adhesive Type | Typical Weight Capacity (per set/strip) | Best For | Notes |
|---|---|---|---|
| Heavy-Duty Adhesive Strips | 5-16 lbs (or more) | Medium to heavy power strips | Excellent bond, often designed for damage-free removal. |
| Command™ Heavy Duty Strips | Up to 16 lbs | Medium to heavy power strips | Proven damage-free removal technology. |
| Heavy-Duty Mounting Tape | Varies widely (check packaging) | Medium power strips, flat surfaces | Can be very strong; check removability. |
| Double-Sided Foam Tape | 1-5 lbs (depends on density/width) | Light to medium power strips, slightly uneven surfaces | Good for conforming to surfaces. |
| Reusable Mounting Putty | Very light (under 1 lb) | Small, lightweight items, temporary holds | Not suitable for sustained, heavy loads. |
| Stick-on Power Strip Holders | Varies (depends on holder adhesive) | Secures entire power strip, neat look | Often use strong adhesive; holder itself supports the strip. |
Note: These are general estimates. Always refer to the manufacturer’s specifications for precise weight limits and usage instructions.
Step-by-Step Guide to Mounting Your Power Strip Without Screws
Let’s combine the best practices into a general step-by-step process for a secure, screw-free mount.
Step 1: Gather Your Supplies
- Power Strip: The item you want to mount.
- Mounting Solution: Heavy-duty adhesive strips, Command™ strips, or a stick-on holder.
- Cleaning Supplies: Isopropyl alcohol (rubbing alcohol) and clean cloths.
- Optional: A measuring tape and a level (for precise placement).
Step 2: Plan Your Placement
- Decide exactly where you want your power strip to go. Consider:
- Accessibility: Is it easy to reach the outlets?
- Cable Length: Will the existing cables reach your devices comfortably?
- Aesthetics: Does it fit visually with your decor?
- Ventilation: Avoid completely enclosing the power strip, especially if it gets warm, to allow for airflow.
Step 3: Prepare the Surfaces
This is the most critical step for ensuring a strong bond.
- Clean the Wall: Use a clean cloth dampened with isopropyl alcohol to wipe down the area of the wall where the power strip will be mounted.
- Let it Dry: Allow the alcohol to evaporate completely. Do not touch the cleaned area with your fingers, as oils from your skin can interfere with adhesion.
- Clean the Power Strip: Wipe the back of the power strip with isopropyl alcohol and let it dry. If using a holder, clean the back of the holder as well.
Step 4: Apply the Adhesive
- If using Adhesive Strips (e.g., Command™):
- Separate the Command™ strips and follow the package instructions for application. This usually involves applying the strips to the back of the power strip.
- Ensure you use enough strips to cover the back of the power strip adequately, distributing them evenly.
- Peel off the protective backing from the strips attached to the power strip.
- If using a Stick-on Holder:
- Apply the adhesive backing to the holder as per its instructions.
- Peel off the protective backing.
Step 5: Mount the Power Strip (or Holder)
- Positioning: Carefully align the power strip (or holder) with your desired location on the wall. Use a level if precision is important.
- Press Firmly: Press the power strip (or holder) firmly against the wall. Hold it in place for the duration recommended by the adhesive manufacturer (usually 30 seconds or more). This ensures the adhesive makes full contact with the wall surface.
- If using Command™ Strips: Follow the specific instructions for applying the second part of the strip to the wall and then attaching the item.
Step 6: Allow Adhesive to Cure
- This step is often overlooked but is vital for a secure power strip wall attachment.
- Most adhesives require time to reach their full bonding strength. For Command™ strips and many heavy-duty adhesives, this is typically at least 1 hour. Some recommend up to 24 hours for maximum hold.
- Resist the temptation to plug in devices immediately. Patience here will pay off in a more durable mount.
Step 7: Connect Devices and Manage Cables
- Once the adhesive has cured, plug your power strip into the wall outlet.
- Connect your electronic devices.
- Use adhesive cable clips or cable management solutions to neatly route and secure the cords, further enhancing the tidy appearance.
Troubleshooting Common Issues
Even with the best methods, you might encounter minor hiccups.
- Adhesive Not Sticking:
- Cause: Surfaces weren’t cleaned properly; residue (dust, grease, paint) was present.
- Solution: Remove the adhesive, thoroughly clean both surfaces with isopropyl alcohol, let them dry completely, and reapply. Ensure you’re using a product suitable for your wall type.
- Power Strip Falling:
- Cause: The weight of the power strip and connected devices exceeds the adhesive’s rating.
- Solution: Use stronger heavy-duty adhesive strips or a product with a higher weight capacity. Ensure you’ve applied enough strips and allowed adequate curing time. Consider a dedicated stick-on power strip holder.
- Damage Upon Removal:
- Cause: Using an adhesive not designed for damage-free removal or not following removal instructions carefully.
- Solution: For Command™ strips, always pull the tab slowly and straight down, parallel to the wall. For other tapes, try gentle heat from a hairdryer (on a low setting) to soften the adhesive before peeling.
- Adhesive Leaving Residue:
- Cause: This can happen with some strong tapes.
- Solution: Try gently warming the residue with a hairdryer and then carefully peeling it off or using a citrus-based adhesive remover.
Frequently Asked Questions (FAQ)
Here are some common questions about mounting power strips without screws:
Q1: Will adhesive strips hold a heavy surge protector with multiple large adapters?
A1: Yes, but you must use heavy-duty adhesive strips or products specifically rated for the weight of your surge protector and all connected devices. Always check the product’s weight capacity and use multiple strips if necessary.
Q2: Can I mount a power strip on a textured wall using adhesive?
A2: Textured walls are more challenging. Look for heavy-duty adhesive strips or foam tapes designed for uneven surfaces. Clean the wall very thoroughly, as dust and debris can compromise adhesion. A dedicated stick-on power strip holder might also work better if it has a conformable adhesive.
Q3: How long do adhesive mounts typically last?
A3: High-quality adhesive mounts, like Command strips for power strip applications, are designed for long-term hold (months to years). However, factors like humidity, temperature fluctuations, and the weight of the attached item can affect their longevity.
Q4: Can I reuse adhesive strips?
A4: Most adhesive strips are single-use. Once removed, their stickiness is compromised. Reusable mounting putty is an exception, but it’s only suitable for very light items.
Q5: Is it safe to mount a power strip with adhesive?
A5: Yes, it is safe when done correctly. Ensure the chosen adhesive is rated for the weight of your power strip and devices, and follow all installation and curing instructions carefully. Proper ventilation for the power strip is also important.
Conclusion: Embrace the Screw-Free Solution!
Mounting a power strip to your wall without screws is not only achievable but also a smart and practical choice for creating a cleaner, more organized living or working space. By utilizing robust adhesive cable clips, reliable Command strips for power strip mounting, or innovative stick-on power strip holders, you can achieve a secure power strip wall attachment without any damage to your walls.
Remember to prioritize surface preparation, choose adhesives with appropriate weight ratings, and allow for adequate curing time. With these simple techniques and the right products, you can easily transform your cluttered areas into tidy, functional environments. Say goodbye to cable chaos and welcome a neat, accessible power solution!