
Image Source: i.ytimg.com
How To Put A Blade On A Ryobi Circular Saw Safely: A Quick Guide
Can you put a Ryobi circular saw blade on yourself? Yes, you absolutely can! It’s a straightforward process when you know the steps and prioritize safety. This guide will walk you through Ryobi circular saw blade replacement for various Ryobi tools, ensuring you can get back to your projects with confidence. Whether you’re performing a Ryobi circular saw blade replacement on your corded model, a Ryobi cordless saw blade change, or even looking at a Ryobi miter saw blade change, the core principles remain consistent.
This guide is designed to be easy to follow, even for beginners. We’ll break down the process of changing Ryobi saw blade into simple, actionable steps. You’ll learn about the essential safety precautions, the tools you’ll need, and how to correctly install a new blade for optimal performance. We’ll also touch upon different Ryobi blade types, from a standard Ryobi electric saw blade to a specialized Ryobi track saw blade, and even briefly mention how the process differs for tools like a Ryobi jigsaw blade or Ryobi reciprocating saw blade. For those using larger Ryobi tools, the principles of Ryobi bench saw blade installation are also covered.
Essential Safety First: Always Prioritize Your Well-being
Before you even think about Ryobi saw blade installation, safety must be your number one priority. Working with power tools, especially those with spinning blades, carries inherent risks. Taking a few moments to prepare and follow safety protocols will prevent injuries and ensure a smooth Ryobi circular saw blade replacement.
Here’s what you need to do before touching the blade:
- Disconnect Power: This is non-negotiable. For corded saws, unplug the power cord from the outlet. For cordless Ryobi saws, remove the battery pack completely. This prevents accidental startup while you’re working.
- Wear Safety Gear: Always wear safety glasses or goggles to protect your eyes from flying debris. Gloves are also recommended to provide a better grip and protect your hands from sharp edges.
- Stable Work Surface: Ensure your Ryobi saw is on a stable, flat surface. This prevents the saw from tipping over during the blade change.
- Clear the Area: Make sure the work area is clear of clutter, flammable materials, and other people, especially children and pets.
- Let it Cool Down: If you’ve just finished a project, allow the saw and blade to cool down before attempting a change. Hot blades can cause burns.
Gathering Your Tools for Ryobi Saw Blade Installation
To successfully perform a Ryobi circular saw blade replacement, you’ll need a few basic tools. Fortunately, Ryobi often includes the necessary wrench with the saw itself, simplifying the process of changing Ryobi saw blade.
Here’s a typical toolkit:
- Spanner Wrench: Most Ryobi circular saws come with a specialized spindle wrench or Allen key. This is crucial for loosening and tightening the blade nut. Check your saw’s manual if you can’t find it.
- New Ryobi Saw Blade: Ensure you have the correct replacement blade for your specific Ryobi model. Blades have different tooth counts and configurations for various cutting applications.
- Gloves: For grip and protection.
- Safety Glasses: Essential eye protection.
- Soft Cloth: For cleaning the blade area.
- Optional: A Block of Wood: Sometimes, a small block of wood can be used to brace the blade and prevent it from turning while you loosen the nut.
Step-by-Step Ryobi Circular Saw Blade Replacement
Now that you’re prepared and have your tools, let’s get to the actual Ryobi circular saw blade installation. We’ll focus on the most common type: the circular saw. The principles for Ryobi miter saw blade change and Ryobi bench saw blade replacement are very similar.
Step 1: Detach the Battery or Unplug
As mentioned in the safety section, this is the first and most critical step. Double-check that the power source is disconnected.
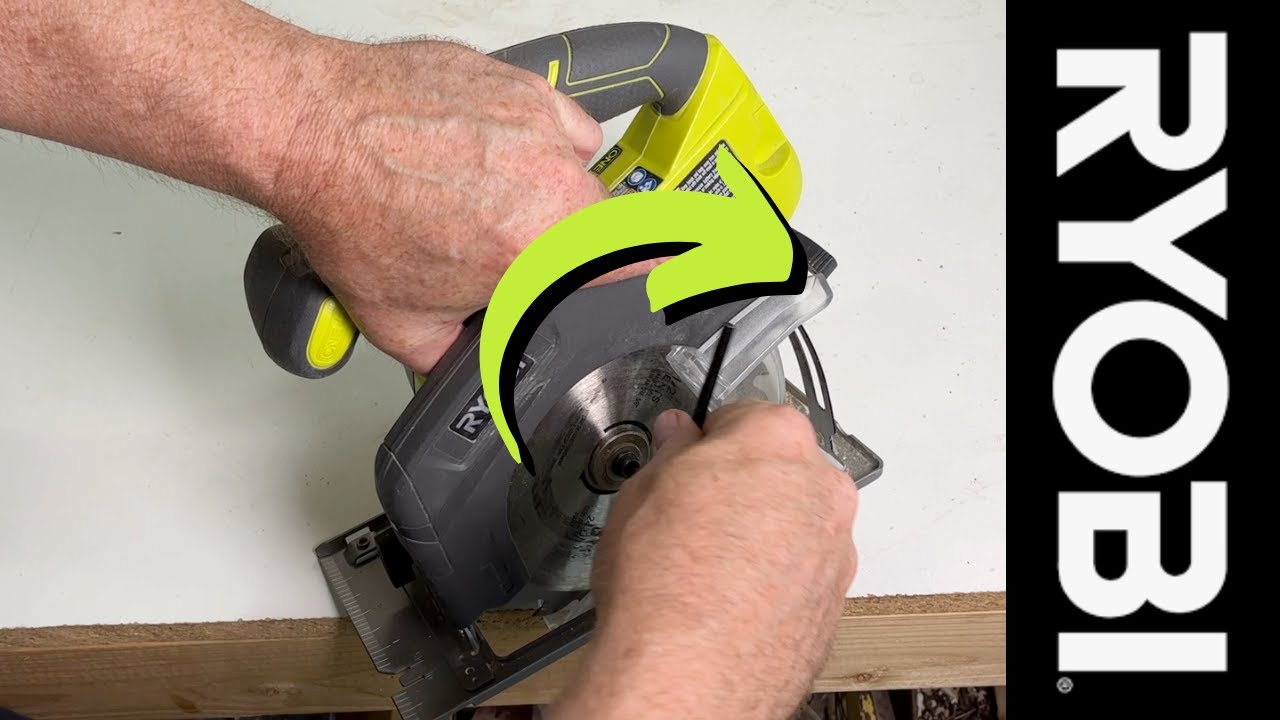
Step 2: Access the Blade Guard and Spindle Lock
Ryobi circular saws have a blade guard that covers the blade for safety. You’ll need to retract or lock this guard to access the blade. Most models have a lever or button on the guard that allows you to do this.
Next, locate the spindle lock. This is usually a button or lever on the motor housing near the blade. Pressing this lock will prevent the spindle (the shaft the blade attaches to) from rotating, making it much easier to loosen the blade nut.
Step 3: Loosen the Blade Nut
This is where the spanner wrench comes in.
- Place the spanner wrench onto the blade nut. The nut is the large hexagonal piece directly holding the blade in place.
- Turn the wrench counter-clockwise. Remember: “lefty loosey.” You might need to apply firm pressure, especially if the nut is a bit tight.
- If the spindle lock is effective, the blade should not spin. If it does, ensure the spindle lock is fully engaged. If you’re having trouble, you can try the block of wood trick: place the wood firmly against the blade teeth to create resistance. Be careful not to damage the blade teeth or your hand.
Step 4: Remove the Old Blade
Once the nut is loose enough, you can unscrew it completely by hand. Keep track of the nut and any washers that might be present. They are often arranged in a specific order.
Carefully slide the old blade off the spindle. Be mindful of the sharp teeth.
Step 5: Clean the Spindle and Mounting Area
Before installing the new blade, take a moment to clean the spindle and the area where the blade sits. Wipe away any sawdust or debris with your soft cloth. A clean mounting surface ensures the new blade sits flush and securely.
Step 6: Install the New Ryobi Circular Saw Blade
This is where the correct Ryobi circular saw blade replacement really happens.
- Blade Direction: This is crucial. Ryobi blades, like most saw blades, have an arrow or markings on the side indicating the direction of rotation. This arrow must point in the same direction as the arrow on the blade guard or the saw’s housing, which typically indicates the direction of the motor’s spin when powered on. For most circular saws, this means the teeth of the blade should be angled forward, towards the front of the saw. Consult your Ryobi saw’s manual for the exact direction.
- Placement: Slide the new Ryobi blade onto the spindle. Make sure it’s seated correctly against the flange (the metal disc it rests on).
- Reinstall Washers and Nut: Place any washers back in their original positions, followed by the blade nut.
- Tighten the Blade Nut: Screw the blade nut on by hand as tightly as you can. Then, use the spanner wrench to tighten it securely. Turn it clockwise (“righty tighty”).
Step 7: Secure the Blade Nut Firmly
This is as important as loosening it. The blade must be securely fastened to prevent it from coming loose during operation, which can be extremely dangerous.
- Engage the spindle lock again.
- Use the spanner wrench to tighten the blade nut firmly. You want it snug and secure, but avoid overtightening, which could strip the threads. A good firm twist with the wrench is usually sufficient.
Step 8: Retract the Blade Guard and Test
Carefully retract the blade guard back to its operating position. Double-check that it moves freely.
Now, for a crucial safety check: with the power still disconnected, try to spin the blade by hand. It should rotate smoothly and without any wobbling. Ensure it’s not catching on anything and that the guard moves correctly.
Step 9: Reconnect Power and Test Run
Once you’re confident everything is correctly installed and secure, you can reconnect the battery or plug in the power cord.
- Hold the saw firmly with both hands.
- Briefly squeeze the trigger to start the saw. Listen for any unusual noises or vibrations. Let it spin for a few seconds to ensure the blade is running true.
- Release the trigger and let the blade come to a complete stop before setting the saw down.
Changing Ryobi Saw Blade: Specific Considerations for Other Ryobi Tools
While the core process for Ryobi circular saw blade replacement is similar across many tools, there are nuances for other Ryobi power tools that use blades.
Ryobi Miter Saw Blade Change
For a Ryobi miter saw blade change, the general steps of disconnecting power, accessing the blade, and using the spindle wrench apply. However, miter saws often have a spindle lock button located directly on the motor housing. You’ll also need to position the miter saw head at a convenient angle, often by tilting it down or to the side, depending on the model, to access the blade nut. The direction of rotation for the blade is equally critical here.
Ryobi Bench Saw Blade Change
Replacing a Ryobi bench saw blade involves a similar procedure. You’ll typically need to lift or tilt the saw’s table to access the blade assembly. Many bench saws have a spindle lock, or you might need to wedge a piece of wood into the blade teeth (from the underside of the table) to keep the blade from turning. Always unplug the saw and wear protective gear.
Ryobi Cordless Saw Blade Options
When discussing a Ryobi cordless saw blade, the primary difference is the battery removal. The process for changing Ryobi saw blade on a cordless model is otherwise identical to its corded counterpart. Ensure the battery is fully removed.
Ryobi Electric Saw Blade Installation
For any Ryobi electric saw blade installation, whether it’s a circular saw, miter saw, or bench saw, the fundamental safety precautions and mechanical steps remain the same. The key is understanding the specific access points and locking mechanisms for each tool.
Ryobi Track Saw Blade
A Ryobi track saw blade change will also follow the general principles but may involve removing a specific housing or cover to access the blade. Track saws are designed for precision, so ensuring the new blade is perfectly seated and tightened is paramount.
Ryobi Jigsaw Blade and Ryobi Reciprocating Saw Blade
It’s worth noting that tools like a Ryobi jigsaw blade and Ryobi reciprocating saw blade have very different blade attachment mechanisms. Jigsaws typically use a tool-free chuck system where you simply twist or pull a collar to release the old blade and insert the new one. Reciprocating saws also often feature a tool-free blade clamp. While these are still “blade changes,” they don’t involve nuts and wrenches in the same way as circular saws.
Common Ryobi Saw Blade Types and What to Look For
Choosing the right blade is as important as installing it correctly. Ryobi offers various blades for different tasks.
| Blade Type | Teeth Count (TPI/Teeth) | Primary Use | Cut Quality | Speed of Cut |
|---|---|---|---|---|
| General Purpose | 24-40 | Wood (dimensional lumber, plywood, OSB) | Good | Moderate |
| Fine Finish | 60+ | Wood (plywood, laminates, trim), hardwoods | Excellent | Slower |
| Wood/Metal Combo | 40-60 | Wood with embedded nails, light gauge metal | Fair | Moderate |
| Wood/Plastic | 40-60 | Wood, plastic, PVC | Good | Moderate |
| Metal Cutting | 60-80 (or specialized) | Non-ferrous metals (aluminum, brass), steel | Good | Moderate |
When purchasing a new blade for your Ryobi saw, always check:
- Arbor Size: This is the diameter of the hole in the center of the blade. It must match the spindle diameter of your Ryobi saw. Common sizes are 5/8” and 1”.
- Blade Diameter: This must match the maximum blade diameter your Ryobi saw is designed for. Common circular saw blade sizes are 7-1/4 inches and 10 inches.
- Material Compatibility: Ensure the blade is designed for the material you intend to cut. Using the wrong blade can lead to poor cuts, kickback, or damage to the blade and tool.
Troubleshooting Common Issues During Ryobi Saw Blade Installation
Even with a clear guide, you might encounter a few hiccups. Here are some common problems and how to solve them:
- Blade Nut Won’t Loosen:
- Ensure the spindle lock is fully engaged.
- Try a different angle with the spanner wrench.
- Use a block of wood to brace the blade (as described earlier).
- If extremely tight, a penetrating lubricant might help, but use it sparingly and clean the area thoroughly afterward.
- Blade Spins When Trying to Loosen Nut:
- The spindle lock is not engaging properly. Check its mechanism.
- The spindle lock might be worn out. If so, this might require professional servicing or a new saw.
- Blade Isn’t Running True (Wobbling):
- The blade might not be seated correctly on the spindle. Remove and reinstall it, ensuring it’s flat against the flange.
- The blade nut might not be tightened enough. Re-tighten securely.
- The blade itself might be damaged or warped. Replace it.
- The spindle could be bent, which is a more serious issue requiring tool inspection.
- Spindle Lock Button is Stuck:
- Try wiggling the blade slightly while pressing the button.
- Clean the area around the button to remove dust or debris.
- If it remains stuck, do not force it. This could damage the mechanism.
Frequently Asked Questions (FAQ)
Q1: How often should I replace my Ryobi saw blade?
A1: You should replace your Ryobi saw blade when it becomes dull, damaged, or starts producing rough cuts. Dull blades can increase the risk of kickback. For frequent use, inspect your blade regularly.
Q2: Can I use a blade from a different brand on my Ryobi saw?
A2: Yes, as long as the blade has the correct arbor size and diameter for your specific Ryobi saw model, you can use blades from other reputable brands. Always ensure the specifications match.
Q3: What happens if I install the Ryobi saw blade backward?
A3: Installing the blade backward will result in poor cut quality, excessive splintering, and increased strain on the saw motor. It can also lead to dangerous kickback. Always check the rotation arrow.
Q4: Is there a difference between a Ryobi circular saw blade and a Ryobi jigsaw blade installation?
A4: Yes, a significant difference. Circular saws use a spindle and nut system for blade attachment, requiring a wrench. Jigsaws and reciprocating saws typically use tool-free chucks where blades are inserted and secured by a clamp mechanism.
Q5: My Ryobi saw makes a lot of noise when the new blade is installed. What could be wrong?
A5: Unusual noise can indicate an improperly tightened blade nut, a damaged blade, or the blade hitting the blade guard. Ensure the blade is securely tightened, not warped, and that the guard is functioning correctly.
By following these detailed steps and safety guidelines, you can confidently perform Ryobi circular saw blade replacement and ensure your Ryobi tools are always ready for your next project. Remember, a sharp blade is a safe blade!