
Image Source: i.ytimg.com
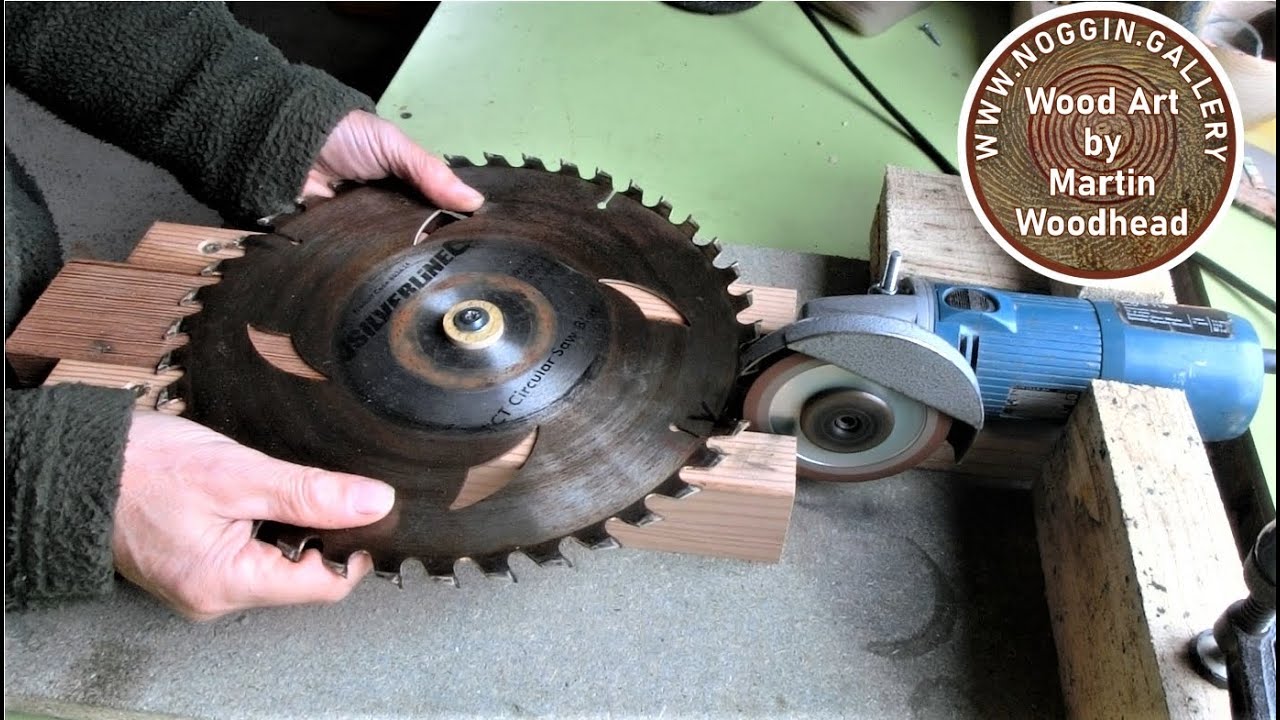
DIY How to Sharpen Circular Saw Blade
Can you sharpen a circular saw blade at home? Yes, you absolutely can sharpen a circular saw blade at home, and it’s a fantastic way to save money and keep your woodworking tools in top condition. Learning how to sharpen circular saw blades is an invaluable skill for any DIYer or professional woodworker. A dull blade doesn’t just make your cuts rougher; it also puts more strain on your saw, can lead to kickback, and generally makes your woodworking projects more frustrating. This comprehensive guide will walk you through everything you need to know about DIY saw blade sharpening, from the basics to specific techniques for different types of blades.
Fathoming the Importance of a Sharp Blade
A sharp circular saw blade is crucial for several reasons:
- Clean Cuts: Sharp teeth slice through wood cleanly, leaving a smooth edge that requires less sanding. Dull blades tear and splinter the wood.
- Reduced Effort: Sharp blades require less force to cut, making your work easier and more enjoyable.
- Extended Tool Life: When you don’t have to force a dull blade, your circular saw’s motor experiences less stress, potentially extending its lifespan.
- Safety: Dull blades are more prone to binding in the wood, which can cause dangerous kickback. A sharp blade glides smoothly, significantly reducing this risk.
- Efficiency: Sharp blades cut faster, saving you time on your projects.
When to Sharpen Your Circular Saw Blade
It’s time to sharpen your blade when you notice any of the following:
- Your saw struggles to cut through wood, even softer types.
- The cut edges are rough, splintered, or burned.
- You experience more vibration or hear a “screeching” sound during cuts.
- You need to apply excessive pressure to make a cut.
Types of Circular Saw Blades and Their Sharpening Needs
Most circular saw blades are made with carbide-tipped teeth. This means the blade itself is typically made of steel, but the cutting edges are small pieces of carbide brazed onto the steel body. Sharpening these blades involves reshaping and re-edging the carbide tips.
- Carbide-Tipped Blades: These are the most common type for general woodworking. Sharpening them involves grinding the carbide tips to restore their original cutting angle and sharpness. This is the primary focus of how to sharpen a carbide saw blade.
- High-Speed Steel (HSS) Blades: Less common for circular saws but found in some specialized applications. HSS blades are entirely made of steel and can be sharpened with standard sharpening stones or grinding wheels.
Choosing Your Sharpening Method
There are several ways to approach DIY saw blade sharpening:
- Manual Sharpening: This involves using hand-held sharpening tools. It’s the most accessible for beginners and requires less specialized equipment.
- Electric Saw Blade Sharpener: These benchtop or handheld machines automate the grinding process. They can be faster and more consistent but require a higher initial investment.
- Professional Sharpening Services: While not strictly DIY, it’s a valid option if you prefer not to sharpen yourself or have very specialized blades.
Method 1: Manual Saw Blade Sharpening
Manual sharpening is a great way to get started. It requires patience and a steady hand, but the results can be very satisfying. This method is also applicable to sharpening miter saw blades and other similar saw blades.
Tools You’ll Need for Manual Sharpening:
- Circular Saw Blade: The blade you want to sharpen.
- Bench Vise: To securely hold the blade.
- Sharpening File: A small, fine-cut file designed for metal. Diamond files are excellent for carbide.
- Magnifying Glass or Loupe: To help you see the small carbide tips clearly.
- Safety Glasses: Essential for protecting your eyes from metal filings.
- Gloves: To protect your hands from sharp edges.
- Marker: To mark teeth that have already been sharpened or are damaged.
- Optional: Circular Saw Blade Sharpening Jig: A jig can significantly improve accuracy and consistency.
Step-by-Step Manual Sharpening Process:
-
Secure the Blade: Clamp the circular saw blade firmly in your bench vise. Ensure it’s held by the steel body, not the carbide tips. A sturdy vise is crucial for a stable sharpening platform.
-
Inspect the Blade: Examine the blade for any damaged or missing teeth. If teeth are severely damaged, it might be more economical to replace the blade. Look at the carbide tips for chips or excessive wear.
-
Identify the Grinding Angle: This is perhaps the most critical step. Circular saw blades have specific tooth geometries and grinding angles.
- Face Grinding: This is the angle on the front of the tooth.
- Top Grinding: This is the angle on the top of the tooth.
- Most general-purpose blades have a combination of these angles. You can often find the recommended angle on the blade itself, its packaging, or by searching online for your specific blade model. A common face grind angle is around 15-20 degrees, and top grinds can vary.
-
Set Up Your File:
- Using a File without a Jig: If you’re not using a jig, you’ll need to eyeball the angles. It’s helpful to hold the file at the correct angle to the tooth.
- Using a Circular Saw Blade Sharpening Jig: A sharpening jig is highly recommended for accuracy. These jigs are designed to hold the file (or grinding stone) at the correct angles and allow you to easily advance from tooth to tooth. They often have adjustable guides for different tooth geometries and angles. Look for a sharpening jig for circular saw blades that can accommodate your blade’s diameter and tooth count.
-
Begin Sharpening:
- Face Grinding: Place the file against the face of a tooth, ensuring it’s at the correct angle. Apply firm, steady pressure and file in one direction, away from the cutting edge. Make several passes, filing from the base of the tooth towards the tip.
- Top Grinding: Once the face is sharpened, move to the top of the tooth. Again, use the file at the correct angle and file in one direction.
-
Sharpen Each Tooth Consistently: The key to a well-sharpened blade is consistency.
- Marking: After sharpening a tooth, mark it with a marker so you don’t accidentally resharpen it or miss any.
- Advancing: Move to the next tooth and repeat the sharpening process.
- Matching: Try to make each tooth as similar as possible to the others. This ensures balanced cutting.
-
Re-Establishing the Gullets: The gullets are the spaces between the teeth. Some wear on the gullets can occur. While extreme gullet reshaping is usually best left to professionals, a gentle touch with a round file can help clean them up. Focus on the carbide tip first.
-
Check for Sharpness: After filing each tooth, you can check for sharpness by gently touching the edge with your fingernail. It should feel “grippy.” You can also examine it under magnification. The goal is to remove the dull metal and reform the sharp cutting edge.
-
Deburring: After filing all teeth, there might be small burrs (wire edges) left on the carbide. These can reduce cutting performance. Gently file them away by taking light, single strokes with the file on the top and face of the teeth, using very light pressure.
-
Clean the Blade: Use a brush or compressed air to remove all metal filings and dust from the blade.
Method 2: Electric Saw Blade Sharpener
An electric saw blade sharpener can significantly speed up the process and improve accuracy, especially if you sharpen blades frequently. These machines typically use a grinding wheel.
Tools You’ll Need for Electric Sharpening:
- Circular Saw Blade: The blade to be sharpened.
- Electric Saw Blade Sharpener: The machine itself.
- Diamond or CBN Grinding Wheels: These are typically used for carbide-tipped blades. The grit size will depend on how dull the blade is and the desired finish.
- Safety Glasses: Always wear eye protection.
- Gloves: For hand protection.
- Bench or Sturdy Surface: To place the sharpener.
- Optional: Specific Jigs or Adapters: Some sharpeners come with specialized jigs for different saw blade types.
Step-by-Step Electric Sharpening Process:
-
Read the Manufacturer’s Instructions: Each electric sharpener is different. Thoroughly read the manual before operating.
-
Install the Correct Grinding Wheel: For carbide-tipped blades, you’ll typically use a diamond or Cubic Boron Nitride (CBN) grinding wheel. Ensure the wheel is securely mounted.
-
Set Up the Sharpener: Place the sharpener on a stable surface. If it has adjustable angles, set them according to your blade’s specifications. Many electric sharpeners have guides that help maintain the correct grinding angles for the face and top of the teeth.
-
Secure the Blade: Most sharpeners have a way to hold the blade, often with a central arbor that the blade slides onto.
-
Align the Grinding Wheel: Position the grinding wheel so it contacts the carbide tip of a tooth at the correct angle. This is where jigs and guides on the electric sharpener are invaluable for achieving consistent angles.
-
Sharpen the Teeth:
- One Tooth at a Time: Advance the blade to the next tooth after sharpening.
- Grind in One Direction: Always grind away from the cutting edge.
- Apply Light Pressure: Let the grinding wheel do the work. Excessive pressure can overheat and damage the carbide or the blade.
- Cooling: Some sharpeners may have a cooling system, or you might need to periodically dip the blade in water to prevent overheating. Overheating can compromise the temper of the carbide and steel.
-
Maintain Consistency: The goal is to make each tooth identical in shape and sharpness. Work your way around the entire blade.
-
Check and Deburr: Inspect the teeth for sharpness and any burrs. Some electric sharpeners have a separate deburring function or wheel. If not, a very light pass with a fine-grit stone or diamond file can remove burrs.
-
Clean the Blade: Thoroughly clean the blade to remove all grinding dust.
Advanced Sharpening Considerations & Techniques
When you get into sharpening dull woodworking tools, especially power tool accessories, precision matters.
- Tooth Count: Blades with more teeth (e.g., 60-80T) are for finer cuts and have smaller teeth. Sharpening these requires more precision than blades with fewer teeth (e.g., 24-40T) used for ripping.
- Tooth Geometry: Different blades have different tooth shapes:
- ATB (Alternate Top Bevel): Teeth alternate between being ground on the top left and top right. This is common for crosscutting.
- FTG (Flat Top Grind): Teeth are ground flat across the top. Often used for dados and grooves.
- TCG (Triple Chip Grind): Features a pair of angled “raker” teeth that precede a larger, square-topped tooth. Excellent for hard materials and plastics.
- HTG (High Alternate Top Grind): A more aggressive ATB angle for faster cutting.
- When sharpening, you must maintain these original tooth geometries. Misaligned grinding will ruin the blade’s cutting performance and safety.
- Grinding Wheel Material:
- Aluminum Oxide: Suitable for steel, but not ideal for carbide.
- Silicon Carbide: Can sharpen steel and is better for carbide than aluminum oxide, but still not the best.
- Diamond: The best choice for sharpening carbide-tipped blades. Diamond abrasives are extremely hard and efficiently grind carbide.
- CBN (Cubic Boron Nitride): Another superabrasive that is excellent for sharpening carbide and often performs comparably to diamond.
- Grit Size:
- Coarse Grit (e.g., 100-150): Use for very dull blades or to reform heavily worn teeth.
- Medium Grit (e.g., 150-220): For general sharpening.
- Fine Grit (e.g., 220+): For honing the edge and achieving a very sharp finish.
- Honing: After grinding, a fine hone (like a leather strop with a polishing compound or a very fine grit diamond file) can further refine the cutting edge, making it even sharper and more durable. This is often a step taken by professional sharpeners.
Troubleshooting Common Sharpening Issues
| Problem | Cause | Solution |
|---|---|---|
| Uneven Sharpening | Inconsistent filing angle, improper jig setup, shaky hand. | Use a sharpening jig. Practice consistent pressure and angle. Hold tools firmly. |
| Overheating the Carbide | Too much pressure, fast grinding without cooling. | Use lighter passes. Allow the blade to cool. Consider a water-cooling method for electric sharpeners. |
| Damaged Tooth | Missing carbide tip, severe chip. | If minor, try to grind carefully. If major, consider professional sharpening or blade replacement. |
| Burrs on Cutting Edge | Filing in both directions, insufficient deburring. | File in one direction only. Use a light touch for deburring with a fine file or stone. |
| Blade Wobble After Sharpening | Uneven sharpening leading to imbalance, warped blade. | Ensure all teeth are sharpened equally. Check blade for flatness. |
| Poor Cut Quality Still | Angles not restored correctly, teeth not sharp enough, burrs remaining. | Re-examine angles. Use finer grit for honing. Ensure burrs are fully removed. |
When to Consider Professional Sharpening
While DIY sharpening is rewarding, there are times when professional sharpening is the better choice:
- Specialized Blades: Blades with complex tooth geometries (like certain TCG or specialized dado blades) can be challenging to sharpen correctly at home without specialized jigs.
- Extremely Damaged Blades: If your blade has multiple missing teeth or significant damage, a professional can often repair or salvage it where DIY methods might fail.
- Lack of Time or Tools: If you don’t have the time or the right tools, a professional service is a quick solution.
- High-Value Blades: For expensive, high-performance blades, entrusting them to professionals ensures they are sharpened to factory specifications.
Maintaining Your Sharpened Blade
Once you’ve sharpened your blade, proper care will extend its sharpness:
- Clean After Use: Remove sawdust and resin buildup after each use.
- Store Properly: Store blades in a protective case or sheath to prevent damage to the teeth.
- Avoid Grinding: Don’t use your circular saw for tasks it’s not designed for, like cutting metal or masonry, as this will dull the blade quickly.
- Use the Right Blade for the Job: Using a ripping blade for crosscutting, or vice-versa, will lead to premature dulling.
The Best Way to Sharpen Circular Saw Blade: A Summary
The best way to sharpen circular saw blade depends on your skill level, available tools, and the type of blade. For beginners, a good quality file and a circular saw blade sharpening jig offer a great balance of control and accuracy. For those who sharpen frequently or need maximum consistency, an electric saw blade sharpener is a worthwhile investment. Ultimately, the goal is to restore the original cutting angles and create a sharp, durable edge, making your woodworking safer and more enjoyable. Mastering manual saw blade sharpening is a fundamental skill that pays dividends, just as learning to sharpen other dull woodworking tools will improve your overall crafting experience.
Frequently Asked Questions (FAQ)
Q1: How often should I sharpen my circular saw blade?
A1: This depends on how much you use it and what materials you cut. A general guideline is every 10-20 hours of cutting time or when you notice a decrease in cutting performance. For heavy use or cutting abrasive materials, you might need to sharpen more frequently.
Q2: Can I sharpen a carbide saw blade with a regular metal file?
A2: While you can use a very fine-cut steel file, it’s not ideal. Carbide is much harder than steel, and a regular file will wear down quickly and won’t create as sharp an edge. Diamond files or specialized carbide files are highly recommended for how to sharpen a carbide saw blade.
Q3: Is it cheaper to sharpen my circular saw blade or buy a new one?
A3: Generally, yes. Sharpening typically costs a fraction of the price of a new blade, especially if you do it yourself. This is one of the primary benefits of DIY saw blade sharpening.
Q4: What are the risks of sharpening a circular saw blade incorrectly?
A4: Incorrect sharpening can lead to an unbalanced blade, which causes vibration and reduces cutting accuracy. You can also damage the carbide tips by grinding at the wrong angle or overheating them. The most significant risk is creating an unsafe blade that is prone to kickback.
Q5: Can I sharpen my miter saw blade using the same methods?
A5: Yes, the principles of sharpening miter saw blade are very similar to sharpening circular saw blades. Both typically use carbide-tipped teeth, so the same files, jigs, and techniques for grinding carbide apply. Ensure you maintain the correct tooth angles for your specific miter saw blade.
Q6: What is the best way to sharpen circular saw blade if I’m a beginner?
A6: For beginners, starting with a good quality file and a circular saw blade sharpening jig is often the best approach. This combination provides control and helps you learn the correct angles without the higher learning curve or initial cost of an electric sharpener.
Q7: How do I know if my circular saw blade is beyond repair?
A7: If several carbide teeth are missing, severely chipped, or if the steel body of the blade is warped or cracked, it’s usually best to replace the blade rather than attempt to sharpen it. Sharpening can only do so much to restore a damaged tooth.