
Can you sharpen drill bits with an angle grinder? Yes, you can sharpen drill bits with an angle grinder, but it requires precision, the right accessories, and strict adherence to safety protocols. This guide will walk you through the process of angle grinder drill bit sharpening, turning your dull bits into sharp tools for your DIY projects. We’ll cover everything from selecting the correct angle grinder disc for sharpening to achieving the correct angle for grinding bits. Whether you’re looking to create a DIY drill bit sharpener setup or simply want to know how to sharpen dull drill bits with what you have, this article provides the answers. We’ll also touch on sharpening different types of bits, including grinding metal drill bits and even sharpening masonry bits with angle grinder (though with caveats).
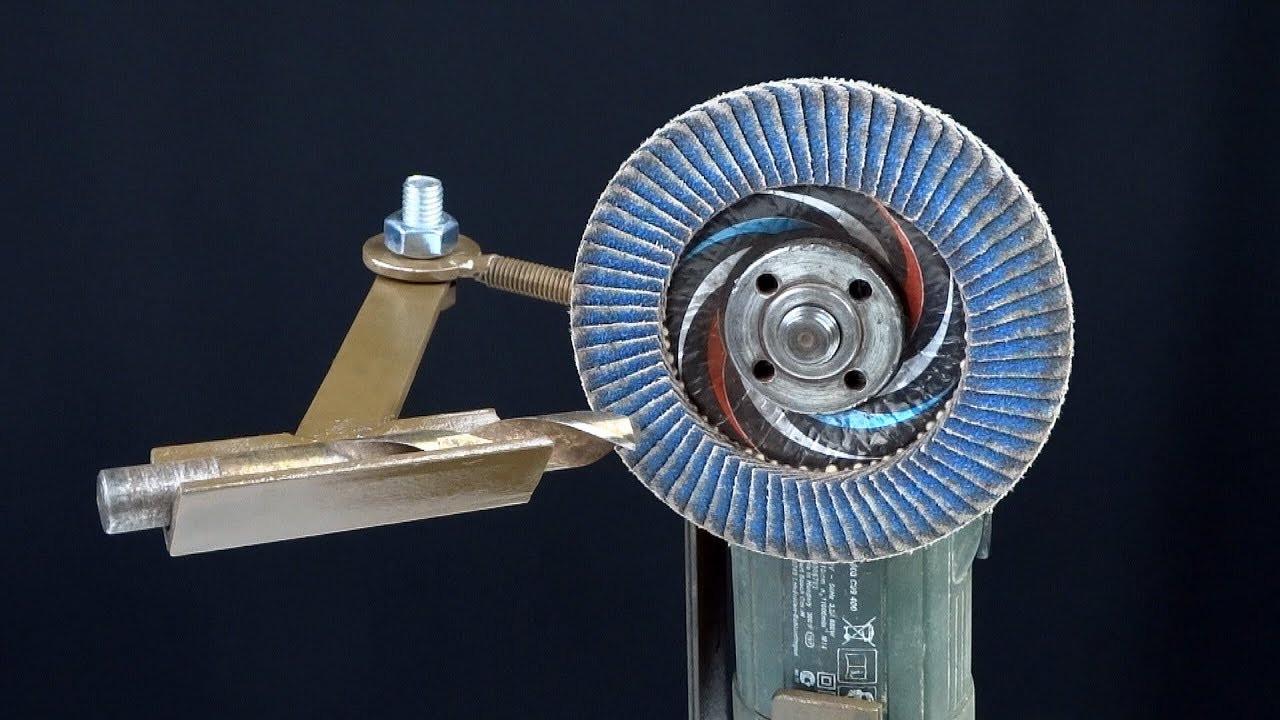
Image Source: binictools.com
Why Sharpen Your Drill Bits?
Over time, even the best drill bits lose their edge. Dull bits don’t just make drilling harder; they can cause a host of problems:
- Increased Effort: You’ll need to apply more pressure, leading to hand fatigue and less precise drilling.
- Poor Hole Quality: Dull bits tear through material rather than cutting cleanly, resulting in rough, oversized, or jagged holes.
- Overheating: Friction increases with dull bits, potentially overheating your drill motor, the bit itself, and even the workpiece. This can damage the temper of the bit and the material you’re working on.
- Increased Risk of Breakage: A dull bit is more likely to bind in the material, leading to it snapping under pressure.
- Reduced Efficiency: Everything takes longer when your tools aren’t performing optimally.
Regular sharpening ensures your drills perform at their best, making your work easier, safer, and more professional.
Safety First: Essential Precautions
Before we dive into the sharpening process, it’s crucial to cover safety. An angle grinder is a powerful tool, and misuse can lead to serious injury.
- Eye Protection: Always wear a full-face shield or safety goggles that wrap around. Grinding metal produces sparks and fine particles that can cause permanent eye damage.
- Hand Protection: Wear sturdy work gloves. This protects your hands from sharp edges, heat, and vibration.
- Hearing Protection: Angle grinders are loud. Use earplugs or earmuffs to prevent hearing damage.
- Body Protection: Wear a long-sleeved shirt, long pants, and closed-toe shoes. Avoid loose clothing or jewelry that could get caught in the grinder.
- Respiratory Protection: Wear a dust mask, especially when grinding metals that might produce harmful fumes or fine dust.
- Secure the Workpiece: Ensure the drill bit you are sharpening is securely held. A vice is ideal. Never try to hold the bit freehand.
- Proper Grinding Disc: Use a grinding disc specifically designed for metal. Ensure it’s the correct size for your angle grinder and is free from damage.
- Angle Grinder Handling: Always keep a firm grip on the angle grinder with both hands. Keep the grinder’s guard in place. Never remove the guard.
- Spark Direction: Be aware of where the sparks are flying. Keep them away from flammable materials, yourself, and others.
- Cooling: Metal heats up rapidly during grinding. Have a bucket of water or a coolant spray handy to cool the bit periodically.
Tools and Materials Needed
To effectively sharpen drill bits with an angle grinder, you’ll need a few key items:
- Angle Grinder: A standard angle grinder will work. Consider one with variable speed if you want more control, though it’s not strictly necessary for drill bit sharpening.
- Appropriate Grinding Disc: A thin cut-off wheel or a grinding disc designed for metal is essential. For sharpening, a finer grit grinding disc is often preferred to avoid removing too much metal.
- Vice: A sturdy bench vice is crucial for holding the drill bit securely.
- Drill Bits: The dull bits you intend to sharpen.
- Water or Cutting Fluid: For cooling the bit during the grinding process.
- Marker Pen: To mark the cutting edge.
- Magnifying Glass (Optional but Recommended): To inspect the edge for sharpness and evenness.
- Measuring Calipers (Optional): To check the cutting edge angles.
Preparing Your Angle Grinder for Sharpening
The setup is as important as the technique.
Selecting the Right Angle Grinder Disc
For sharpening drill bits, you want a disc that removes metal precisely without being overly aggressive.
- Thin Cut-Off Wheels: These are good for making controlled passes. However, they can be brittle and may not be ideal for the repetitive contact of sharpening.
- Grinding Discs: These are designed for shaping and sharpening. Look for a disc with a finer grit (e.g., 60-80 grit) for better control and a smoother finish. Ensure it’s rated for the RPM of your grinder.
Important Note: Never use a flap disc or wire wheel for sharpening drill bits. These are for removing material or cleaning, not for precise edge creation.
Mounting the Disc Safely
- Unplug the Grinder: Ensure the angle grinder is completely disconnected from the power source.
- Remove Old Disc (if any): Use the grinder’s flange wrench to loosen and remove the existing disc.
- Inspect New Disc: Check the new disc for any cracks or defects.
- Mount New Disc: Place the new disc onto the grinder spindle, ensuring it sits flat against the inner flange.
- Secure with Outer Flange: Place the outer flange over the disc and thread the locking nut.
- Tighten Securely: Use the flange wrench to tighten the locking nut firmly. Do not overtighten, as this can damage the disc.
- Replace Guard: Ensure the grinder’s protective guard is securely in place.
The Process: Step-by-Step Sharpening
Sharpening a twist drill bit involves restoring the cutting edges and the clearance angles at the tip. The goal is to recreate the original geometry as closely as possible. This is a skill that improves with practice.
Step 1: Secure the Drill Bit
Clamp the drill bit firmly in your vice. Position the vice so that the bit is held horizontally or at a slight upward angle, making it accessible to the grinder.
Step 2: Mark the Cutting Edges
Using a permanent marker, color the entire cutting lip of the drill bit. This will help you see where you are grinding and ensure you’re removing metal evenly from both sides.
Step 3: Set the Grinding Angle
This is one of the most critical aspects of angle grinder drill bit sharpening. The drill bit grinding angle typically needs to be between 59 and 60 degrees for most general-purpose metal drilling. However, different materials and bit types may require slightly different angles.
- For general metal bits: Aim for the 59-60 degree angle.
- For softer metals: A slightly lower angle (around 55 degrees) might be more effective.
- For harder metals: A slightly higher angle (around 60-65 degrees) can provide more durability.
Since an angle grinder doesn’t have the fine adjustments of a dedicated drill bit grinder, you’ll be relying on your feel and visual estimation.
Step 4: The Grinding Motion
This is where the correct angle for grinding bits comes into play.
- Approach Angle: Hold the drill bit at the desired correct angle for grinding bits (e.g., 59-60 degrees) relative to the face of the grinding disc. The point of the drill bit should be facing the disc.
- Contact Point: Bring the cutting edge of the drill bit into light contact with the spinning grinding disc.
- Grinding Motion: Move the drill bit in a smooth, sweeping motion across the face of the disc, maintaining the angle. The motion should be from the heel of the cutting lip towards the point.
- Cooling: After a few seconds of grinding, lift the bit away from the grinder and immerse the tip in water or spray it with coolant. This prevents the bit from overheating and losing its temper.
- Repeat on Opposite Side: Rotate the drill bit so the other cutting edge is presented to the grinder. Grind this side with the same motion and pressure, aiming to remove an equal amount of metal as the first side. Continue alternating between sides, cooling frequently.
- Checking Progress: Periodically wipe the bit clean and check your progress. The marker ink should be mostly gone from the cutting edges. You want to see a fresh, sharp edge forming. Ensure both cutting edges are the same length and shape.
Key Points for Grinding:
- Light Passes: Don’t try to remove a lot of metal in one go. Take light, controlled passes.
- Consistent Angle: Try to maintain a consistent angle throughout the sweep.
- Even Material Removal: Aim to remove equal amounts of metal from both cutting edges.
- Avoid Overheating: This is paramount. If the bit turns blue, it has been overheated and its temper is ruined. It will no longer drill effectively and may need to be discarded or re-hardened.
Step 5: Sharpening the Clearance Angle (Web Thinning)
The cutting edges need clearance behind them to cut effectively. Without proper clearance, the bit will rub rather than cut, generating heat and requiring more force. This is often the most challenging part for beginners.
- Locate the Web: The web is the solid part of the drill bit that forms the body. The cutting edges extend from this web.
- Grinding Position: Hold the drill bit so that the cutting lip is slightly angled away from the grinding disc. You are now grinding the heel of the cutting edge, not the primary cutting face.
- Clearance Angle: The correct angle for grinding bits for clearance is typically about 12-15 degrees. This angle allows the cutting edge to bite into the material without the heel dragging.
- Grinding Motion: Bring the heel of the cutting edge into light contact with the disc. Use a rocking motion, pivoting the bit slightly as you grind, to create a slightly concave or flat relief behind the cutting edge.
- Alternating Sides: Again, alternate between the two cutting edges, ensuring symmetry. Check your work with a magnifying glass to ensure you have a clean relief angle.
Tip for Clearance: Some people find it easier to grind the clearance angle by holding the bit at an angle and rotating it around its own axis as it contacts the grinding disc. Experiment to find what works best for you.
Step 6: Checking for Sharpness and Symmetry
Once you believe the bit is sharp, carefully inspect it.
- Visual Inspection: Look at the cutting edges under good light. They should appear sharp and have a consistent angle.
- Symmetry: Ensure both cutting edges are identical in length and angle. Any difference will cause the drill to cut an oversized hole.
- No Blueing: Confirm that the bit has not been overheated.
If the bit isn’t sharp enough, repeat the grinding and clearance steps, taking even lighter passes. If one side looks significantly different, you may need to grind the other side more to match it.
Step 7: Finishing Touches
Some users prefer to lightly deburr the cutting edges with a fine sharpening stone or a very fine grit sandpaper wrapped around a dowel. This removes any microscopic burrs left by the grinding disc.
Sharpening Different Types of Drill Bits
While this guide focuses on twist drills, the principles can be adapted for other bits with modifications.
Sharpening Metal Drill Bits
This is the primary focus of angle grinder drill bit sharpening. The process outlined above is generally for grinding metal drill bits. The key is the correct drill bit grinding angle and avoiding overheating, as metal bits are tempered and can lose their hardness if excessively heated.
Sharpening Masonry Bits with Angle Grinder
Sharpening masonry bits with angle grinder is possible, but it’s a different process due to their carbide tips.
- Carbide Tips: Masonry bits have hardened carbide tips brazed onto the steel shank.
- Grinding Medium: You need a grinding disc specifically designed for carbide or a diamond grinding wheel. A standard metal grinding disc will quickly wear down and may not effectively sharpen the carbide.
- Angle: The correct angle for grinding bits for masonry bits is usually a bit wider, often around 110-130 degrees included angle for the primary cutting edge.
- Process:
- Secure the bit in the vice.
- Use a diamond wheel or carbide-specific grinding disc on your angle grinder.
- Hold the bit at the correct angle to the wheel, presenting the carbide tip.
- Grind the primary cutting face of the carbide tip, moving the bit across the wheel.
- Cool the tip frequently, as carbide can also be damaged by heat.
- There are usually two or four cutting edges on a masonry bit, so repeat for all edges.
- Caution: It is very easy to damage the brazing that holds the carbide tip to the shank with an angle grinder. Be extremely gentle and take very light passes.
Due to the delicate nature of the carbide tip and the brazing, many DIY enthusiasts find it challenging to successfully sharpen masonry bits with an angle grinder. A dedicated carbide sharpening stone or file is often a safer and more effective alternative.
Other Bit Types
- Wood Bits: While you can technically sharpen wood bits, their geometry is different, and an angle grinder might be too aggressive. Dedicated sharpening tools for wood bits are generally recommended.
- Step Drills, Hole Saws: These typically require specialized sharpening methods and are often best replaced when dull.
Common Mistakes and How to Avoid Them
- Overheating the Bit: The most common mistake. Always use light passes and cool the bit frequently.
- Inconsistent Angles: Leads to unbalanced cutting edges and poor drilling performance. Practice maintaining a consistent angle.
- Grinding Too Much Material: Be patient. It’s better to take many light passes than one aggressive one.
- Not Sharpening Both Sides Equally: Results in the drill bit wandering and cutting an oversized hole.
- Using the Wrong Disc: Using a worn or inappropriate disc will make sharpening difficult and potentially damage the bit or grinder.
- Holding the Bit Freehand: This leads to inconsistent angles and potential injury. Always use a vice.
Creating a DIY Drill Bit Sharpener with an Angle Grinder
While a dedicated drill bit sharpening jig is the most accurate way to sharpen, you can adapt your angle grinder setup.
- Angle Guide: You could fabricate a simple jig that holds the drill bit at a fixed angle and guides it against the grinder disc. This involves some metalworking skill to create accurately.
- Bench Grinder Attachment: For those with bench grinders, there are specialized drill bit sharpening attachments that hold the bit at the correct angles, making the process much simpler and more repeatable. You could adapt this concept to a stationary angle grinder setup, though this is a more advanced DIY project.
Ultimately, for precise angle grinder tool sharpening, especially for drill bits, a dedicated jig or tool is often more practical than freehand grinding.
When to Replace a Drill Bit
Despite your best efforts, some drill bits are beyond saving. Replace a drill bit if:
- The flutes are severely damaged or worn away.
- The carbide tip on a masonry bit is chipped or cracked.
- You’ve significantly overheated the bit, turning it blue.
- You cannot achieve symmetrical, sharp cutting edges after several attempts.
- The bit is severely corroded.
Investing in new, quality drill bits is often more cost-effective than spending excessive time trying to salvage a completely worn-out bit.
Frequently Asked Questions (FAQ)
Q: What is the best angle grinder disc for sharpening drill bits?
A: A thin cut-off wheel or a fine-grit grinding disc (60-80 grit) designed for metal is generally suitable. The key is a disc that removes metal precisely without being overly aggressive.
Q: Can I sharpen drill bits with a flap disc on an angle grinder?
A: No, flap discs are not designed for the precise sharpening of drill bit edges. They are too aggressive and will likely remove too much material unevenly, ruining the bit.
Q: How do I know if I’ve overheated my drill bit?
A: If the metal of the drill bit turns blue or a dark purple, it has been overheated. This indicates that the heat treatment (temper) has been compromised, and the bit will no longer hold a sharp edge effectively.
Q: My sharpened bit still doesn’t cut well. What could be wrong?
A: Several issues could be the cause:
* The angles might not be correct.
* The cutting edges might not be symmetrical.
* The clearance behind the cutting edges might be insufficient.
* The bit might have been overheated during sharpening.
* The bit may simply be worn out beyond repair.
Q: Is angle grinder drill bit sharpening a good idea for HSS (High-Speed Steel) bits?
A: Yes, HSS bits can be sharpened with an angle grinder, but the same principles of light passes and cooling apply. HSS is designed to retain hardness at higher temperatures, but excessive heat can still damage it.
Q: Can I sharpen a left-hand drill bit with an angle grinder?
A: Yes, the process is the same, but you’ll be grinding in the opposite direction of rotation for the cutting edges to achieve a left-hand cutting action.
Q: Is angle grinder tool sharpening safe for other tools like chisels or plane blades?
A: While angle grinders can be used for rough shaping of some tools, they are generally too aggressive and generate too much heat for delicate sharpening of chisels or plane blades. Bench grinders with specialized jigs or whetstones are preferred for these tools to maintain their precise bevels and avoid overheating.
By following these guidelines, you can safely and effectively use your angle grinder to restore the sharpness of your drill bits, saving you money and improving your drilling performance. Remember, practice makes perfect, so don’t be discouraged if your first few attempts aren’t flawless.