
Can you achieve perfectly straight cuts with a tile wet saw? Absolutely! A tile wet saw is an essential tool for any tiling project, enabling precise and clean cuts. Whether you’re cutting ceramic tile or the more demanding porcelain tile, mastering its use will elevate the quality of your finished work. This guide will walk you through everything you need to know, from initial setup to advanced techniques for making straight cuts.
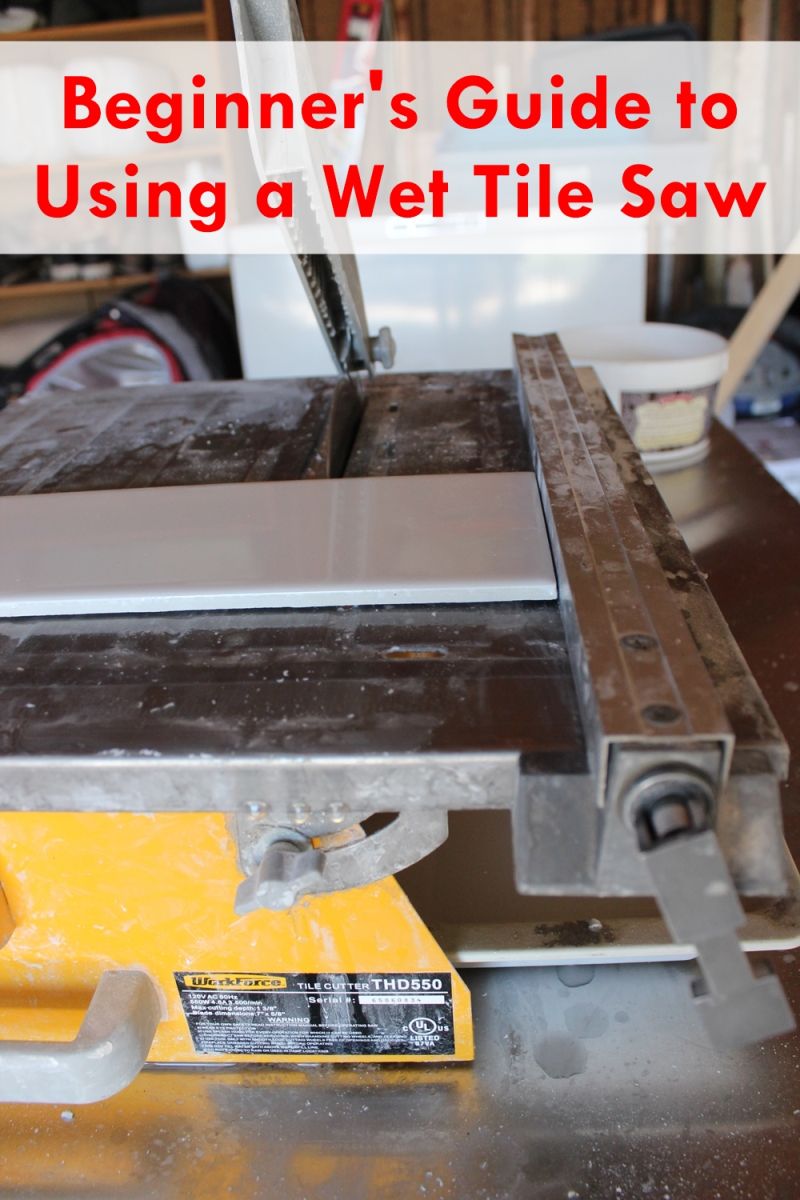
Image Source: cdn.homedit.com
Getting Started with Your Tile Wet Saw
Before you even think about cutting, proper wet saw safety and wet tile saw setup are paramount. This ensures both your safety and the longevity of your tool.
Essential Safety Precautions
Operating a wet saw involves water, electricity, and spinning blades, so safety must be your top priority.
- Eye Protection: Always wear safety glasses or goggles. Water and tile debris can fly off at high speeds.
- Hearing Protection: While not as loud as some power tools, prolonged use can still benefit from earplugs or earmuffs.
- Hand Protection: Wear sturdy work gloves to protect your hands from sharp tile edges and potential nicks.
- Footwear: Closed-toe, slip-resistant shoes are a must to protect your feet and prevent slips.
- Ventilation: Ensure you’re working in a well-ventilated area, especially when cutting materials that can create fine dust.
- Electrical Safety: Keep the power cord away from water. Use a GFCI (Ground Fault Circuit Interrupter) outlet for added protection. Never operate the saw with wet hands.
- Blade Guard: Always ensure the blade guard is properly in place and functioning.
Setting Up Your Wet Saw
A correctly set up wet saw is crucial for accurate and safe cutting.
1. Assembling the Saw
- Base and Stand: Most wet saws come with a portable base or a stand. Ensure it’s stable and level on a flat surface.
- Water Reservoir: Locate the tile saw water reservoir. Fill it with clean water to the indicated fill line. The water is crucial for cooling the diamond blade for tile and minimizing dust.
- Blade Installation:
- Ensure the saw is unplugged.
- Most saws have a quick-release system or require a wrench to remove the blade bolt.
- Check the blade’s direction of rotation. The arrow on the tile saw blade should point in the direction the motor spins (usually towards you when you’re facing the saw).
- Tighten the blade bolt securely but do not overtighten.
- Cutting Table/Surface: Ensure the cutting table is clean, free of debris, and moves smoothly.
2. The Role of Water
The water in the tile saw water reservoir is not just for dust control; it’s vital for the performance of the diamond blade for tile.
- Cooling: The friction between the spinning blade and the tile generates significant heat. Water cools the blade, preventing it from overheating, warping, or losing its cutting edge.
- Lubrication: Water acts as a lubricant, reducing friction and allowing the blade to cut more smoothly and efficiently.
- Dust Suppression: This is perhaps the most visible benefit. The water washes away the tile dust and debris as it’s cut, creating a slurry that is collected in the reservoir. This significantly reduces airborne dust, making the cutting process healthier and cleaner.
Mastering the Art of Making Straight Cuts
Achieving straight cuts is the primary goal for most tiling jobs. While wet saws make this easier, a few techniques will ensure perfection.
Understanding Your Tile Saw Blade
The tile saw blade is the heart of your cutting operation. Different blades are designed for different materials and cutting styles.
- Continuous Rim Blades: These have a smooth edge and are ideal for delicate materials like glass or very smooth ceramic tiles. They produce the cleanest cuts but can be slower.
- Rim Blades: These have small teeth along the edge. They are good all-rounders for most ceramic and some porcelain tiles.
- Turbo Rim Blades: These have a wavy or segmented edge, offering a balance between speed and a clean finish. They are excellent for cutting porcelain tile and harder materials.
- Diamond Blade Types: The term “diamond blade for tile” refers to blades with industrial diamonds embedded in the cutting edge. The quality and concentration of these diamonds significantly impact performance and longevity.
Choosing the Right Blade
- For general ceramic tile, a good quality rim or turbo blade will suffice.
- For cutting porcelain tile, which is much harder and denser, a high-quality turbo rim or a blade specifically designed for porcelain is recommended. These blades are designed to withstand the increased heat and friction.
Pre-Cutting Preparations
Getting your tile ready before it hits the blade is as important as the cut itself.
1. Measuring and Marking
- Accurate Measurement: Use a reliable tape measure for all your measurements. Double-check your figures, especially for critical cuts.
- Marking the Tile: Use a grease pencil, wax pencil, or a specialized tile marker. Avoid markers that can bleed or be permanent.
- Cutting Line: For straight cuts, draw a clear line directly on the tile where you intend to cut.
2. Positioning the Tile
- Blade Alignment: Visually align your marked cutting line with the tile saw blade.
- Starting the Cut: Begin the cut with the blade positioned just ahead of the starting edge of your marked line. This ensures the blade engages smoothly.
Executing the Cut
Here’s how to make that perfect straight cut:
1. Feeding the Tile
- Gentle and Steady Pressure: The key to making straight cuts is to apply steady, gentle pressure to the tile as you push it through the blade. Do not force the tile. Let the diamond blade for tile do the work.
- Smooth Movement: Push the tile through the saw in a single, continuous motion. Avoid stopping and starting mid-cut, as this can lead to chipping or an uneven edge.
- Full Blade Engagement: Ensure the entire width of the blade is engaged with the tile during the cut.
- Blade Contact Point: The cutting action happens as the tile passes through the bottom portion of the spinning blade.
2. Maintaining a Straight Path
- Cutting Guides: Many wet saws come with rip fences or miter guides. These are invaluable for making straight cuts.
- Rip Fence: This is a guide that runs parallel to the blade. You place the edge of your tile against it, ensuring a consistent distance from the blade.
- Miter Guide: This adjustable guide allows for angled cuts but can also be locked at 90 degrees for perfectly straight cuts.
- Practice Cuts: If you’re new to using a wet saw, it’s highly recommended to practice on scrap pieces of tile. This helps you get a feel for the pressure and speed required.
- Blade Wobble: If you notice the blade wobbling, check if it’s securely fastened or if the blade itself might be damaged or warped.
3. Managing Tile Thickness and Cutting Depth
- Tile Saw Cutting Depth: Most wet saws have an adjustable tile cutting depth, or it’s fixed by the design of the saw. The tile saw blade protrudes a certain amount above the cutting surface.
- Porcelain Tile Considerations: When cutting porcelain tile, which is very dense, ensure your saw and blade are adequate for the job. If your saw has limited tile cutting depth, you might need to make multiple shallow passes or use a more powerful saw.
- Avoiding Under-Cutting: Do not attempt to cut through excessively thick tiles in one pass if your saw isn’t designed for it. This can damage the blade and lead to jagged cuts.
Post-Cut Procedures
Once the cut is complete, there are a few final steps.
- Cooling the Blade: Allow the blade to continue spinning in the water for a few moments after the cut to cool it down.
- Removing the Tile: Carefully remove the cut tile from the saw.
- Cleaning: Rinse the cut edge of the tile to remove any slurry.
Advanced Techniques and Troubleshooting
Even with practice, you might encounter challenges. Here’s how to address them.
Cutting Large Format Tiles
Cutting large format tiles requires extra care.
- Support: Ensure the tile is well-supported on both sides of the cut. Some saws have extension tables or roller supports for this purpose.
- Steady Feed: Maintain an even, steady feed rate. The sheer weight of a large tile can sometimes cause it to sag, leading to an uneven cut.
Dealing with Chipping and Breakage
Chipping, especially on the edge of the tile, can be frustrating.
- Blade Quality: A worn-out or low-quality tile saw blade is a common cause of chipping. Ensure you are using a sharp, appropriate blade.
- Cutting Speed: Cutting too fast can cause chipping. Slow down and let the blade do the work.
- Tile Direction: For some tiles, especially those with a glaze on top, cutting from the back can sometimes reduce chipping on the visible surface. Try marking your cut line on the back of the tile.
- Blade Depth: If the tile cutting depth is too shallow, it might not cut through the tile cleanly, leading to breakage. Conversely, if the blade is too deep and hitting the table, it can cause issues.
Rip Cuts vs. Straight Cuts
While “making straight cuts” is the focus, sometimes you need to cut off a strip of tile (a rip cut).
- Rip Cuts: These are cuts parallel to the existing edge of the tile. Using a rip fence is almost essential for accurate rip cuts. Without a fence, it’s very difficult to maintain a consistent offset from the blade.
When to Replace Your Tile Saw Blade
The diamond blade for tile doesn’t last forever.
- Signs of Wear:
- Increased chipping or rough cuts.
- Slower cutting speed.
- The blade feels “dull” or requires more force to cut.
- Visible wear on the diamond-impregnated edge.
- Blade Lifespan: The lifespan of a blade depends heavily on the type of tile being cut, the quality of the blade, and how it’s used. Cutting porcelain tile will generally wear down a blade faster than cutting ceramic tile.
Tile Saw Maintenance: Keeping Your Tool in Top Shape
Proper tile saw maintenance ensures your tool performs reliably and safely for years to come.
Regular Cleaning
- After Each Use:
- Unplug the saw.
- Drain the tile saw water reservoir.
- Remove any accumulated slurry and debris from the reservoir, cutting table, and blade guard.
- Wipe down all surfaces with a damp cloth.
- Deep Cleaning: Periodically, you might need to remove the blade and thoroughly clean the motor housing and spindle area.
Water and Pump Maintenance
- Water Quality: Use clean water. Dirty water can clog the pump and shorten its life. Some users add a small amount of dish soap to the water to help lubricate and cool the blade, but check your saw’s manual for recommendations.
- Pump Check: Ensure the water pump is submerged and working correctly to circulate water to the blade. Check for any blockages in the water line.
Blade Care
- Storage: Store your spare blades in a dry place to prevent rust.
- Inspection: Before and after use, inspect the blade for any damage, cracks, or excessive wear.
General Checks
- Fasteners: Periodically check that all bolts and screws on the saw are tight.
- Moving Parts: Ensure the cutting table and any adjustable guides move smoothly. Lubricate if necessary, following the manufacturer’s instructions.
Frequently Asked Questions (FAQ)
Here are some common questions about using a tile wet saw.
Q1: Can I cut natural stone with a tile wet saw?
A1: Yes, you can cut natural stone like granite or marble, but you’ll need a blade specifically designed for stone. These blades often have a continuous rim or are segmented for faster cutting and better heat dissipation. Always check the manufacturer’s recommendations for your specific saw and blade.
Q2: How often should I change the water in the tile saw water reservoir?
A2: It’s best to change the water after each significant use or when it becomes too cloudy and dirty. Dirty water can impede cooling and lubrication, and the debris can clog the pump.
Q3: My saw is making a loud grinding noise. What could be the problem?
A3: A loud grinding noise usually indicates an issue with the tile saw blade.
* The blade might be loose.
* The blade could be damaged, warped, or dull.
* Debris might be caught between the blade and the blade guard or the saw housing.
* The motor bearings might be failing (less common).
Always unplug the saw and inspect the blade and surrounding areas before operating again.
Q4: What is the typical tile cutting depth of a standard wet saw?
A4: The tile cutting depth varies between models. Most portable wet saws designed for ceramic and porcelain tiles can cut through tiles up to 1 inch thick. Larger, more powerful saws can handle thicker materials or larger format tiles. Always check your saw’s specifications.
Q5: Is it safe to cut without water?
A5: No, it is not safe or recommended to cut without water. Operating a tile saw blade dry will cause it to overheat rapidly, damaging the blade and the tile. It will also produce a dangerous amount of fine silica dust, which is a serious health hazard. The water is crucial for cooling, lubrication, and dust suppression.
Q6: Can I use a regular circular saw blade on a tile wet saw?
A6: Absolutely not. You must use a diamond blade for tile designed specifically for wet saws and the material you are cutting. Regular saw blades are not designed for the speed, water, or abrasive nature of tile cutting and can shatter or cause severe damage and injury.
By following these expert tips, you’ll be well-equipped to use your tile wet saw with confidence, achieving clean, straight cuts every time. Remember, safety first, and practice makes perfect!