
Can you use a Ryobi miter saw to make precise angled cuts? Yes, Ryobi miter saws are designed to make accurate angled cuts, allowing for both miter and bevel adjustments for various woodworking projects. This guide will walk you through everything you need to know to use your Ryobi miter saw effectively and safely.
A Ryobi miter saw is a fantastic tool for any woodworker, from beginners to seasoned pros. It helps you make clean, accurate cuts, especially for tasks involving angles like framing, trim work, or building furniture. This article will cover Ryobi miter saw setup, Ryobi miter saw safety tips, how to make common cuts like a Ryobi miter saw crosscut, adjusting angles for a Ryobi miter saw miter angle, performing Ryobi miter saw bevel adjustment, Ryobi miter saw blade replacement, Ryobi miter saw dust collection, Ryobi miter saw alignment, Ryobi miter saw maintenance, and Ryobi miter saw troubleshooting. Let’s get started and make your woodworking shine!
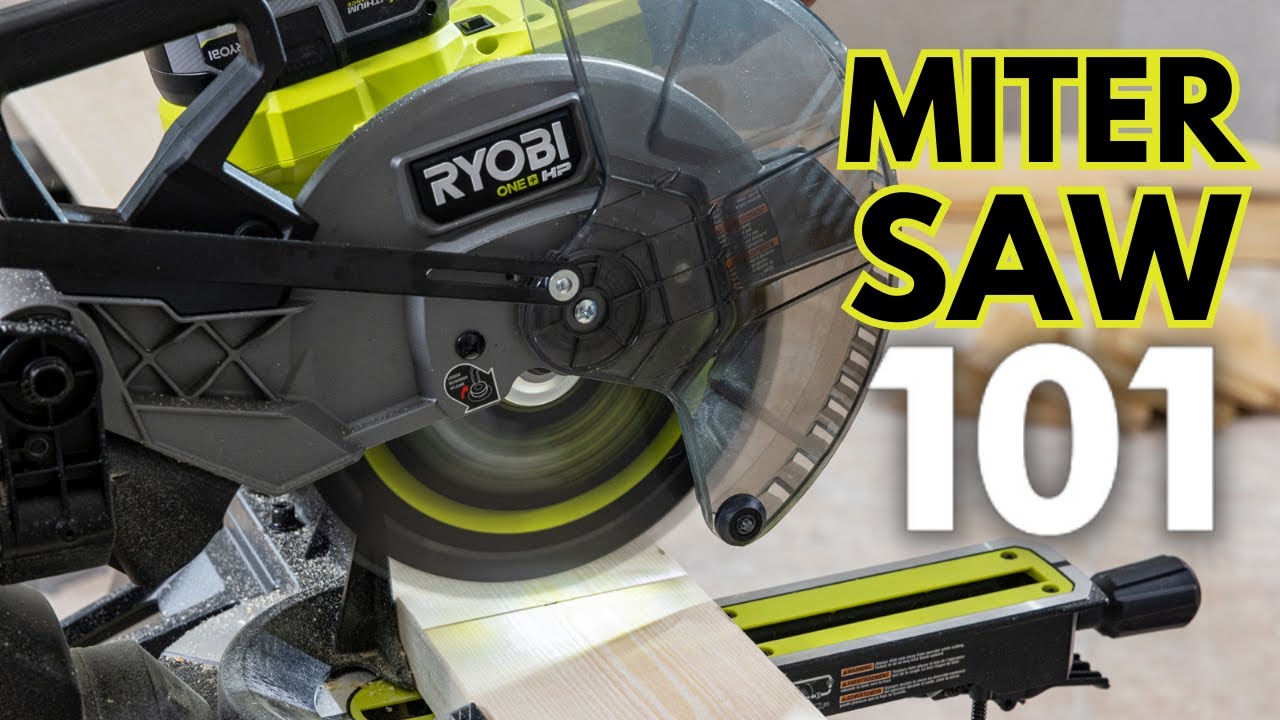
Image Source: i.ytimg.com
Getting Your Ryobi Miter Saw Ready: Initial Setup
Before you can make any cuts, you need to get your Ryobi miter saw set up correctly. A solid Ryobi miter saw setup is key to accuracy and safety.
Unboxing and Placement
When you first get your Ryobi miter saw, carefully unbox it. Check for any damage that may have occurred during shipping. Most Ryobi miter saws come with basic instructions. Read them thoroughly.
- Stable Surface: Place the saw on a sturdy workbench or a dedicated saw stand. It should be level and not wobble. A wobbly saw is a dangerous saw.
- Power Source: Ensure you have a grounded power outlet nearby. If you’re using an extension cord, make sure it’s the correct gauge for the power draw of the saw. A cord that’s too thin can overheat.
Understanding the Parts
Familiarize yourself with the main parts of your Ryobi miter saw. Knowing what each part does will help you use it safely and effectively.
- Base: The sturdy foundation of the saw.
- Table: The surface where you place your workpiece. It usually has positive stops for common angles.
- Blade Guard: A crucial safety feature that covers the blade when it’s not cutting. Always ensure it’s functioning correctly.
- Miter Angle Adjustment: This allows you to swing the saw head left or right to cut different angles.
- Bevel Angle Adjustment: This lets you tilt the blade itself (usually to the left) to make angled cuts through the thickness of the wood.
- Locking Levers/Handles: Used to secure the miter and bevel angles in place.
- Power Switch: Turns the saw on and off.
- Spindle Lock Button: Used to hold the blade still when changing it.
Installing Accessories (Optional)
Some Ryobi miter saws come with accessories like dust bags or clamps.
- Dust Collection: If your saw has a dust port, attach a dust bag or connect a shop vacuum. This is vital for a clean workspace and your health. Good Ryobi miter saw dust collection makes a big difference.
- Work Clamps: If included, learn how to attach and use the work clamps. They help hold your workpiece securely, which is a major Ryobi miter saw safety tip.
Safety First: Essential Ryobi Miter Saw Safety Tips
Woodworking power tools require respect. Following Ryobi miter saw safety tips is not optional; it’s essential for preventing injuries.
Personal Protective Equipment (PPE)
- Eye Protection: Always wear safety glasses or goggles. Wood chips and dust can fly unexpectedly.
- Hearing Protection: Miter saws can be loud. Earplugs or earmuffs protect your hearing.
- Dust Mask/Respirator: Sawdust can be harmful. Wear a mask, especially for extended use.
- Gloves (Use with Caution): While gloves can protect your hands, they can also get caught in the blade. Avoid loose-fitting gloves. Some woodworkers prefer not to wear gloves when operating a miter saw.
Safe Operating Practices
- Read the Manual: Seriously, read your Ryobi miter saw’s manual. It has specific safety instructions for your model.
- Keep Guards in Place: Never remove or bypass the blade guard.
- Secure Your Workpiece: Use clamps to hold the wood firmly against the fence and table. Never try to hold small pieces with your hand close to the blade.
- Clear the Cutting Area: Make sure there are no obstructions around the saw. Keep pets and children away from the work area.
- Blade Awareness: Never reach under the blade guard. Keep your hands a safe distance from the spinning blade at all times.
- One Person Operation: Only one person should operate the saw at a time.
- No Loose Clothing: Avoid wearing baggy clothes, jewelry, or anything that could get caught.
- Proper Stance: Stand comfortably and balanced. Don’t overreach.
- Wait for Blade to Stop: Always wait for the blade to come to a complete stop before raising the saw head or removing the workpiece.
- Inspect the Blade: Before each use, check the blade for damage, loose teeth, or proper mounting.
Making Accurate Cuts: The Ryobi Miter Saw in Action
Once your saw is set up and you’re geared up with PPE, it’s time to make some cuts. Mastering a few key cuts will open up a world of woodworking possibilities.
Setting the Miter Angle
The Ryobi miter saw miter angle allows you to cut the end of a board at an angle across its width. This is crucial for building frames, boxes, or anything with angled corners.
- Loosen the Miter Lock: Find the handle or knob that locks the saw head’s angle. Loosen it.
- Position the Angle: Swing the saw head to the desired angle. Your Ryobi miter saw will have markings on the base for common angles (0°, 15°, 22.5°, 30°, 45°). Many saws have positive stops at these key angles for quick and accurate selection.
- Lock the Angle: Once the desired angle is set, tighten the miter lock firmly. Ensure it’s snug so the saw head doesn’t move during the cut.
- Test Cut (Optional but Recommended): If you’re unsure, make a test cut on scrap wood to confirm the angle.
Performing a Crosscut
A Ryobi miter saw crosscut is simply a cut made across the width of a board, usually at a 90-degree angle (a straight cut). This is the most basic cut you’ll make.
- Set Miter Angle to 0°: Ensure the miter angle is set to 90 degrees (0 degrees on the miter scale).
- Position the Wood: Place your workpiece on the table and against the fence.
- Align the Blade: Carefully lower the blade (without powering it on) to align the blade’s kerf (the width of the cut) with your pencil mark on the wood. You can often see the blade line up with the cutting mark. Some Ryobi models have laser guides to help with this.
- Hold Securely: Clamp the wood in place if possible. If not, hold it firmly against the fence and table with your non-cutting hand, keeping it well away from the blade.
- Power On and Cut: Turn on the saw and let the blade reach full speed. Then, smoothly and steadily lower the blade through the wood.
- Complete the Cut: Continue to lower the blade until the cut is complete.
- Retract and Power Off: Allow the blade to stop spinning completely before raising the saw head. Turn off the saw.
- Remove Workpiece: Safely remove the cut piece of wood.
Making Bevel Cuts
A Ryobi miter saw bevel adjustment allows you to tilt the blade to cut an angle through the thickness of the wood. This is used for things like compound angles or creating chamfers.
- Loosen the Bevel Lock: Find the handle or knob that locks the blade angle. Loosen it.
- Set the Bevel Angle: Tilt the saw head to your desired bevel angle. Most Ryobi miter saws tilt to the left, typically up to 45 degrees. Again, check the scale for precise angles and positive stops.
- Lock the Bevel: Securely tighten the bevel lock.
- Align and Cut: Position your wood and make the cut as you would for a crosscut. Remember, the blade is now tilted, so be mindful of your workpiece and hand placement.
Compound Cuts
A compound cut involves both a miter angle and a bevel angle at the same time. These are common in crown molding installation. Consult your Ryobi miter saw’s manual for specific instructions on how to set and achieve compound cuts for your model, as the procedure can vary slightly.
Blade Management: Replacement and Maintenance
A sharp, clean blade makes all the difference. Knowing how to perform Ryobi miter saw blade replacement and basic maintenance will keep your saw performing at its best.
When to Replace Your Blade
- Dullness: If cuts are rough, splintered, or require excessive force, the blade is likely dull.
- Damage: Bent teeth, missing teeth, or cracks mean the blade needs immediate replacement for safety.
- Build-up: Excessive pitch or glue build-up can affect cut quality.
How to Replace the Blade
- Safety First: Unplug the saw! Ensure the blade has stopped completely. Wear gloves for grip and to protect your hands from sharp edges.
- Access the Blade: Most Ryobi miter saws have a quick-release mechanism or screws to lift or remove the blade guard for access. Refer to your manual.
- Lock the Spindle: Press and hold the spindle lock button to prevent the arbor shaft from turning.
- Loosen the Arbor Nut: Use the wrench that came with your saw (or an appropriate socket wrench) to loosen and remove the arbor nut. The threads are usually standard (left-hand threads are rare on miter saws, but always confirm in your manual).
- Remove Old Blade: Carefully take off the old blade. Note which side faces outwards (usually the side with the markings).
- Install New Blade: Place the new blade onto the arbor, ensuring the correct side faces outward.
- Reinstall Arbor Nut: Screw the arbor nut back on and tighten it securely with the wrench. Again, ensure the spindle lock is engaged while tightening.
- Reassemble Guard: Lower or reattach the blade guard.
- Test Spin: Before plugging in, give the blade a spin by hand to ensure it rotates freely and nothing is catching.
Blade Selection
- Tooth Count: For general crosscuts and miter cuts, a blade with 40-60 teeth is good. For smoother finishes, especially on hardwoods or trim, a higher tooth count (60-80) is better. For rip cuts (cutting along the grain), fewer teeth (24-32) are preferred.
- Blade Type: Use blades specifically designed for miter saws. Carbide-tipped blades offer durability. Ensure the blade diameter matches your saw’s specifications.
Keeping it Clean: Ryobi Miter Saw Dust Collection
Sawdust is more than just a mess; it’s a health hazard and can impact your saw’s performance. Effective Ryobi miter saw dust collection is crucial.
How Dust Collection Works
Most Ryobi miter saws have a dust port, usually at the back of the motor housing or the blade guard. This port connects to either a dust bag that catches larger particles or a shop vacuum hose that actively removes dust from the cutting area.
Maximizing Dust Collection Efficiency
- Connect a Vacuum: For the best results, connect a shop vacuum to the dust port. Ensure the vacuum has a good filter, and consider a HEPA filter for finer particles.
- Empty Bags Regularly: If using a dust bag, empty it before it becomes too full. A full bag reduces airflow and collection efficiency.
- Clean the Saw: Periodically clean sawdust buildup from the saw’s base, table, fence, and blade guard. This prevents dust from interfering with the saw’s mechanisms and improves dust collection. Use a brush and vacuum.
Maintaining Precision: Ryobi Miter Saw Alignment
Over time or after transport, your Ryobi miter saw might lose its precise alignment. Checking and adjusting Ryobi miter saw alignment ensures your cuts are square and accurate.
Checking for Squareness (90 Degrees)
- Blade to Miter Scale: Set your miter angle to 0°. Make a cut on a piece of scrap wood.
- Use a Speed Square: Place a speed square against the cut edge of the wood and the fence of the saw. The speed square should sit perfectly flush against both the cut edge and the fence, indicating a true 90-degree cut.
- Check for Gaps: Look for any light gaps between the speed square and the wood or fence. If there are gaps, your miter alignment needs adjustment.
Checking for Blade Runout
Blade runout is when the blade doesn’t spin perfectly true.
- Safety First: Unplug the saw.
- Lift the Guard: Gently lift the blade guard.
- Rotate Blade by Hand: Slowly rotate the blade by hand and observe its edge.
- Look for Wobble: If the blade wobbles significantly, it might be bent, or the arbor might be damaged. This usually requires professional attention or replacement.
Adjusting Miter and Bevel Alignment
Refer to your specific Ryobi miter saw manual for detailed alignment procedures. However, general steps often involve:
- Miter Alignment: There are usually adjustment screws or bolts on the miter fence assembly. Loosen these slightly, adjust the fence until your speed square shows a perfect 90-degree cut at the 0° miter setting, and then retighten the screws.
- Bevel Alignment: Similar adjustment screws are typically found on the bevel mechanism. Adjust them until the blade is perfectly perpendicular to the table at the 0° bevel setting.
Table: Common Miter Saw Alignment Checks
| Check | Procedure | Indicator of Misalignment | Adjustment Method (General) |
|---|---|---|---|
| Square Cut | Cut a board at 0° miter and 0° bevel. Use a speed square on the cut edge against the fence. | Speed square does not sit flush on cut edge and fence. | Adjust miter fence screws until squareness is achieved. |
| Bevel Square | Tilt the saw to 0° bevel. Use a speed square on the side of the blade against the fence/table. | Blade is not perfectly perpendicular to the table. | Adjust bevel adjustment screws until perpendicular. |
| Blade Wobble | With the saw unplugged, rotate the blade by hand and observe its edge. | Blade appears to wobble or spin unevenly. | Potentially bent blade, damaged arbor, or arbor nut loose. |
Keeping Your Saw Running Smoothly: Ryobi Miter Saw Maintenance
Regular Ryobi miter saw maintenance will extend its life and ensure consistent performance.
Cleaning
- After Each Use: Brush or vacuum sawdust from the table, fence, base, and blade guard.
- Periodically: Wipe down the saw’s exterior with a damp cloth. For metal parts, a light coat of wax can prevent rust.
Lubrication
- Moving Parts: Lightly lubricate pivot points and adjustment mechanisms with a silicone-based spray or a light machine oil, as recommended by your manual. Avoid over-lubricating, as this can attract dust.
Inspection
- Cords and Plugs: Check for fraying or damage.
- Blade: Inspect for sharpness and damage before each use.
- Guards: Ensure guards move freely and return to their protective position.
- Locking Mechanisms: Make sure all miter and bevel locks engage securely.
Solving Problems: Ryobi Miter Saw Troubleshooting
Even with good maintenance, you might encounter issues. Here are some common Ryobi miter saw troubleshooting tips.
Saw Won’t Start
- Check Power: Is the saw plugged in? Is the breaker tripped? Is the outlet working?
- Overload Protection: Some saws have a thermal overload switch that trips if the motor gets too hot. Let it cool down before trying again.
- Safety Switch: Ensure the safety switch (if present) is fully engaged.
Rough or Splintered Cuts
- Dull Blade: Replace the blade.
- Blade Not at Full Speed: Ensure the blade is spinning at its maximum RPM before starting the cut. Don’t force the cut.
- Workpiece Not Secure: Make sure the wood is firmly clamped.
- Blade Wobble: Check for blade runout.
Miter or Bevel Angle is Inaccurate
- Alignment Issue: Check and adjust the saw’s alignment (see section on Ryobi miter saw alignment).
- Lock Not Tightened: Ensure the miter or bevel lock is fully secured before cutting.
- Worn Stops: If the positive stops feel loose or worn, manual adjustment to the correct angle might be needed.
Blade Guard Doesn’t Retract or Return Properly
- Obstruction: Check for sawdust or debris preventing movement.
- Spring Mechanism: The spring that returns the guard might be damaged or dislodged. This may require repair.
Excessive Dust Not Being Collected
- Poor Connection: Ensure the vacuum hose or dust bag is securely attached.
- Blocked Hose/Bag: Check for clogs in the dust collection system.
- Vacuum Power: If using a shop vac, ensure it’s powerful enough.
- Saw Design: Some older or less expensive saws may have less efficient dust collection systems.
Frequently Asked Questions (FAQ)
Q1: Can I use a Ryobi miter saw for metal?
A1: Generally, no. Standard miter saw blades are designed for wood. Cutting metal requires specialized blades and often a different type of saw (like a metal-cutting chop saw or an abrasive cutoff saw) designed for the heat and friction generated. Using the wrong blade can damage your saw and be extremely dangerous. Always check your Ryobi miter saw’s manual for recommended material types.
Q2: How do I make a 45-degree cut with my Ryobi miter saw?
A2: Set your Ryobi miter saw miter angle to 45 degrees. Loosen the miter lock, swing the saw head to the 45-degree mark on the scale, and then re-tighten the lock firmly. Ensure the wood is held securely and make your cut.
Q3: What kind of blade should I use for cutting crown molding?
A3: Cutting crown molding often involves compound cuts (both miter and bevel). You’ll typically use a blade with a higher tooth count (60-80 teeth) for a cleaner finish on this type of material. Ensure the blade diameter and arbor size match your Ryobi miter saw.
Q4: My Ryobi miter saw is making a lot of noise.
A4: Excessive noise can indicate several things:
* Dull Blade: A dull blade can cause the saw to strain.
* Loose Parts: Check if any bolts or screws are loose, especially around the motor or blade.
* Blade Wobble: This could mean the blade is damaged or not mounted correctly.
* Motor Issue: If the noise is a grinding or whining sound that doesn’t go away, there might be a problem with the motor bearings.
Always unplug the saw and inspect it carefully. If you suspect a motor issue, consult a professional or Ryobi support.
Q5: How often should I lubricate my Ryobi miter saw?
A5: Lubrication is usually only needed on the pivot points and adjustment mechanisms, and only when they start to feel stiff. It’s not a frequent requirement. Check your manual for specific recommendations on lubrication points and frequency. Over-lubrication can attract dust and create more problems.
Conclusion
Your Ryobi miter saw is a powerful tool that, with proper technique and care, can significantly elevate the quality of your woodworking projects. By prioritizing Ryobi miter saw safety tips, mastering the Ryobi miter saw setup, and knowing how to adjust for Ryobi miter saw miter angle and Ryobi miter saw bevel adjustment, you can achieve precise cuts like a Ryobi miter saw crosscut with confidence. Remember to keep up with Ryobi miter saw maintenance, effective Ryobi miter saw dust collection, and be prepared for Ryobi miter saw troubleshooting to ensure your saw remains a reliable partner in your workshop. Happy cutting!