
Can I wire a 30 amp circuit breaker myself? Yes, you can wire a 30 amp circuit breaker yourself if you have the necessary electrical knowledge, tools, and follow all safety precautions. What is a 30 amp circuit breaker? A 30 amp circuit breaker is a safety device that protects electrical circuits from overcurrents, preventing damage to appliances and wiring, and reducing the risk of fire. Who is this guide for? This guide is for homeowners and DIY enthusiasts who are comfortable with basic electrical work and want to learn how to safely wire a 30 amp circuit breaker.
Wiring a 30 amp circuit breaker is a critical task that requires precision and a strong emphasis on safety. Whether you’re adding a new circuit for a powerful appliance like an electric range or a hot tub, or performing a 30 amp breaker replacement, getting it right is paramount. This guide will walk you through the process, from gathering your supplies to the final connection, ensuring you maintain electrical safety for breakers at all times.
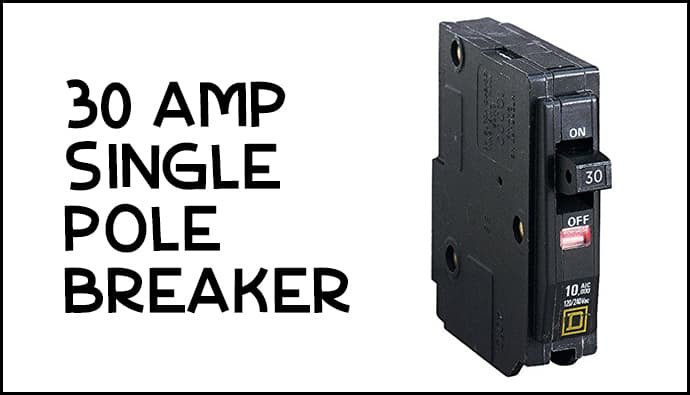
Image Source: cdn.shopify.com
Preparing for 30 Amp Circuit Installation
Before you even think about touching a wire, proper preparation is key to a successful and safe 30 amp circuit installation. This involves gathering the right materials, understanding the principles, and ensuring your workspace is safe.
Essential Tools and Materials
To successfully wire a 30 amp breaker, you’ll need a specific set of tools and materials. Having everything ready beforehand will make the process smoother and safer.
- 30 Amp Circuit Breaker: Ensure you have the correct type and amperage for your breaker panel. It will typically be a “double pole” breaker for 240-volt circuits, or a “single pole” breaker for 120-volt circuits, though 30 amps are more commonly used for 240V applications.
- Appropriate Gauge Wire: For a 30 amp circuit, you’ll need 10-gauge wire. This is crucial for safety, as using a smaller gauge wire can overheat and pose a fire hazard. The wire will typically consist of a hot wire (black), a neutral wire (white, if applicable for a 120V circuit), and a ground wire (bare copper or green). For 240-volt circuits, you’ll have two hot wires (often black and red) and a ground wire.
- Wire Strippers: To safely remove the insulation from the ends of the wires.
- Wire Cutters: For cleanly cutting wires to the required length.
- Screwdrivers: Both Phillips and flathead screwdrivers, typically insulated for electrical work, are needed for various connections.
- Voltage Tester (Non-Contact): An essential safety tool to confirm that power is off before you begin.
- Pliers (Lineman’s Pliers are useful): For gripping, bending, and cutting wires.
- Electrical Tape: For insulating connections and marking wires.
- Wire Connectors (Wire Nuts): To securely join wires. Ensure they are rated for the wire gauge and amperage.
- Newspaper or Drop Cloth: To protect your workspace.
- Safety Glasses: To protect your eyes from debris.
- Gloves: Insulated electrical gloves offer an extra layer of protection.
Locating and De-energizing the Power Source
The absolute first step in any electrical work is to ensure the power is off. This is non-negotiable for electrical safety for breakers.
- Identify the Correct Breaker: Go to your main electrical panel. You need to identify the breaker that controls the circuit you’ll be working on. If you’re adding a new circuit, you’ll be installing a new breaker. If it’s a 30 amp breaker replacement, find the existing one.
- Turn Off the Breaker: Firmly switch the breaker to the “OFF” position.
- Verify Power is Off: This is where your voltage tester comes in.
- For a 120-volt circuit, test the hot wire against the neutral and the ground wire.
- For a 240-volt circuit, test between the two hot wires.
- A non-contact voltage tester should not detect any voltage. Double-check your work! It’s always better to be safe than sorry.
Reading Your Breaker Panel
Familiarize yourself with your breaker panel wiring. Understanding the layout of your breaker panel wiring is crucial. Panels usually have a bus bar where the breakers connect. Each slot is designed for a specific type of breaker.
- Single Pole Breakers: These are narrower and control 120-volt circuits. They take up one slot in the panel.
- Double Pole Breakers: These are wider and control 240-volt circuits. They span across two slots in the panel, connecting to both hot bus bars. A 30 amp breaker for an appliance like a dryer or oven will typically be a double-pole breaker.
Wiring a 30 Amp Breaker: Step-by-Step Guide
Once you have prepared your tools and workspace, and confirmed the power is off, you can proceed with wiring the 30 amp breaker. This guide covers the general steps; always refer to your electrical panel’s manual and local electrical codes for specific instructions.
Connecting Wires to the Breaker
This is the core of how to wire a 30 amp circuit breaker. The process varies slightly depending on whether you’re connecting to a single-pole or double-pole breaker, and whether it’s a 120V or 240V circuit.
For a Double Pole 30 Amp Breaker (Common for 240V Circuits)
Most 30 amp circuits are 240 volts, requiring a double-pole breaker.
- Strip the Hot Wires: Carefully strip about 3/4 inch of insulation from the ends of the two hot wires (typically black and red for 240V circuits) using your wire strippers.
- Loosen the Terminal Screws: On the double-pole breaker, you’ll see two screw terminals, one for each pole. Loosen these screws sufficiently to allow the wire to be inserted.
- Connect the Hot Wires:
- Take one hot wire and insert its stripped end into one of the terminal screws.
- Take the second hot wire and insert its stripped end into the other terminal screw.
- Tighten the Terminal Screws: Securely tighten the screws with your screwdriver. Ensure the wire is firmly held and no stray strands are exposed. Tug gently to confirm the connection is secure.
For a Single Pole 30 Amp Breaker (Less Common, but possible for certain 120V loads)
If you’re dealing with a 120V circuit that requires 30 amps (e.g., some specific types of RV hookups or small workshops), you’ll use a single-pole breaker.
- Strip the Hot Wire: Strip about 3/4 inch of insulation from the single hot wire (usually black).
- Loosen the Terminal Screw: On the single-pole breaker, you’ll see one screw terminal. Loosen this screw.
- Connect the Hot Wire: Insert the stripped end of the hot wire into the terminal.
- Tighten the Terminal Screw: Securely tighten the screw, ensuring the wire is firmly held.
Connecting the Ground Wire
The ground wire is a vital safety component.
- Strip the Ground Wire: Strip about 3/4 inch of insulation from the bare copper or green ground wire.
- Locate the Ground Bus Bar: In your breaker panel, you’ll find a ground bus bar, which is a metal strip with holes or screws where all ground wires are connected.
- Connect the Ground Wire:
- If the ground bus bar has a dedicated screw for the incoming ground wire, use that.
- If not, use an available hole with a screw, or a specialized ground lug.
- Loop the stripped ground wire around the screw and tighten it securely. Ensure a good, solid connection.
Connecting the Neutral Wire (If Applicable for 120V Circuits)
For 120-volt circuits using a single-pole breaker that also require a neutral connection, you will have a neutral wire (typically white).
- Strip the Neutral Wire: Strip about 3/4 inch of insulation from the white neutral wire.
- Locate the Neutral Bus Bar: In your breaker panel, you’ll also find a neutral bus bar, similar to the ground bus bar, where all neutral wires are connected.
- Connect the Neutral Wire:
- Loop the stripped neutral wire around an available screw terminal on the neutral bus bar.
- Tighten the screw securely.
Installing the Breaker in the Panel
Now it’s time to connect the breaker itself to the panel.
- Position the Breaker: Align the breaker with the bus bar slot in the panel. For a double-pole breaker, ensure it spans the correct two slots, bridging the two hot bus bars.
- Engage the Bus Bar: Push the breaker down firmly onto the bus bar. You should feel it snap into place. The hot wires (connected to the breaker terminals) should now be attached to the panel’s power source.
- Secure the Breaker (if applicable): Some breakers have a mounting clip or screw to secure them to the panel’s back or edge for stability. Consult your panel’s documentation.
Routing and Securing the Wires
Proper wire management is important for both aesthetics and safety.
- Neatness: Gently tuck and arrange the wires within the panel, ensuring they don’t interfere with other breakers or components.
- Clips: Use provided wire clips or appropriate staples to secure the cable as it enters the panel, keeping it neat and preventing strain.
Testing the 30 Amp Circuit
After the wiring is complete and all connections are secure, it’s time to test the circuit.
- Double-Check All Connections: Visually inspect all your connections one last time. Ensure no stray wire strands are exposed and all screws are tight.
- Re-install Panel Cover: Carefully put the main electrical panel cover back in place, ensuring all screws are tightened.
- Turn On the Breaker: Go back to your main electrical panel and flip the newly installed 30 amp breaker to the “ON” position.
- Test the Outlet/Appliance: If you wired a new outlet or connection point, use a multimeter or the appliance itself to confirm it’s receiving power.
Important Safety Considerations for Breakers
Electrical safety for breakers is paramount. Never compromise on safety.
Why Safety is Crucial
- Preventing Fires: Incorrect wiring or overloading can cause wires to overheat, leading to fires.
- Protecting Equipment: Proper breaker function safeguards your appliances and electronics from power surges and faults.
- Personal Safety: Faulty wiring can lead to electric shock, which can be severe or fatal.
Key Safety Tips
- Always Turn Off Power: This cannot be stressed enough. Use your voltage tester to be absolutely sure.
- Use the Correct Wire Gauge: For 30 amps, 10-gauge wire is mandatory.
- Match Breaker to Wire: The breaker’s amperage rating must match or be lower than the wire’s capacity.
- Follow Local Codes: Electrical codes vary by location. Always adhere to your local building and electrical codes.
- When in Doubt, Call a Professional: If you are unsure about any part of the process, it’s always best to consult a qualified electrician. Attempting complex tasks without adequate knowledge can be dangerous.
30 Amp Breaker Replacement Considerations
If you’re performing a 30 amp breaker replacement, many of the steps are similar to installation, with a few key differences.
Steps for Replacement
- De-energize the Circuit: As always, turn off the breaker controlling the circuit, and then test to confirm power is off. For a 30 amp breaker replacement, you’ll likely be turning off the main breaker to work on the panel safely if you’re not comfortable working with live bus bars.
- Remove the Old Breaker: Carefully unclip or unscrew the old breaker from the bus bar. Disconnect the wires attached to the breaker’s terminals.
- Connect the New Breaker: Attach the wires to the new 30 amp breaker following the steps outlined earlier for connecting hot, neutral (if applicable), and ground wires.
- Install the New Breaker: Snap the new breaker into the panel.
- Test the Circuit: Restore power and test the circuit.
Common Issues During Replacement
- Corrosion: Terminals and bus bars can become corroded, leading to poor connections. Clean any corrosion gently with a wire brush or fine sandpaper.
- Damaged Wires: Inspect the wires connected to the breaker for any signs of damage, fraying, or overheating. If found, trim and re-strip the wire or replace the section of wire if necessary.
- Incorrect Breaker Type: Ensure the replacement breaker is the correct type (e.g., GFCI, AFCI if required) and amperage for the circuit.
Special Considerations: 240 Volt Breaker Wiring
Wiring a 240 volt breaker wiring is common for high-draw appliances.
Key Differences for 240V
- Double-Pole Breaker: You will always use a double-pole breaker.
- Two Hot Wires: A 240V circuit uses two hot wires (typically black and red) and a ground wire. There is no neutral wire for the appliance itself, though some appliances might have a separate 120V component that requires a neutral.
- Bus Bar Connection: The double-pole breaker connects to two separate bus bars in the panel, providing the two different voltage phases.
Wiring 240V Appliances
When connecting appliances that require 240 volts, ensure the appliance’s wiring requirements match the circuit you’ve installed. This includes voltage, amperage, and connection type.
Frequently Asked Questions (FAQ)
Q1: Can I use a 12-gauge wire for a 30 amp circuit?
A1: No. For a 30 amp circuit, you must use 10-gauge wire. Using a smaller gauge like 12-gauge can lead to overheating and a fire hazard.
Q2: What’s the difference between a single-pole and a double-pole breaker?
A2: A single-pole breaker controls a 120-volt circuit and takes up one slot in the breaker panel. A double-pole breaker controls a 240-volt circuit and takes up two slots, connecting to both hot bus bars.
Q3: Do I need a special breaker for a 30 amp circuit?
A3: No, you just need a 30 amp breaker. However, depending on the location and type of circuit, you might need a specific type like a GFCI (Ground Fault Circuit Interrupter) or AFCI (Arc Fault Circuit Interrupter) breaker, which offers additional protection.
Q4: How do I know if my appliance needs a 30 amp circuit?
A4: Check the appliance’s nameplate or manual. It will specify the required voltage and amperage.
Q5: Is it safe to work in the breaker panel if the main breaker is off?
A5: While turning off the main breaker de-energizes the entire panel, the bus bars still carry the incoming power from the utility. Always use extreme caution and a voltage tester even with the main breaker off. If you are unsure, always hire a qualified electrician.
Q6: What are the common reasons for a 30 amp breaker to trip?
A6: A 30 amp breaker tripping usually indicates an overload (too many devices drawing power) or a short circuit (a fault in the wiring or appliance).
By following these detailed steps and prioritizing electrical safety for breakers, you can confidently approach the task of wiring a 30 amp circuit breaker. Remember, when in doubt, always seek professional assistance from a licensed electrician.