
Can you cut melamine with a circular saw? Yes, you absolutely can cut melamine with a circular saw, and with the right techniques and tools, you can achieve clean, chip-free edges. Melamine, a composite wood product covered with a decorative paper layer, is popular for furniture and cabinetry due to its affordability and durability. However, its hard, smooth surface makes it prone to chipping and splintering when cut, especially with an inappropriate saw or blade. This guide will walk you through the best methods for cutting melamine cleanly with a circular saw, ensuring professional-looking results for your projects.
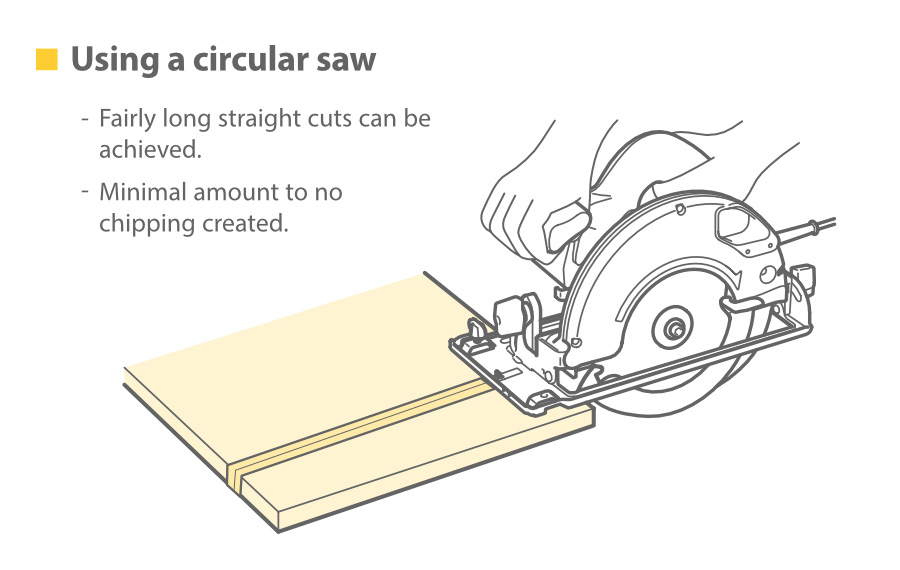
Image Source: www.wardrobedoorsdirect.co.uk
Why Melamine is Tricky to Cut
Melamine’s beauty is also its challenge. The thin decorative paper layer on top of the particleboard or MDF core is fused at high temperatures. When a saw blade enters this material, it can easily tear the paper and chip the underlying core. This happens because the blade, as it exits the material, doesn’t have support for the paper layer. The goal when cutting melamine is to minimize this tearing and chipping action.
Essential Tools for Cutting Melamine
Before you start, gather the right equipment. Using the wrong tools is a common reason for poor results.
The Best Circular Saw for Melamine
While almost any circular saw can cut melamine, some features make the job easier and result in cleaner cuts.
- Cordless vs. Corded: Cordless saws offer portability, while corded saws provide consistent power. For long cuts on large sheets, a corded saw might be preferred to avoid battery changes.
- Amperage/Voltage: Higher amperage (corded) or voltage (cordless) means more power, which helps the blade cut smoothly through the material without bogging down.
- Variable Speed: While not essential, a saw with variable speed can be helpful. Starting at a lower speed can sometimes reduce chipping on the initial entry.
- Dust Collection: Melamine creates fine dust. A saw with good dust collection ports will keep your workspace cleaner and your lungs healthier.
The Right Circular Saw Blade for Melamine
This is arguably the most crucial element for clean melamine cuts. Standard wood blades often have too few teeth or the wrong tooth geometry, leading to chipping.
- High Tooth Count Blades: Look for blades with 60 teeth or more for a 10-inch blade, and proportionally more for smaller blades. More teeth mean smaller chip-out zones.
- Alternative Tooth Configuration (ATB): Blades with an Alternate Top Bevel (ATB) tooth grind are designed for cleaner cuts in laminate and melamine. Each tooth is ground with a steep bevel on alternating sides, allowing the teeth to slice through the material rather than just tear it.
- Thin Kerf Blades: These blades remove less material, which means less strain on your saw and less potential for chipping.
- Specialized Melamine Blades: Several manufacturers offer blades specifically designed for melamine and laminate. These often feature carbide tips and specialized tooth designs for optimal performance.
Here’s a quick comparison of blade types for melamine:
| Blade Type | Teeth Count (Typical for 10″) | Tooth Grind | Best For | Considerations |
|---|---|---|---|---|
| Standard Wood Blade | 24-40 | ATB/FTG | General wood cutting | High risk of chipping melamine; not recommended. |
| Plywood/Laminate Blade | 60-80 | ATB/Hi-ATB | Melamine, laminates, veneered plywood | Excellent for clean cuts; invest in a quality one. |
| Melamine-Specific Blade | 80+ | Hi-ATB/Hi-FTG | Ultimate clean cuts in melamine and high-pressure laminates | Often the most expensive but delivers the best results. |
| Carbide-Tipped Blades | Varies | Varies | Durability and ability to cut harder materials | Look for carbide-tipped blades specifically marketed for laminate or melamine. |
Melamine Cutting Techniques for Pristine Edges
Achieving clean melamine cuts involves more than just picking the right blade. Proper technique and preparation are key.
1. Scoring Melamine: The Foundation of Clean Cuts
Scoring the cut line before making the main cut is a fundamental step in preventing chip-out. This creates a shallow groove that guides the saw blade and cuts through the melamine’s decorative surface layer.
- Using a Utility Knife:
- Use a sharp utility knife and a metal ruler or straightedge.
- Carefully score along your cut line. Apply firm pressure.
- Make multiple passes with the knife until you have a deep groove. This groove should go all the way through the melamine’s surface paper.
- The goal is to score the decorative paper so that when the saw blade enters, it cuts cleanly along this scored line.
- Using a Router with a V-Groove Bit: For very precise scoring or if you’re making multiple cuts, a router with a V-groove bit can be used. Set the depth of the bit very shallowly – just enough to cut the surface paper.
- Using a Second Saw (Less Common but Effective): Some professionals make a very shallow “scoring” cut with a different saw or a different blade setup first, then follow with their main cut. However, for most DIYers, a utility knife is sufficient.
2. Setting Up Your Cut Line
Accurate marking and setting up your cut line ensure you don’t waste material and that your pieces are the correct size.
- Measure Twice, Cut Once: This adage is especially true with melamine. Mistakes are costly as they require replacing the material.
- Marking: Use a sharp pencil or a fine-tip marker for your cut lines. For accuracy, consider using a marking knife for a more precise line that won’t smear.
- Sighting: Hold your saw up to the cut line to ensure the blade’s path aligns with your mark. Remember that the blade has a kerf (the width of the cut), so account for this when marking.
3. Supporting the Melamine Sheet
Proper support is critical to prevent the melamine from flexing or sagging during the cut, which can lead to chipping.
- Sawhorses: Use at least two sturdy sawhorses. Position them so that the melamine is well-supported on both sides of the cut line, with a minimal overhang.
- Cutting Board/Support Surface: If cutting large sheets, a large plywood or MDF sheet laid on sawhorses can provide a more stable and flatter surface than two small sawhorses alone.
- Clamping: Clamp the melamine securely to your support surface to prevent movement during the cut. Ensure clamps are out of the way of the saw base and blade.
4. Minimizing Chip-Out Melamine: The Push Stick and Blade Depth
These are crucial for a clean finish.
- Blade Depth: Set the blade depth so that it extends only about one-eighth to one-quarter inch (3-6 mm) below the melamine. A blade that is set too deep will create more drag and increase the chance of tear-out.
- Push Stick: Always use a push stick to guide the saw. This keeps your hands safe and provides a consistent, steady pressure through the cut.
5. The Cutting Process: Smooth and Steady
Execution is key.
- Engage the Blade: Let the saw reach full speed before it contacts the melamine.
- Slow and Steady: Feed the saw through the material at a consistent, moderate pace. Do not force the saw. Let the blade do the work. Pushing too hard will increase chipping.
- Maintain Contact: Keep the saw’s base plate flat on the melamine and against your guide (if using one) throughout the cut.
- Exiting the Cut: As you approach the end of the cut, maintain steady pressure. If the offcut piece is small, consider clamping it to the main piece to prevent it from falling and causing a rough tear-out.
6. Cutting Melamine from the “Good” Side
This is a vital tip for preventing chip-out.
- Blade Direction: A circular saw blade cuts on its upward stroke. This means the teeth are pushing material up as they cut.
- The “Good” Side: Melamine typically has two sides, one often designated as the “show” or “good” side.
- Placement: When making a cut, place the melamine so that the “good” side is facing down on the sawhorse or workbench. This way, the upward-cutting teeth will be engaging the underside of the melamine first. The saw will then exit the cut on the “good” side, but because the score line and support are on the underside, the upward force of the teeth on exit will be less damaging to the visible surface.
7. Using a Melamine Cutting Guide
A melamine cutting guide, also known as a rip fence or edge guide, is essential for making straight, parallel cuts.
- Built-in Rip Fence: Most circular saws come with a basic rip fence. Ensure it’s sturdy and parallel to the blade.
- Aftermarket Edge Guides: For more precise and stable guidance, consider investing in an aftermarket edge guide or a dedicated cutting guide system. These attach to the saw’s base plate and slide along a track or a pre-set edge.
- DIY Cutting Guides: You can also create your own guide by attaching a strip of MDF or plywood to your saw’s base plate, extending it to create a wider, more stable surface. This guide then runs along a clamped straightedge.
8. The Melamine Cutting Jig: For Repeatability and Accuracy
For projects requiring many identical cuts, a melamine cutting jig can be a game-changer.
- Purpose: A jig is a custom-made fixture that holds your saw or guides it along a precise path.
- Simple Jig Example: You can create a simple jig by attaching a known-width piece of material (like 3/4-inch MDF) to the base of your circular saw. The distance from the blade to the edge of this added piece is then consistent. When you place this jig against a clamped straightedge, you can make perfectly repeatable cuts.
- More Advanced Jigs: More complex jigs can involve a track system or guide rails for incredibly accurate cuts.
9. Using a Jigsaw vs. Circular Saw for Melamine
While a circular saw is generally preferred for long, straight cuts, a jigsaw is useful for curves or short cuts.
- Jigsaw Limitations: Jigsaws can be much harder to control for straight lines, and their reciprocating blade action can lead to more chipping, especially if the blade has a wide kerf or tooth spacing.
- Jigsaw Best Practices for Melamine: If you must use a jigsaw:
- Use a fine-toothed blade designed for laminate or plastic.
- Score the cut line with a utility knife first.
- Ensure the jigsaw’s base plate is flat on the melamine.
- Use a slow, steady speed.
- Consider running the jigsaw from the underside if possible, though this is often impractical.
- Circular Saw Advantage: The circular saw’s continuous rotation and a guided base plate offer superior stability and control for making straight cuts in melamine compared to a jigsaw.
Melamine Edge Treatment: Finishing Touches
Even with the best cutting techniques, some minor imperfections might occur. Here’s how to address them.
- Sanding: Very fine-grit sandpaper (220 grit or higher) can be used to gently smooth any minor burrs or fuzzies on the edge. Be careful not to sand through the melamine’s laminate layer.
- Applying Edge Banding: For a professional finish, the cut edge of melamine is often covered with edge banding. This is a strip of laminate or PVC with adhesive on one side.
- Prepare the Edge: Ensure the edge is clean and free of dust.
- Apply Adhesive (if not pre-glued): If using heat-activated banding, use an iron or a dedicated edge banding tool.
- Trim Excess: Once applied and cooled, use a sharp utility knife or an edge banding trimmer to carefully trim any excess banding flush with the melamine surface.
- Sanding Edges: A sanding block can then be used very lightly to smooth the edge of the banding.
- Filler/Touch-Up: For very minor chips that can’t be sanded away, specialized melamine repair pens or wood filler that matches the melamine color can be used.
Advanced Melamine Cutting Techniques
For those looking to push their melamine cutting skills, consider these advanced methods.
1. The Zero-Clearance Insert
Many table saws and some circular saws can have zero-clearance inserts. While more common for table saws, the principle applies. A zero-clearance insert provides support directly around the blade, minimizing the gap through which material can be pushed and torn. For circular saws, this often translates to ensuring the base plate is in excellent condition and the blade guard functions smoothly.
2. Using a Track Saw System
Track saw systems (like Festool, Makita, or Bosch) are designed for making precise, clean cuts in sheet goods, including melamine.
- How it Works: A track saw runs on a guide rail that is clamped to the workpiece. This rail guarantees perfectly straight cuts and also features a splinter guard that runs along the cut line, providing excellent support to the edge and significantly reducing chip-out.
- Cost: Track saw systems are an investment, but if you cut a lot of melamine or other sheet goods, they can be worth the cost for the precision and ease of use.
3. The Plunge Cut Technique (Use with Caution)
Some advanced users might use a plunge cut where the saw is lowered directly into the material mid-sheet.
- Process: This requires precise control and a blade that can enter the material cleanly. The primary concern here is preventing the initial plunge from causing a large chip.
- Scoring is Critical: Scoring the melamine deeply before attempting a plunge cut is absolutely essential.
- Not Recommended for Beginners: This technique is generally not recommended for those new to cutting melamine due to the high risk of damaging the material.
Troubleshooting Common Melamine Cutting Problems
Even with the best efforts, you might encounter issues. Here’s how to fix them.
Problem: Excessive Chipping
- Solution:
- Check your blade: Is it sharp? Is it the right type for melamine?
- Score the line more deeply.
- Ensure the “good” side is facing down.
- Reduce blade depth.
- Feed the saw slower.
- Check your melamine support – is it flexing?
- Try a different cutting guide.
Problem: Inaccurate Cuts (Not Straight)
- Solution:
- Ensure your cutting guide is properly aligned and clamped securely.
- Make sure the saw’s base plate is flat against the guide throughout the cut.
- Check if your saw’s base plate is warped or damaged.
- Use a sturdier guide or a track saw system.
Problem: Blade Binding or Saw Stalling
- Solution:
- You are likely feeding the saw too fast, or the blade is dull.
- Ensure your blade is appropriate for the material and sharp.
- Reduce feed rate.
- Check if the melamine is warped or if your support is uneven.
Frequently Asked Questions About Cutting Melamine
Here are some common questions people have about cutting melamine:
Q1: Do I need a special blade to cut melamine with a circular saw?
A1: Yes, it is highly recommended to use a blade with a high tooth count (60+ teeth for a 10-inch blade) and an Alternate Top Bevel (ATB) or similar specialized grind for cutting melamine. Standard wood blades will likely cause significant chipping.
Q2: Which side of the melamine should face up when cutting with a circular saw?
A2: For the cleanest cuts, the “good” or decorative side of the melamine should face down. This allows the saw blade’s upward cutting action to engage the underside first, minimizing tear-out on the visible surface.
Q3: How can I prevent chipping when cutting melamine?
A3: Key methods include using the correct blade, scoring the cut line with a sharp utility knife, ensuring the good side faces down, using proper support, and feeding the saw smoothly and steadily.
Q4: Is a jigsaw or a circular saw better for cutting melamine?
A4: A circular saw is generally better for making long, straight cuts in melamine because it offers more stability and control. A jigsaw is typically used for curved cuts or short pieces, but it can be harder to achieve chip-free results with it.
Q5: What is the best circular saw for melamine?
A5: The best circular saw for melamine is one that has enough power (high amperage/voltage), a stable base plate, and can accommodate high-tooth-count blades. Features like good dust collection are also beneficial.
Q6: How deep should the blade be set when cutting melamine?
A6: Set the circular saw blade depth so that it extends only about 1/8 to 1/4 inch (3-6 mm) below the melamine. This minimizes drag and the chance of chipping.
Q7: Can I use a hand saw to cut melamine?
A7: While technically possible, using a hand saw on melamine is extremely difficult to do cleanly and is not recommended. The hard laminate surface will dull hand saw blades quickly, and achieving a straight, chip-free cut is nearly impossible.
Conclusion: Mastering Melamine Cuts
Cutting melamine with a circular saw is a skill that can be learned and mastered. By selecting the right tools, especially a high-quality melamine cutting blade, and employing proper techniques like scoring, supporting the material correctly, and cutting with the finished side down, you can achieve remarkably clean edges. Remember to take your time, practice on scrap pieces, and don’t be afraid to experiment with different techniques until you find what works best for you and your specific project needs. With a little patience and attention to detail, you’ll be cutting melamine like a pro.